crwdns2915892:0crwdne2915892:0
This guide shows how to fix Joy-Con drift for the Nintendo Switch Joy-Cons.
Joy-Con drift is when the Nintendo Switch thinks that the analog stick (also known as the joystick, controller stick, or thumbstick) of the Joy-Con is moving, but it isn't.
Joy-Con drift may occur as you use the Joy-Cons over time from dust and debris building up. You do not need to disassemble the Joy-Con for this repair. In addition, this guide will not corrode any parts of your Joy-Con controller.
Please note this repair is temporary and will last only a certain amount of time.
crwdns2942213:0crwdne2942213:0
-
-
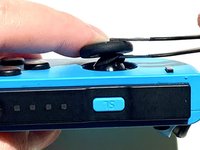
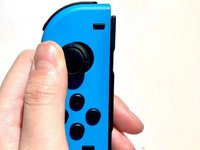
Press and hold the black round button on the back of the Joy-Con, then slide it forward to remove.
-
-
-
Open the 404B contact cleaner and insert the tube into the nozzle.
-
-
-
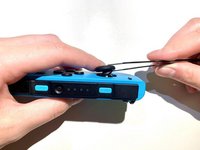
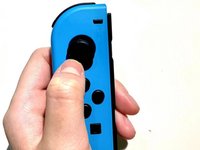
Push the Joy Stick to the side and hold.
-
-
-
crwdns2935267:0crwdne2935267:0Tweezers$4.99
-
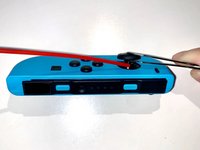
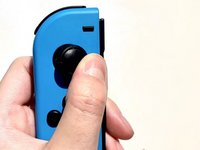
Use tweezers to lift the rubber ring under the Joy Stick, and hold.
-
-
-
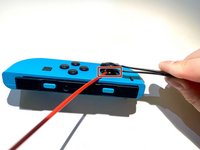
Aim the contact cleaner's nozzle at the gap and spray 404B contact cleaner once or twice.
-
-
-
Rotate the Joy Stick for 30 seconds to allow full penetration of the liquid inside.
-
-
-
Wait 10 minutes for the liquid to dry completely.
-
-
-
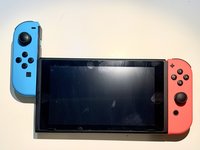
Insert the Joy-Con back into the Switch to test the Joy-Con.
-
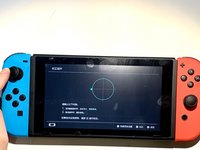
Navigate to System Settings > Controllers and Sensors > Calibrate Control Sticks.
-
Follow the on-screen prompts on your Switch.
-


Enjoy your Joy-Con being able to work properly again!
crwdns2935221:0crwdne2935221:0
crwdns2935229:036crwdne2935229:0
crwdns2947412:02crwdne2947412:0
Muchas gracias.
Process says it requires compressed air then goes on to use contact cleaner instead.