crwdns2933423:0crwdne2933423:0

How to Disassemble an OXO Container Lid for Cleaning

crwdns2942213:0crwdne2942213:0

  1. How to Disassemble an OXO Container Lid for Cleaning, How to Disassemble an OXO Container Lid for Cleaning: crwdns2935265:01crwdnd2935265:01crwdnd2935265:02crwdne2935265:0 How to Disassemble an OXO Container Lid for Cleaning, How to Disassemble an OXO Container Lid for Cleaning: crwdns2935265:01crwdnd2935265:02crwdnd2935265:02crwdne2935265:0
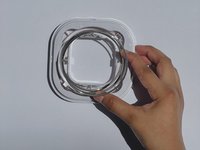
    • Twist the bottom piece off by following the directions displayed on the lid.

    • Once inside, remove the outer layer seal from the lid by pulling it straight up.

  2. How to Disassemble an OXO Container Lid for Cleaning: crwdns2935265:02crwdnd2935265:01crwdnd2935265:03crwdne2935265:0 How to Disassemble an OXO Container Lid for Cleaning: crwdns2935265:02crwdnd2935265:02crwdnd2935265:03crwdne2935265:0 How to Disassemble an OXO Container Lid for Cleaning: crwdns2935265:02crwdnd2935265:03crwdnd2935265:03crwdne2935265:0
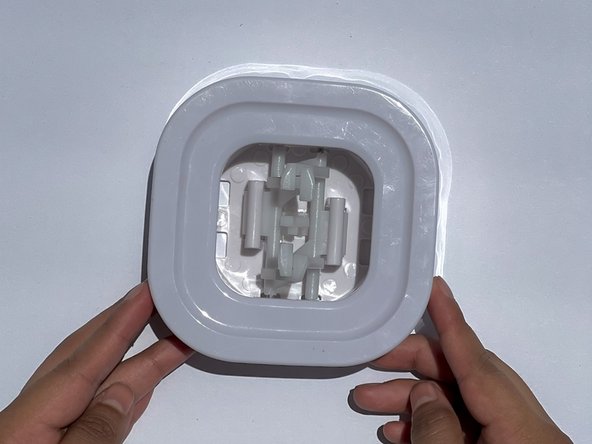
    • Flip the lid so the button faces up. Then remove the button from the base of the lid.

    • This requires more added force.

    • Separate the interior prongs.

  3. How to Disassemble an OXO Container Lid for Cleaning: crwdns2935265:03crwdnd2935265:01crwdnd2935265:02crwdne2935265:0 How to Disassemble an OXO Container Lid for Cleaning: crwdns2935265:03crwdnd2935265:02crwdnd2935265:02crwdne2935265:0
    • After separating the prongs, the spring and the circular spring cap will separate from the square frame with little force.

    • With some force, remove the two prongs from the base of the lid by snapping them out of the bracket. Be careful not to break the bracket's small prongs.

    • The disassembled parts can now be cleaned with warm, soapy water.

  4. How to Disassemble an OXO Container Lid for Cleaning: crwdns2935265:04crwdnd2935265:01crwdnd2935265:02crwdne2935265:0 How to Disassemble an OXO Container Lid for Cleaning: crwdns2935265:04crwdnd2935265:02crwdnd2935265:02crwdne2935265:0
    • To reassemble the lid, start by connecting the outer layer piece with the base piece. Grooves in the parts will only allow them to be connected in the correct way.

    • Place the spring in the center of the lid within the circular outline.

  5. How to Disassemble an OXO Container Lid for Cleaning: crwdns2935265:05crwdnd2935265:01crwdnd2935265:01crwdne2935265:0
    • Take the small interior circle and place it on top of the spring.

    • Use force to push this piece down. Make sure the slots align.

    • This piece will not stay in place on its own. Flip the lid over and keep it on a flat surface to prevent the spring from releasing.

  6. How to Disassemble an OXO Container Lid for Cleaning: crwdns2935265:06crwdnd2935265:01crwdnd2935265:02crwdne2935265:0 How to Disassemble an OXO Container Lid for Cleaning: crwdns2935265:06crwdnd2935265:02crwdnd2935265:02crwdne2935265:0
    • Reattach the two prongs to the lid.

    • Intertwine the two prongs together.

    • The spring should now be firmly held in place.

  7. How to Disassemble an OXO Container Lid for Cleaning: crwdns2935265:07crwdnd2935265:01crwdnd2935265:02crwdne2935265:0 How to Disassemble an OXO Container Lid for Cleaning: crwdns2935265:07crwdnd2935265:02crwdnd2935265:02crwdne2935265:0
    • Twist the bottom piece back on the lid.

    • Reattach the button to the center of the lid.

crwdns2935217:0crwdne2935217:0

crwdns2935229:02crwdne2935229:0

Lorna Lauro

crwdns2935283:004/20/22crwdne2935283:0

187 crwdns2915208:0crwdne2915208:0

crwdns2935295:0crwdne2935295:0

crwdns2915084:0crwdne2915084:0

CSU Los Angeles, Team 7-77, Harris Spring 2022 crwdns2935289:0CSU Los Angeles, Team 7-77, Harris Spring 2022crwdne2935289:0

CSULA-HARRIS-S22S7G77

crwdns2934841:01crwdne2934841:0

crwdns2935303:01crwdne2935303:0

crwdns2917034:0crwdne2917034:0

Excellent guide, a set I got came with the metal pins of the prongs unseated from their holes, causing the lid to operate incorrectly. I was able to re-seat them and get the lid working with the help of this.

Stefan Rust - crwdns2934203:0crwdne2934203:0

crwdns2917038:0crwdne2917038:0

crwdns2936625:0crwdne2936625:0:

crwdns2936751:024crwdne2936751:0 10

crwdns2936753:07crwdne2936753:0 77

crwdns2936753:030crwdne2936753:0 333

crwdns2942667:0crwdne2942667:0 11,574