crwdns2933423:0crwdne2933423:0

How to Apply the Power Button Board Adhesive in your Kobo Clara eReader

crwdns2942213:0crwdne2942213:0

  1. How to Apply the Power Button Board Adhesive in your Kobo Clara eReader, Remove the old adhesive: crwdns2935265:01crwdnd2935265:01crwdnd2935265:01crwdne2935265:0
    crwdns2935267:0crwdne2935267:0
    Tweezers
    $4.99
    crwdns2942207:0crwdne2942207:0
    • If you're transferring your power button board to a new screen, follow the next three steps. Otherwise, skip to this step to install a new power button board.

    • Use tweezers, or your fingers, to remove any remaining adhesive on the bottom of your power button board.

    • Make sure the board is as clean as possible so the replacement adhesive sits evenly on the frame.

  2. How to Apply the Power Button Board Adhesive in your Kobo Clara eReader, Apply the adhesive: crwdns2935265:02crwdnd2935265:01crwdnd2935265:03crwdne2935265:0 How to Apply the Power Button Board Adhesive in your Kobo Clara eReader, Apply the adhesive: crwdns2935265:02crwdnd2935265:02crwdnd2935265:03crwdne2935265:0 How to Apply the Power Button Board Adhesive in your Kobo Clara eReader, Apply the adhesive: crwdns2935265:02crwdnd2935265:03crwdnd2935265:03crwdne2935265:0
    crwdns2935267:0crwdne2935267:0
    Tesa 61395 Tape
    $2.99
    crwdns2942207:0crwdne2942207:0
    • Measure and cut a few strips of a thin double-sided tape, like Tesa tape, and apply it to the bottom of the power button board.

    • Peel off the liners from the strips to expose the adhesive.

  3. How to Apply the Power Button Board Adhesive in your Kobo Clara eReader, Secure the power button board: crwdns2935265:03crwdnd2935265:01crwdnd2935265:02crwdne2935265:0 How to Apply the Power Button Board Adhesive in your Kobo Clara eReader, Secure the power button board: crwdns2935265:03crwdnd2935265:02crwdnd2935265:02crwdne2935265:0
    • Place the power button board on its spot on the frame, making sure it's aligned with its two pegs.

    • Press down on the power button board to adhere it.

  4. How to Apply the Power Button Board Adhesive in your Kobo Clara eReader, Remove the old adhesive: crwdns2935265:04crwdnd2935265:01crwdnd2935265:02crwdne2935265:0 How to Apply the Power Button Board Adhesive in your Kobo Clara eReader, Remove the old adhesive: crwdns2935265:04crwdnd2935265:02crwdnd2935265:02crwdne2935265:0
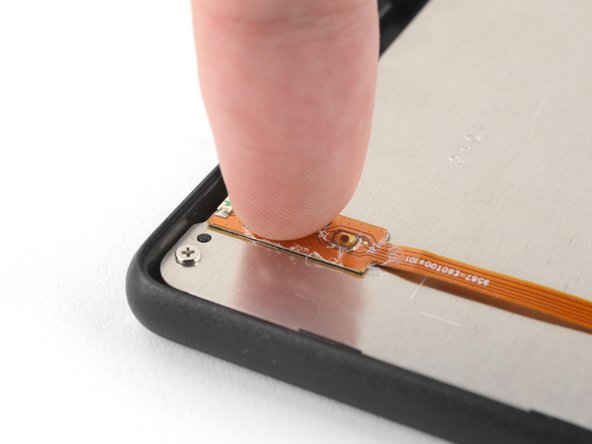
    • Use a spudger, or your fingers, to remove the remaining adhesive at the power button board's spot on the frame.

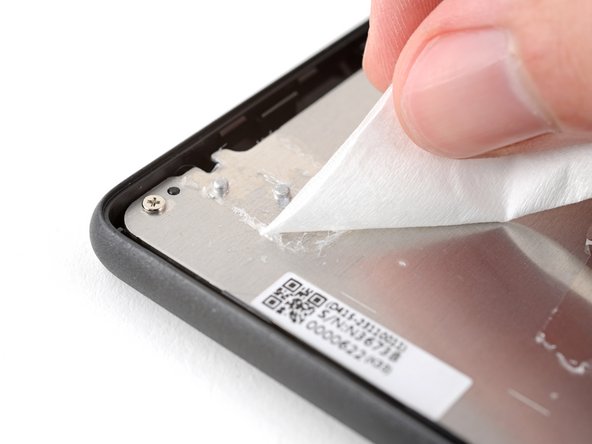
    • Apply a few drops of isopropyl alcohol (>90%) to the power button board's spot on the frame.

    • Use a coffee filter or a lint-free cloth to wipe off any remaining adhesive residue.

    • Make sure the spot is as clean as possible so the replacement adhesive sits evenly on the frame.

  5. How to Apply the Power Button Board Adhesive in your Kobo Clara eReader, Secure the power button board: crwdns2935265:05crwdnd2935265:01crwdnd2935265:03crwdne2935265:0 How to Apply the Power Button Board Adhesive in your Kobo Clara eReader, Secure the power button board: crwdns2935265:05crwdnd2935265:02crwdnd2935265:03crwdne2935265:0 How to Apply the Power Button Board Adhesive in your Kobo Clara eReader, Secure the power button board: crwdns2935265:05crwdnd2935265:03crwdnd2935265:03crwdne2935265:0
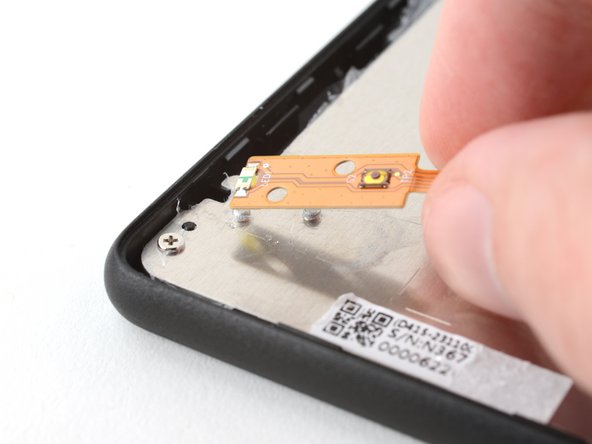
    • Peel off the liner on the bottom of the new power button board to expose the adhesive.

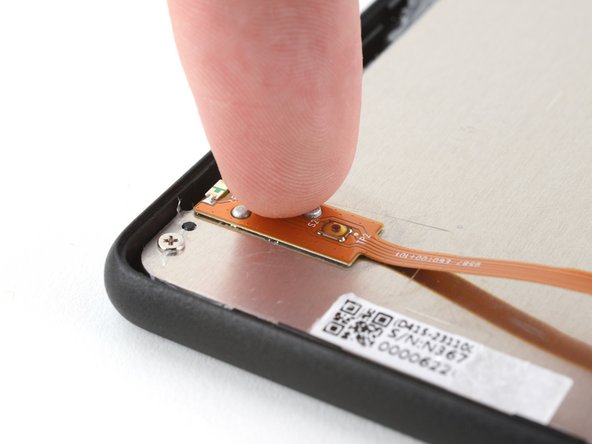
    • Place the power button board on its spot on the frame, making its aligned with its two pegs.

    • Press down on the power button board to adhere it.

crwdns2915888:0crwdne2915888:0

Repair didn’t go as planned? Try some basic troubleshooting, or ask our Answers Community for help.

Alex Diaz-Kokaisl

crwdns2935283:001/16/22crwdne2935283:0

125,007 crwdns2915208:0crwdne2915208:0

crwdns2935297:0582crwdne2935297:0

crwdns2915084:0crwdne2915084:0

iFixit crwdns2935289:0iFixitcrwdne2935289:0

Staff

crwdns2931471:0136crwdne2931471:0

crwdns2935297:017,430crwdne2935297:0

crwdns2944067:00crwdne2944067:0

crwdns2917038:0crwdne2917038:0

crwdns2936625:0crwdne2936625:0:

crwdns2936751:024crwdne2936751:0 0

crwdns2936753:07crwdne2936753:0 4

crwdns2936753:030crwdne2936753:0 64

crwdns2942667:0crwdne2942667:0 127