crwdns2933423:0crwdne2933423:0

How To Patch A Hole In The Wall

crwdns2942213:0crwdne2942213:0

  1. How To Patch A Hole In The Wall, How To Patch A Hole In The Wall: crwdns2935265:01crwdnd2935265:01crwdnd2935265:03crwdne2935265:0 How To Patch A Hole In The Wall, How To Patch A Hole In The Wall: crwdns2935265:01crwdnd2935265:02crwdnd2935265:03crwdne2935265:0 How To Patch A Hole In The Wall, How To Patch A Hole In The Wall: crwdns2935265:01crwdnd2935265:03crwdnd2935265:03crwdne2935265:0
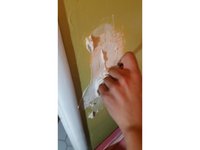
    • Sand down the hole and the area surrounding. This is in order to get paint off the wall.

  2. How To Patch A Hole In The Wall: crwdns2935265:02crwdnd2935265:01crwdnd2935265:02crwdne2935265:0 How To Patch A Hole In The Wall: crwdns2935265:02crwdnd2935265:02crwdnd2935265:02crwdne2935265:0
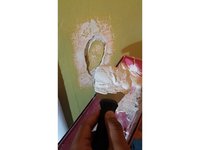
    • Use the rag and the toothbrush to clean off any excess rubble near the hole.

  3. How To Patch A Hole In The Wall: crwdns2935265:03crwdnd2935265:01crwdnd2935265:01crwdne2935265:0
    • Follow the directions on the spackle box to prepare the spackle for application.

    • Although all spackle brands are different, spackle should have a consistency similar to toothpaste when mixed with water.

  4. How To Patch A Hole In The Wall: crwdns2935265:04crwdnd2935265:01crwdnd2935265:03crwdne2935265:0 How To Patch A Hole In The Wall: crwdns2935265:04crwdnd2935265:02crwdnd2935265:03crwdne2935265:0 How To Patch A Hole In The Wall: crwdns2935265:04crwdnd2935265:03crwdnd2935265:03crwdne2935265:0
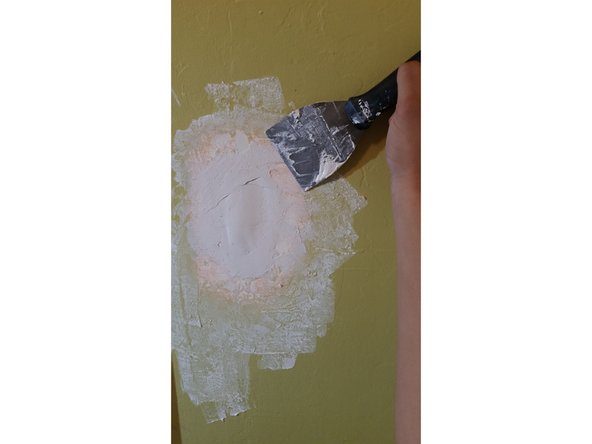
    • Take the spackle mix and apply it to the hole.

    • Make sure to layer the spackle evenly and remove excess spackle.

  5. How To Patch A Hole In The Wall: crwdns2935265:05crwdnd2935265:01crwdnd2935265:01crwdne2935265:0
    • Wait 30-45 minutes for the spackle patch to dry.

    • Wait time may vary depending on the depth of the hole and spackle mix used.

  6. How To Patch A Hole In The Wall: crwdns2935265:06crwdnd2935265:01crwdnd2935265:01crwdne2935265:0
    • Make sure the spackle is dry.

    • Sand the spackle until it is smooth and flush with the wall.

crwdns2915888:0crwdne2915888:0

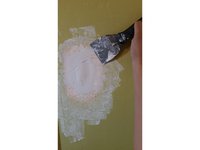
Now your wall should be looking as good as new!

crwdns2935229:03crwdne2935229:0

Joseph Garcia

crwdns2935283:009/29/15crwdne2935283:0

293 crwdns2915208:0crwdne2915208:0

crwdns2935295:0crwdne2935295:0

crwdns2915084:0crwdne2915084:0

Cal Poly, Team 17-2, Green Fall 2015 crwdns2935289:0Cal Poly, Team 17-2, Green Fall 2015crwdne2935289:0

CPSU-GREEN-F15S17G2

crwdns2931471:04crwdne2931471:0

crwdns2935297:08crwdne2935297:0

crwdns2917034:0crwdne2917034:0

I suggest using a sanding sponge or block in step 6

Dennis - crwdns2934203:0crwdne2934203:0

crwdns2917038:0crwdne2917038:0

crwdns2936625:0crwdne2936625:0:

crwdns2936751:024crwdne2936751:0 0

crwdns2936753:07crwdne2936753:0 0

crwdns2936753:030crwdne2936753:0 10

crwdns2942667:0crwdne2942667:0 1,457