crwdns2915892:0crwdne2915892:0
The first step to replacing any internal component in the hoverboard is to remove the external plastic covers. You will need a Phillips #2 screwdriver with a long shaft for this guide.
crwdns2942213:0crwdne2942213:0
-
-
Flip the hoverboard over so the labels are facing upwards.
-
Remove the twenty 18mm screws using a Phillips #2 screwdriver and twisting counterclockwise.
 crwdns2952109:0crwdne2952109:0
-
-
-
-
Remove the bottom cover by lifting it away from the hoverboard.
-
-
-
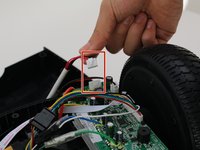
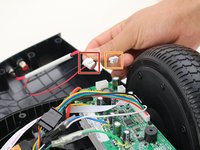
Remove one connector from the non-battery side circuit board.
-
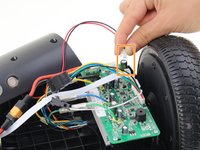
Remove the next connector from the non-battery side circuit board.
-


To reassemble your device, follow these instructions in reverse order.
crwdns2935221:0crwdne2935221:0
crwdns2935229:03crwdne2935229:0
crwdns2935287:0crwdne2935287:0

Cal Poly, Team S13-G2, White Fall 2018 crwdns2935289:0Cal Poly, Team S13-G2, White Fall 2018crwdne2935289:0
CPSU-WHITE-F18S13G2
crwdns2931471:03crwdne2931471:0
crwdns2935297:04crwdne2935297:0
crwdns2947412:02crwdne2947412:0
I'm gettin nothin at all.. Charger is green.. But absolutely nothing when press the on button.. All the cables are connected.. No lights or anythin.. Can anyone help.
stemirnoff@hotmail.co.uk - crwdns2934203:0crwdne2934203:0 crwdns2950251:0crwdne2950251:0
I am getting the 5 red lights. I have followed all the instructions. Is there a site to buy the motherboards that are burned out? Is it financially worth buy both boards and replacing them?
-Christopher Fields, Network Engineer, PC Repair, Grantsville, UT
Christopher Fields - crwdns2934203:0crwdne2934203:0 crwdns2950251:0crwdne2950251:0