crwdns2933423:0crwdne2933423:0

Hoover LiNX The Nozzle Prongs Replacement

crwdns2942213:0crwdne2942213:0

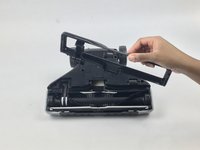
  1. Hoover LiNX The Nozzle Prongs Replacement, Replace The Motor: crwdns2935265:01crwdnd2935265:01crwdnd2935265:01crwdne2935265:0
    • Detach the rolling assembly from the body by pushing the button found at the base.

  2. Hoover LiNX The Nozzle Prongs Replacement: crwdns2935265:02crwdnd2935265:01crwdnd2935265:01crwdne2935265:0
    • Remove the seven 7.5mm Phillips #1 screws from the brush retainer.

  3. Hoover LiNX The Nozzle Prongs Replacement: crwdns2935265:03crwdnd2935265:01crwdnd2935265:02crwdne2935265:0 Hoover LiNX The Nozzle Prongs Replacement: crwdns2935265:03crwdnd2935265:02crwdnd2935265:02crwdne2935265:0
    • Remove the brush and retainer from the rolling assembly.

    • The brush will need to be disconnected from the belt.

  4. Hoover LiNX The Nozzle Prongs Replacement: crwdns2935265:04crwdnd2935265:01crwdnd2935265:01crwdne2935265:0
    • Remove the eight 4mm Phillips #1 screws from the bottom panel.

  5. Hoover LiNX The Nozzle Prongs Replacement: crwdns2935265:05crwdnd2935265:01crwdnd2935265:01crwdne2935265:0
    • Remove the bottom panel.

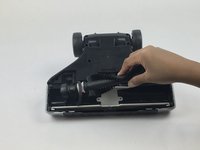
  6. Hoover LiNX The Nozzle Prongs Replacement: crwdns2935265:06crwdnd2935265:01crwdnd2935265:01crwdne2935265:0
    • Remove the motor.

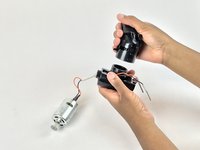
  7. Hoover LiNX The Nozzle Prongs Replacement, The Nozzle Prongs: crwdns2935265:07crwdnd2935265:01crwdnd2935265:01crwdne2935265:0
    • Remove the two 7.5mm Phillips #1 screws from the main body.

  8. Hoover LiNX The Nozzle Prongs Replacement: crwdns2935265:08crwdnd2935265:01crwdnd2935265:01crwdne2935265:0
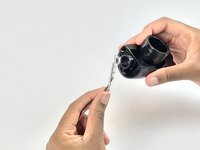
    • Remove the black covering from the air tube.

  9. Hoover LiNX The Nozzle Prongs Replacement: crwdns2935265:09crwdnd2935265:01crwdnd2935265:01crwdne2935265:0
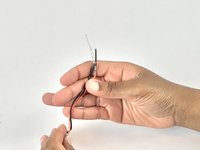
    • Slide the prongs out through their channels.

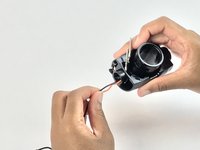
  10. Hoover LiNX The Nozzle Prongs Replacement: crwdns2935265:010crwdnd2935265:01crwdnd2935265:02crwdne2935265:0 Hoover LiNX The Nozzle Prongs Replacement: crwdns2935265:010crwdnd2935265:02crwdnd2935265:02crwdne2935265:0
    • Remove the angled neck and feed the prongs out through their channels.

  11. Hoover LiNX The Nozzle Prongs Replacement: crwdns2935265:011crwdnd2935265:01crwdnd2935265:02crwdne2935265:0 Hoover LiNX The Nozzle Prongs Replacement: crwdns2935265:011crwdnd2935265:02crwdnd2935265:02crwdne2935265:0
    • Replace the prongs.

crwdns2915888:0crwdne2915888:0

To reassemble your device, follow these instructions in reverse order.

crwdns2935229:02crwdne2935229:0

Sara Vlhova

crwdns2935283:001/25/18crwdne2935283:0

541 crwdns2915208:0crwdne2915208:0

crwdns2935297:04crwdne2935297:0

crwdns2915084:0crwdne2915084:0

USF Tampa, Team S7-G4, Passmore Spring 2018 crwdns2935289:0USF Tampa, Team S7-G4, Passmore Spring 2018crwdne2935289:0

USFT-PASSMORE-S18S7G4

crwdns2931471:04crwdne2931471:0

crwdns2935297:012crwdne2935297:0

crwdns2947412:02crwdne2947412:0

How do I get to the receivers for the prongs? They appear to be too loose to make a connection and i have not been able to get into the body to tighten. Is there another way to improve this connection?

Robert L Worthing - crwdns2934203:0crwdne2934203:0

Thank you for asking ifixit your 11/1018 question. I’ve been trying to disassemble the body to get at the receiver(s)/socket(s) for those prongs for days. And ifixit, please, have you got a picture of the routing of the brush motor wires from the motor through the rolling assembly, the swiveling universal joint, and along the back of the airtube?

donwesel - crwdns2934203:0crwdne2934203:0

crwdns2917038:0crwdne2917038:0

crwdns2936625:0crwdne2936625:0:

crwdns2936751:024crwdne2936751:0 0

crwdns2936753:07crwdne2936753:0 0

crwdns2936753:030crwdne2936753:0 8

crwdns2942667:0crwdne2942667:0 1,893