crwdns2915892:0crwdne2915892:0
Follow this guide to remove or repair any of the parts related to the front panel.
crwdns2942213:0crwdne2942213:0
-
-
Remove the two 3/4" wing screws on the bottom of the fan by rotating them counter-clockwise.
-
-
-
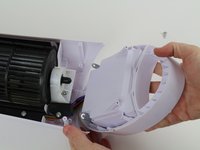
Twist the fan base counter-clockwise until the pins line up as shown.
-
Pull the base straight towards you to remove it, feeding the wire through the base.
-
-
-
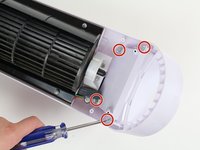
Remove all of the marked 1/2" Phillips #02 screws on the backside of the fan
-
Remove the two marked 3/4" Phillips #02 screws in the middle.
-
-
-
-
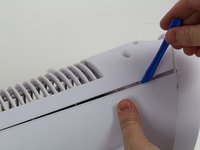
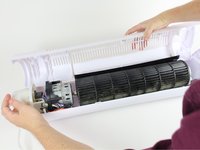
Use a plastic opening tool or screwdriver to pry off the back of the fan, starting from the top down.
Please advise how I can order the part which locating on bottom of motor mount bracket. The white colour bracket for fan body diretion rotorying aid. The part as show on picture on left hand side holding. Thanks.
-
-
-
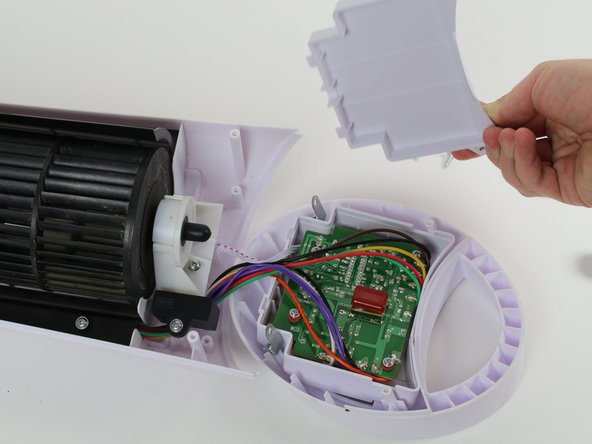
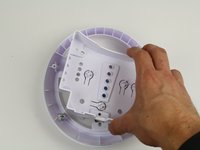
Remove the four 1/2" Phillips #02 screws, indicated by a red circle.
-
Lean the front panel forwards and set it down.
-
-
-
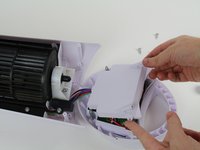
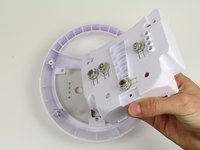
Gently lift and remove the panel covering the electronics assembly.
-
-
-
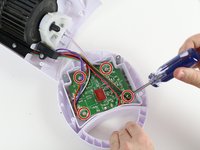
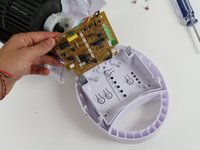
Remove the four 1/2" Phillips #01 screws in the circuit board.
-
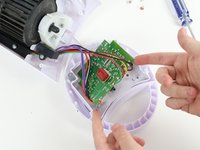
Gently pull the circuit board off of the rest of the front panel assembly.
-
-
-
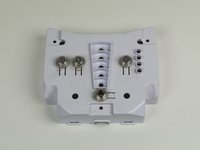
Lift out the internal part of the front panel to access the buttons.
-
-
-
If necessary, remove the buttons by grabbing them with two fingers and pulling up and away from the panel.
-


To reassemble your device, follow these instructions in reverse order.
To reassemble your device, follow these instructions in reverse order.
crwdns2935221:0crwdne2935221:0
crwdns2935227:0crwdne2935227:0
crwdns2915084:0crwdne2915084:0

Cal Poly, Team 11-6, Forte Fall 2015 crwdns2935289:0Cal Poly, Team 11-6, Forte Fall 2015crwdne2935289:0
CPSU-FORTE-F15S11G6
crwdns2931471:04crwdne2931471:0
crwdns2935297:04crwdne2935297:0
crwdns2947412:02crwdne2947412:0
the piece to make it turn is broken
the piece that make it turn is broken!