crwdns2933423:0crwdne2933423:0
crwdns2947577:0crwdnd2947577:0crwdne2947577:0

HomePod Disassembly

crwdns2942213:0crwdne2942213:0

  1. HomePod Disassembly, Top Touch Cover: crwdns2935265:01crwdnd2935265:01crwdnd2935265:02crwdne2935265:0 HomePod Disassembly, Top Touch Cover: crwdns2935265:01crwdnd2935265:02crwdnd2935265:02crwdne2935265:0
    • Be sure to unplug your HomePod before disassembly.

    • Using a hairdryer on hot, heat up the top touch surface and remove.

    • The cover is not flexible. Special care must be taken to avoid cracking or snapping the top cover.

    crwdns2952109:0crwdne2952109:0

    crwdns2917038:0crwdne2917038:0

  2. HomePod Disassembly, Removing the Touch Surface: crwdns2935265:02crwdnd2935265:01crwdnd2935265:03crwdne2935265:0 HomePod Disassembly, Removing the Touch Surface: crwdns2935265:02crwdnd2935265:02crwdnd2935265:03crwdne2935265:0 HomePod Disassembly, Removing the Touch Surface: crwdns2935265:02crwdnd2935265:03crwdnd2935265:03crwdne2935265:0
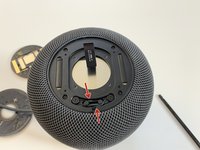
    • Remove four T6 screws.

    • Using a hair dryer on hot, soften the adhesive holding the touch pad assembly to the top frame.

    • Using a guitar pick, carefully pry up the touch pad.

    crwdns2952109:0crwdne2952109:0

    crwdns2917038:0crwdne2917038:0

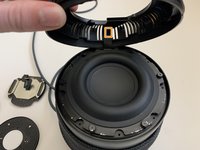
  3. HomePod Disassembly, Disconnecting the Touch Surface: crwdns2935265:03crwdnd2935265:01crwdnd2935265:03crwdne2935265:0 HomePod Disassembly, Disconnecting the Touch Surface: crwdns2935265:03crwdnd2935265:02crwdnd2935265:03crwdne2935265:0 HomePod Disassembly, Disconnecting the Touch Surface: crwdns2935265:03crwdnd2935265:03crwdnd2935265:03crwdne2935265:0
    • Maneuver the touch assembly board up from the top frame.

    • Flip the retaining lever upwards with a spudger to release the ribbon cable.

    • Remove the ribbon cable from the connector.

    crwdns2952109:0crwdne2952109:0

    crwdns2917038:0crwdne2917038:0

  4. HomePod Disassembly, 3D Mesh Draw Strings: crwdns2935265:04crwdnd2935265:01crwdnd2935265:03crwdne2935265:0 HomePod Disassembly, 3D Mesh Draw Strings: crwdns2935265:04crwdnd2935265:02crwdnd2935265:03crwdne2935265:0 HomePod Disassembly, 3D Mesh Draw Strings: crwdns2935265:04crwdnd2935265:03crwdnd2935265:03crwdne2935265:0
    crwdns2935267:0crwdne2935267:0
    Tweezers
    $4.99
    • Using tweezers (or fingers) unwind the drawstrings from the moorings.

    • The drawstrings are wrapped/looped around each T6 screw post. Remove or loosen each and unwrap the drawstring.

    crwdns2952109:0crwdne2952109:0

    crwdns2917038:0crwdne2917038:0

  5. HomePod Disassembly, Touch Surface Support Plate: crwdns2935265:05crwdnd2935265:01crwdnd2935265:02crwdne2935265:0 HomePod Disassembly, Touch Surface Support Plate: crwdns2935265:05crwdnd2935265:02crwdnd2935265:02crwdne2935265:0
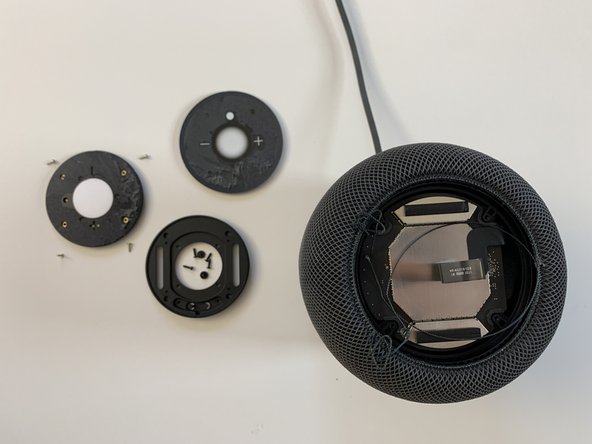
    • Remove the four T6 screws securing the touch surface support disc to the lid and slide the 3D mesh fabric sleeve downwards.

    • Remove the touch surface support frame disk from the HomePod.

    crwdns2952109:0crwdne2952109:0

    crwdns2917038:0crwdne2917038:0

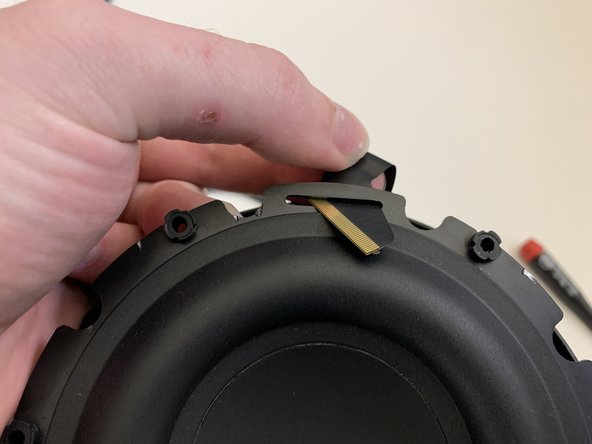
  6. HomePod Disassembly, Logic Board Removal: crwdns2935265:06crwdnd2935265:01crwdnd2935265:03crwdne2935265:0 HomePod Disassembly, Logic Board Removal: crwdns2935265:06crwdnd2935265:02crwdnd2935265:03crwdne2935265:0 HomePod Disassembly, Logic Board Removal: crwdns2935265:06crwdnd2935265:03crwdnd2935265:03crwdne2935265:0
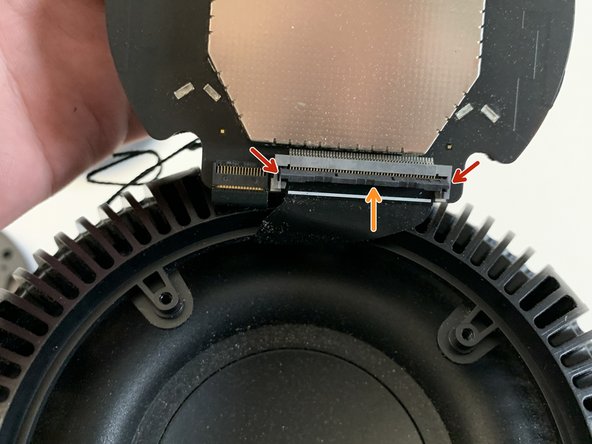
    • Flip the logic board up and using a spudger, carefully pry the retaining lever upwards.

    • Pop the ribbon cable straight upwards and out. This cable has "ears" on each side and doesn't not slide into the connector.

    crwdns2952109:0crwdne2952109:0

    crwdns2917038:0crwdne2917038:0

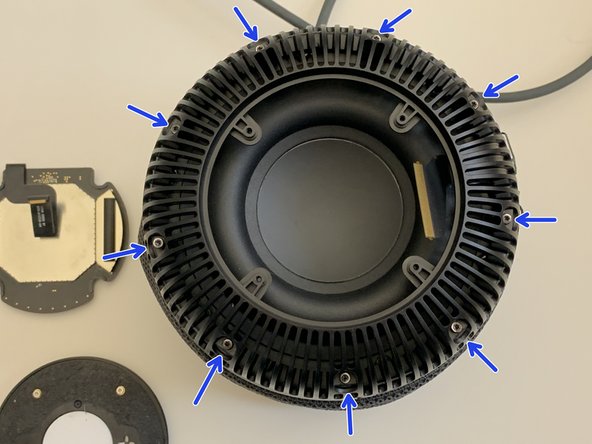
  7. HomePod Disassembly, Top Cover Removal (screws): crwdns2935265:07crwdnd2935265:01crwdnd2935265:03crwdne2935265:0 HomePod Disassembly, Top Cover Removal (screws): crwdns2935265:07crwdnd2935265:02crwdnd2935265:03crwdne2935265:0 HomePod Disassembly, Top Cover Removal (screws): crwdns2935265:07crwdnd2935265:03crwdnd2935265:03crwdne2935265:0
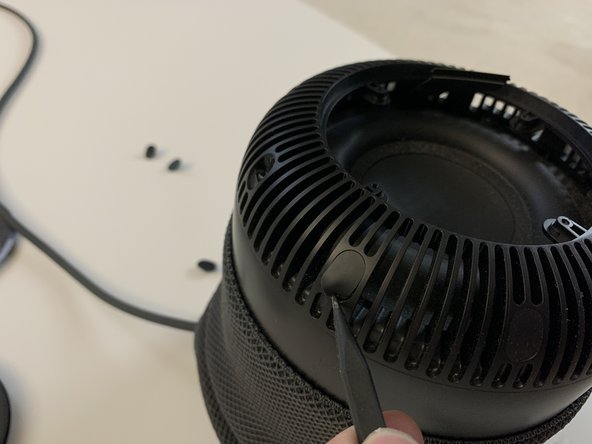
    • Using a spudger, remove the nine rubber screw caps.

    • Using a Torx T6 screwdriver, remove the nine T6 screws securing the top to the main housing.

    crwdns2952109:0crwdne2952109:0

    crwdns2917038:0crwdne2917038:0

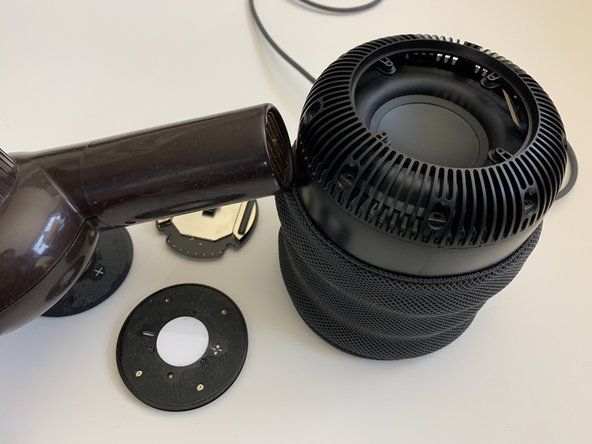
  8. HomePod Disassembly, Softening the Adhesive: crwdns2935265:08crwdnd2935265:01crwdnd2935265:03crwdne2935265:0 HomePod Disassembly, Softening the Adhesive: crwdns2935265:08crwdnd2935265:02crwdnd2935265:03crwdne2935265:0 HomePod Disassembly, Softening the Adhesive: crwdns2935265:08crwdnd2935265:03crwdnd2935265:03crwdne2935265:0
    • Using a hairdryer on high heat, aim the hairdryer as shown and heat the perimeter just below the seam where the top meets the main housing.

    • This step is critical. If you have trouble with the next step, repeat the heating process in the trouble area.

    crwdns2952109:0crwdne2952109:0

    crwdns2917038:0crwdne2917038:0

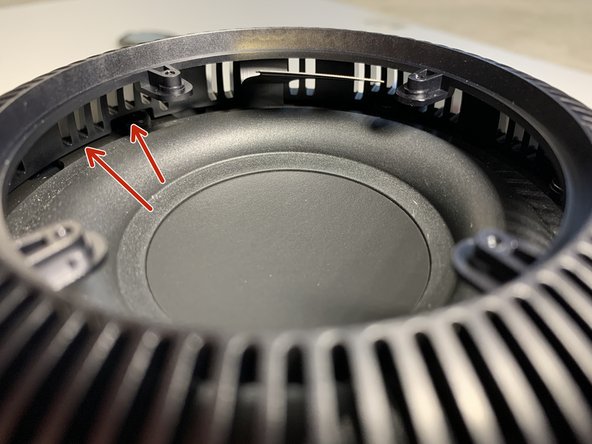
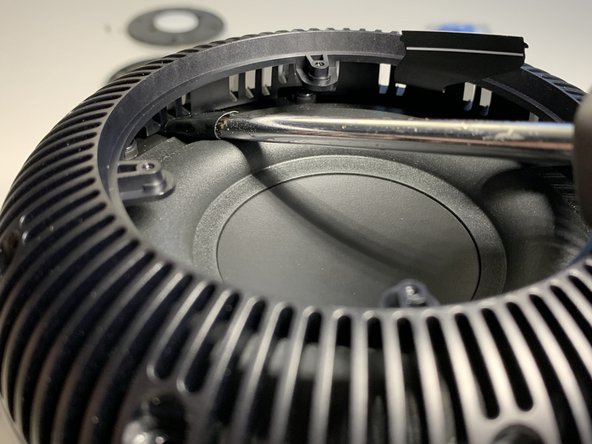
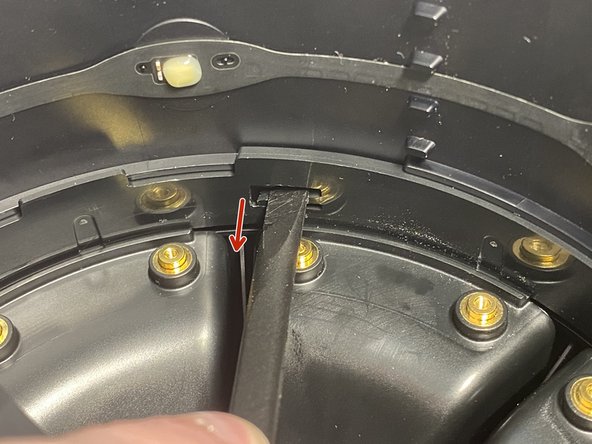
  9. HomePod Disassembly, Separating the Top: crwdns2935265:09crwdnd2935265:01crwdnd2935265:03crwdne2935265:0 HomePod Disassembly, Separating the Top: crwdns2935265:09crwdnd2935265:02crwdnd2935265:03crwdne2935265:0 HomePod Disassembly, Separating the Top: crwdns2935265:09crwdnd2935265:03crwdnd2935265:03crwdne2935265:0
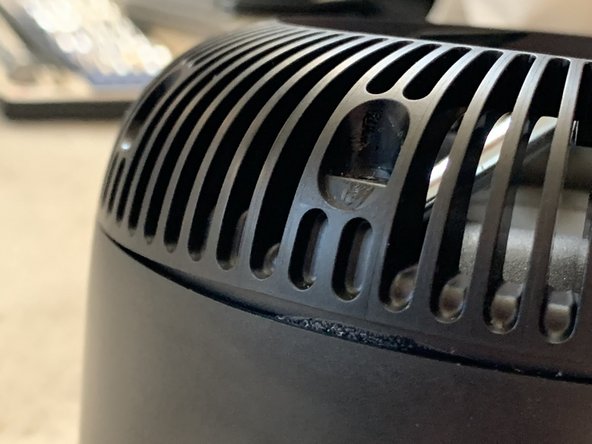
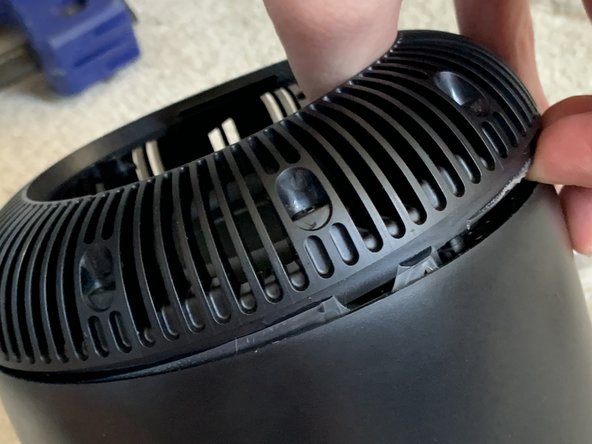
    • This step requires significant force even with plenty of heat applied in the previous step.

    • Insert a wide flat blade screwdriver wrapped in 1-2 layers of electrical tape.

    • You will need to apply a fair amount of pressure to wedge the screwdriver head in the small gap.

    • Pull the top cover straight up. This will need to be done in four sections.

    crwdns2952109:0crwdne2952109:0

    crwdns2917038:0crwdne2917038:0

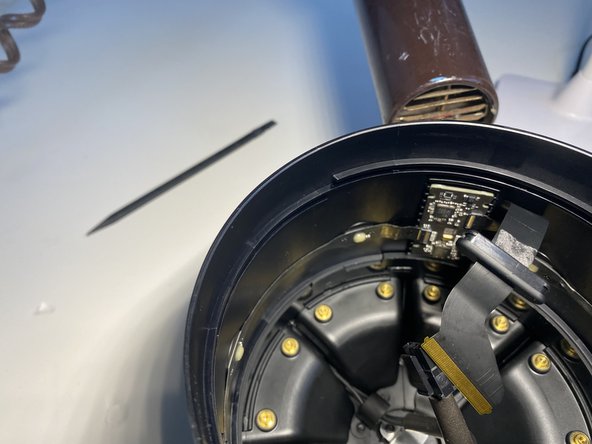
  10. HomePod Disassembly, Top Removal (continued): crwdns2935265:010crwdnd2935265:01crwdnd2935265:03crwdne2935265:0 HomePod Disassembly, Top Removal (continued): crwdns2935265:010crwdnd2935265:02crwdnd2935265:03crwdne2935265:0 HomePod Disassembly, Top Removal (continued): crwdns2935265:010crwdnd2935265:03crwdnd2935265:03crwdne2935265:0
    • Be careful when freeing the top from the glue. The ribbon cable we disconnected in Step 7 is adhered to the top and can easily become torn.

    crwdns2952109:0crwdne2952109:0

    crwdns2917038:0crwdne2917038:0

  11. HomePod Disassembly, Top Removal (continued 2): crwdns2935265:011crwdnd2935265:01crwdnd2935265:02crwdne2935265:0 HomePod Disassembly, Top Removal (continued 2): crwdns2935265:011crwdnd2935265:02crwdnd2935265:02crwdne2935265:0
    • Careful peel the ribbon cable from the top.

    • Take your time as you don't want to tear this cable.

    crwdns2952109:0crwdne2952109:0

    crwdns2917038:0crwdne2917038:0

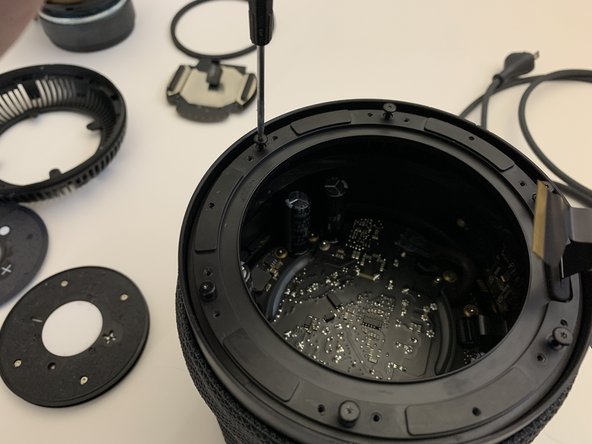
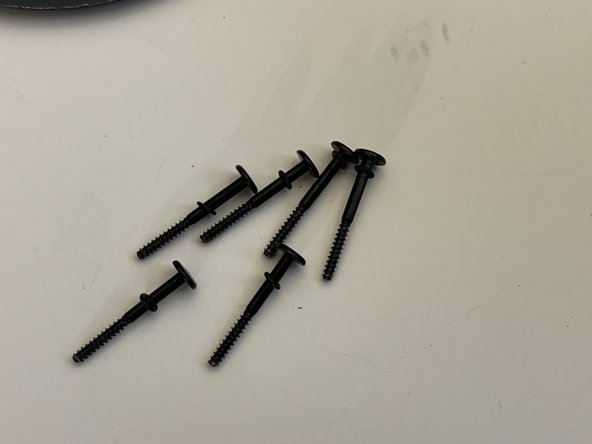
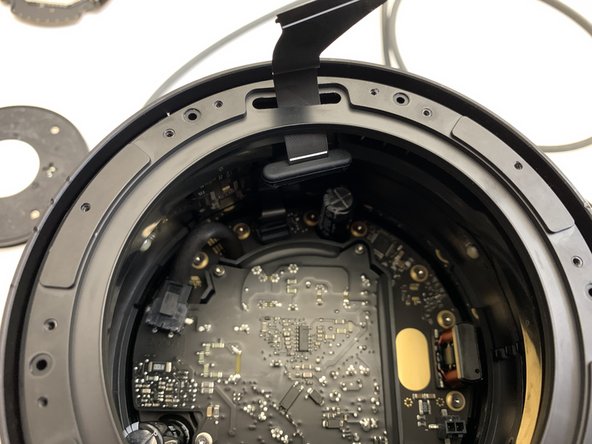
  12. HomePod Disassembly, Woofer Removal: crwdns2935265:012crwdnd2935265:01crwdnd2935265:03crwdne2935265:0 HomePod Disassembly, Woofer Removal: crwdns2935265:012crwdnd2935265:02crwdnd2935265:03crwdne2935265:0 HomePod Disassembly, Woofer Removal: crwdns2935265:012crwdnd2935265:03crwdnd2935265:03crwdne2935265:0
    • Remove the six Torx T6 screws securing the woofer.

    • Carefully lift the woofer out by it's edges and slip the logic board ribbon cable through.

    crwdns2952109:0crwdne2952109:0

    crwdns2917038:0crwdne2917038:0

  13. HomePod Disassembly, Disconnecting the Woofer: crwdns2935265:013crwdnd2935265:01crwdnd2935265:03crwdne2935265:0 HomePod Disassembly, Disconnecting the Woofer: crwdns2935265:013crwdnd2935265:02crwdnd2935265:03crwdne2935265:0 HomePod Disassembly, Disconnecting the Woofer: crwdns2935265:013crwdnd2935265:03crwdnd2935265:03crwdne2935265:0
    • Support the woofer on the top edge of the HomePod with your hand.

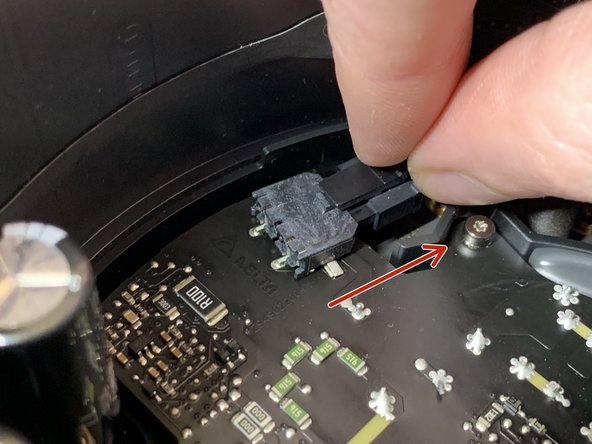
    • With your other hand, reach inside and squeeze the tab on the connector and pull strait up to disconnect the woofer from the amplifier board.

    • Remove the woofer from the HomePod.

    crwdns2952109:0crwdne2952109:0

    crwdns2917038:0crwdne2917038:0

  14. HomePod Disassembly, Woofer Gasket: crwdns2935265:014crwdnd2935265:01crwdnd2935265:03crwdne2935265:0 HomePod Disassembly, Woofer Gasket: crwdns2935265:014crwdnd2935265:02crwdnd2935265:03crwdne2935265:0 HomePod Disassembly, Woofer Gasket: crwdns2935265:014crwdnd2935265:03crwdnd2935265:03crwdne2935265:0
    • Remove the woofer's gasket.

    • This is a simple, yet critical part and sealing the enclosure with the driver installed. Failure to replace this gasket will result in degradation of sound and excessive air noise.

    crwdns2952109:0crwdne2952109:0

    crwdns2917038:0crwdne2917038:0

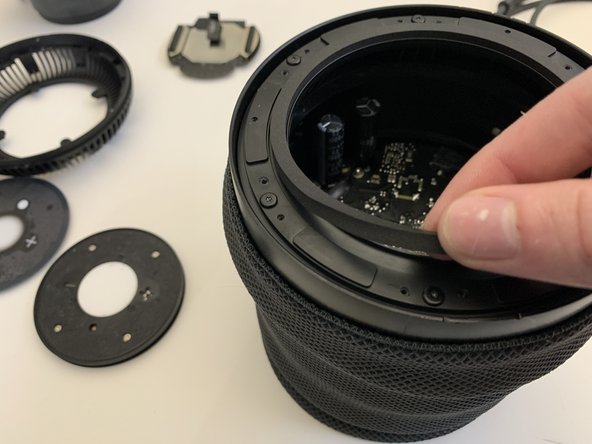
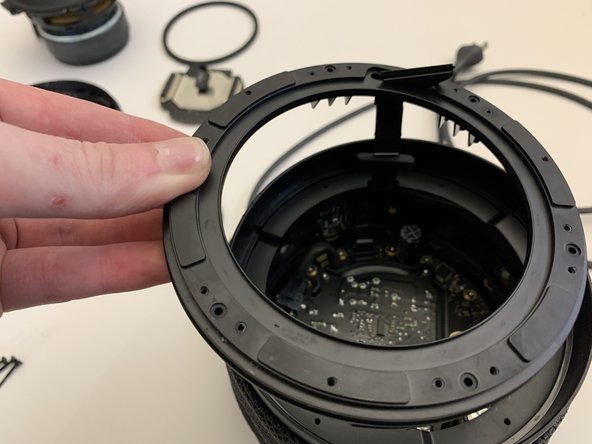
  15. HomePod Disassembly, Upper Ring Removal: crwdns2935265:015crwdnd2935265:01crwdnd2935265:03crwdne2935265:0 HomePod Disassembly, Upper Ring Removal: crwdns2935265:015crwdnd2935265:02crwdnd2935265:03crwdne2935265:0 HomePod Disassembly, Upper Ring Removal: crwdns2935265:015crwdnd2935265:03crwdnd2935265:03crwdne2935265:0
    • Remove the six Torx T6 screws.

    • Note the small delicate rubber O rings that go with each screw. Replace any damaged or missing O rings.

    crwdns2952109:0crwdne2952109:0

    crwdns2917038:0crwdne2917038:0

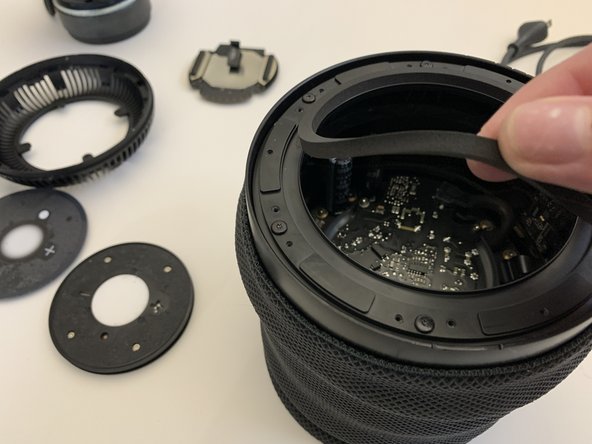
  16. HomePod Disassembly, Upper Ring Removal (Continued): crwdns2935265:016crwdnd2935265:01crwdnd2935265:03crwdne2935265:0 HomePod Disassembly, Upper Ring Removal (Continued): crwdns2935265:016crwdnd2935265:02crwdnd2935265:03crwdne2935265:0 HomePod Disassembly, Upper Ring Removal (Continued): crwdns2935265:016crwdnd2935265:03crwdnd2935265:03crwdne2935265:0
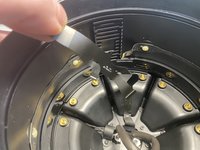
    • Using a spudger, push the silicone grommet through the upper ring.

    • Remove the upper ring from the HomePod.

    crwdns2952109:0crwdne2952109:0

    crwdns2917038:0crwdne2917038:0

  17. HomePod Disassembly, Middle Ring Removal: crwdns2935265:017crwdnd2935265:01crwdnd2935265:03crwdne2935265:0 HomePod Disassembly, Middle Ring Removal: crwdns2935265:017crwdnd2935265:02crwdnd2935265:03crwdne2935265:0 HomePod Disassembly, Middle Ring Removal: crwdns2935265:017crwdnd2935265:03crwdnd2935265:03crwdne2935265:0
    • With the upper ring removed, remove the grommet from the ribbon cable.

    • Rotate the middle ring counter clockwise to unscrew it from the HomePod.

    crwdns2952109:0crwdne2952109:0

    crwdns2917038:0crwdne2917038:0

  18. HomePod Disassembly, Power Supply Removal: crwdns2935265:018crwdnd2935265:01crwdnd2935265:03crwdne2935265:0 HomePod Disassembly, Power Supply Removal: crwdns2935265:018crwdnd2935265:02crwdnd2935265:03crwdne2935265:0 HomePod Disassembly, Power Supply Removal: crwdns2935265:018crwdnd2935265:03crwdnd2935265:03crwdne2935265:0
    • Push down on the locking tab and pull in the direction of the arrow.

    • Remove the four Torx T6 screws securing the power supply to the amplifier board.

    crwdns2952109:0crwdne2952109:0

    crwdns2917038:0crwdne2917038:0

  19. HomePod Disassembly, Power Supply Removal Tips: crwdns2935265:019crwdnd2935265:01crwdnd2935265:03crwdne2935265:0 HomePod Disassembly, Power Supply Removal Tips: crwdns2935265:019crwdnd2935265:02crwdnd2935265:03crwdne2935265:0 HomePod Disassembly, Power Supply Removal Tips: crwdns2935265:019crwdnd2935265:03crwdnd2935265:03crwdne2935265:0
    • Be sure to pull straight up (orange arrow) when removing the power supply (after removing the screws). This connector is fragile and easily damaged during removal and installation!

    • The third photo shows how the power supply board properly mates with the amplifier board.

    crwdns2952109:0crwdne2952109:0

    crwdns2917038:0crwdne2917038:0

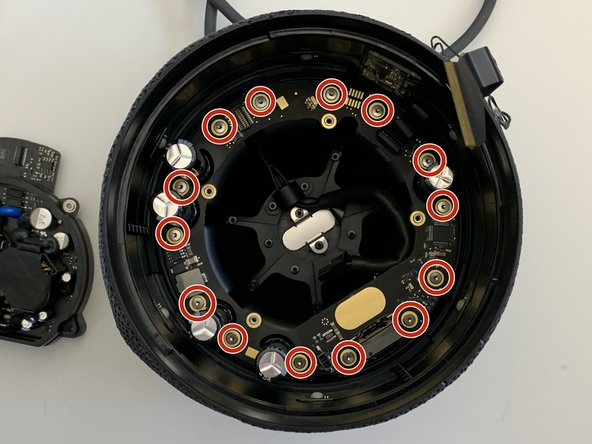
  20. HomePod Disassembly, Amplifier Board Removal: crwdns2935265:020crwdnd2935265:01crwdnd2935265:03crwdne2935265:0 HomePod Disassembly, Amplifier Board Removal: crwdns2935265:020crwdnd2935265:02crwdnd2935265:03crwdne2935265:0 HomePod Disassembly, Amplifier Board Removal: crwdns2935265:020crwdnd2935265:03crwdnd2935265:03crwdne2935265:0
    • Disconnect the ribbon cable connecting the amplifier board to the logic board.

    • Remove the 14 Torx T6 screws securing the amplifier board to the 7 tweeters.

    • Carefully lift out and remove the amplifier board from the HomePod.

    crwdns2952109:0crwdne2952109:0

    crwdns2917038:0crwdne2917038:0

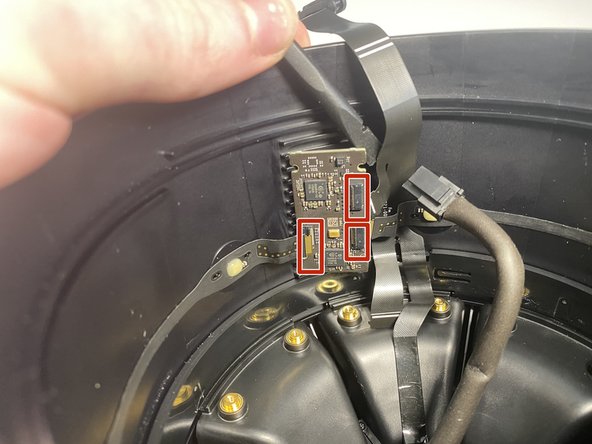
  21. HomePod Disassembly, Microphone Board Removal: crwdns2935265:021crwdnd2935265:01crwdnd2935265:03crwdne2935265:0 HomePod Disassembly, Microphone Board Removal: crwdns2935265:021crwdnd2935265:02crwdnd2935265:03crwdne2935265:0 HomePod Disassembly, Microphone Board Removal: crwdns2935265:021crwdnd2935265:03crwdnd2935265:03crwdne2935265:0
    • Disconnect the 3 ribbon cables from the Microphone board.

    • Using a hair dryer, heat the microphone board from the back side.

    • Using a plastic spudger, remove the PCB from the housing.

    crwdns2952109:0crwdne2952109:0

    crwdns2917038:0crwdne2917038:0

  22. HomePod Disassembly, Tweeter Retaining Ring: crwdns2935265:022crwdnd2935265:01crwdnd2935265:03crwdne2935265:0 HomePod Disassembly, Tweeter Retaining Ring: crwdns2935265:022crwdnd2935265:02crwdnd2935265:03crwdne2935265:0 HomePod Disassembly, Tweeter Retaining Ring: crwdns2935265:022crwdnd2935265:03crwdnd2935265:03crwdne2935265:0
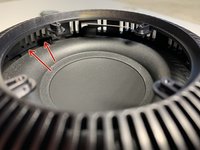
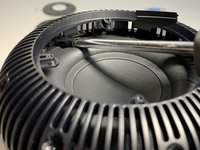
    • This is difficult to do, but with two spudgers and a finger nail, it's possible.

    • Using one hand to depress the 2 spiders and a finger nail to depress the 3rd clip, use your free hand to unscrew (counter clockwise) the tweeter retaining ring.

    • It is only necessary to rotate the tweeter retention ring several turns. It is not necessary to remove it entirely.

    crwdns2952109:0crwdne2952109:0

    crwdns2917038:0crwdne2917038:0

  23. HomePod Disassembly, Tweeter Removal: crwdns2935265:023crwdnd2935265:01crwdnd2935265:02crwdne2935265:0 HomePod Disassembly, Tweeter Removal: crwdns2935265:023crwdnd2935265:02crwdnd2935265:02crwdne2935265:0
    • Remove the three screws that secure the tweeter in place.

    crwdns2952109:0crwdne2952109:0

    crwdns2917038:0crwdne2917038:0

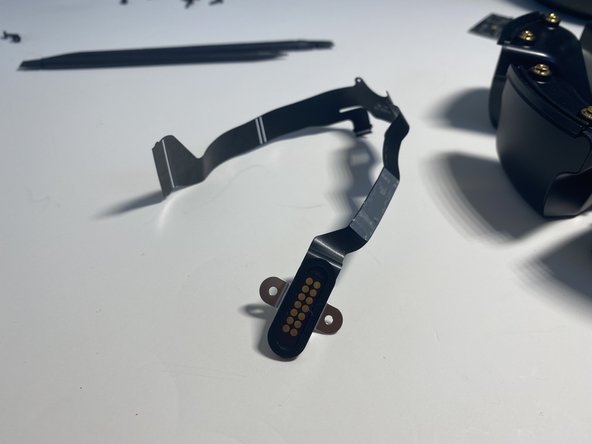
  24. HomePod Disassembly, Main Ribbon Cable Removal: crwdns2935265:024crwdnd2935265:01crwdnd2935265:03crwdne2935265:0 HomePod Disassembly, Main Ribbon Cable Removal: crwdns2935265:024crwdnd2935265:02crwdnd2935265:03crwdne2935265:0 HomePod Disassembly, Main Ribbon Cable Removal: crwdns2935265:024crwdnd2935265:03crwdnd2935265:03crwdne2935265:0
    • Remove the two T6 screws securing the diagnostic port to the bottom housing

    • Careful peel the ribbon cable from the wall of the HomePod. Take care not to tear this cable.

    • Remember it helps to heat the outside of the housing near the ribbon cable with a hair dryer to soften the adhesive securing this ribbon cable in place.

    crwdns2952109:0crwdne2952109:0

    crwdns2917038:0crwdne2917038:0

crwdns2915888:0crwdne2915888:0

To reassemble your device, follow these instructions in reverse order.

crwdns2935221:0crwdne2935221:0

crwdns2935229:017crwdne2935229:0

Nicholas Ouimet

crwdns2935283:010/16/09crwdne2935283:0

3,700 crwdns2915208:0crwdne2915208:0

crwdns2935297:011crwdne2935297:0

crwdns2947412:09crwdne2947412:0

Probably one of the hardest Apple product I've disassembled, took me almost an hour to remove the top.

Thank you for your guide!

Lulucmy - crwdns2934203:0crwdne2934203:0 crwdns2950251:0crwdne2950251:0

My homepod was knocked off a table during a party and started buzzing like crazy with any bass. I was able to follow this, and remove the woofer with no problems. turns out the woofer cage had bent unsealing the woofer, i was able to hammer it straight, reassemble, and it works perfectly again. THANK YOU.

mn mongo - crwdns2934203:0crwdne2934203:0 crwdns2950251:0crwdne2950251:0

What's the best way to test the PSU? My HomePod bricked, I disassembled it using this guide (Thank you!), the cable checks out, the next suspect is the PSU.

yarikos - crwdns2934203:0crwdne2934203:0 crwdns2950251:0crwdne2950251:0

Thank you for the information, it is really very useful.

A family member gave me his first generation Homepod which is not working after a fall from a table. Due to its age it is out of warranty and was not repaired or replaced by the official Apple service. He tried unsuccessfully to repair it.

Today I opened it up and the flat cable that connects the motherboard to other components on the bottom of the device is broken very close to its connection to this motherboard.

I really don't think this is the original fault of the device but I would like to know if there is a possibility to repair or replace this cable.

Thank you very much.

Guiseppe - crwdns2934203:0crwdne2934203:0 crwdns2950251:0crwdne2950251:0
Someone in Mexico that repairs Homepod First version/Alguien en mexico que repare homepod primera version

Homero Amaro Lira - crwdns2934203:0crwdne2934203:0 crwdns2950251:0crwdne2950251:0

crwdns2917038:0crwdne2917038:0

crwdns2936625:0crwdne2936625:0:

crwdns2936751:024crwdne2936751:0 52

crwdns2936753:07crwdne2936753:0 238

crwdns2936753:030crwdne2936753:0 862

crwdns2942667:0crwdne2942667:0 39,659