crwdns2933423:0crwdne2933423:0

Hitachi HB-B102 Automatic Home Bakery II Motor Replacement

crwdns2942213:0crwdne2942213:0

  1. Hitachi HB-B102 Automatic Home Bakery  II Motor Replacement, Outer Casing: crwdns2935265:01crwdnd2935265:01crwdnd2935265:02crwdne2935265:0 Hitachi HB-B102 Automatic Home Bakery  II Motor Replacement, Outer Casing: crwdns2935265:01crwdnd2935265:02crwdnd2935265:02crwdne2935265:0
    • Make sure to unplug the device before starting.

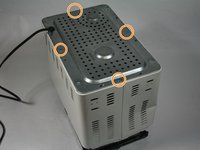
    • Remove the lid by opening it to a 45 degree angle and pulling out.

  2. Hitachi HB-B102 Automatic Home Bakery  II Motor Replacement: crwdns2935265:02crwdnd2935265:01crwdnd2935265:03crwdne2935265:0 Hitachi HB-B102 Automatic Home Bakery  II Motor Replacement: crwdns2935265:02crwdnd2935265:02crwdnd2935265:03crwdne2935265:0 Hitachi HB-B102 Automatic Home Bakery  II Motor Replacement: crwdns2935265:02crwdnd2935265:03crwdnd2935265:03crwdne2935265:0
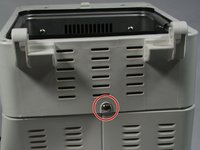
    • Next, remove the two 1.3cm screws that hold on the control panel with a #2 Phillips head screwdriver. These screws, and the rest of the screws in this guide can all be removed using a #2 Phillips head screwdriver.

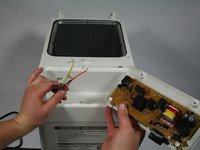
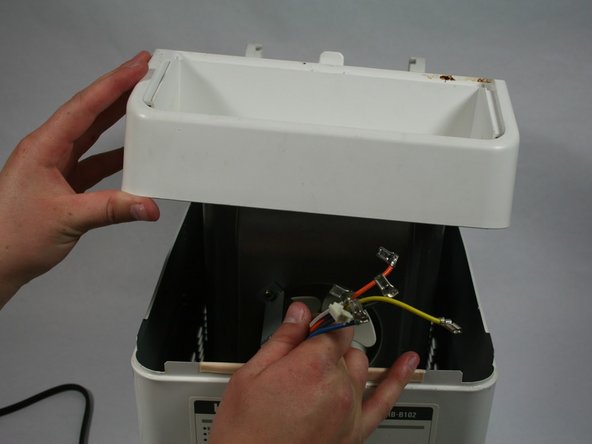
    • Then pull the control panel out of the device by using a metal spudger to pry it up. Flip it over and look at the back of the motherboard.

  3. Hitachi HB-B102 Automatic Home Bakery  II Motor Replacement: crwdns2935265:03crwdnd2935265:01crwdnd2935265:03crwdne2935265:0 Hitachi HB-B102 Automatic Home Bakery  II Motor Replacement: crwdns2935265:03crwdnd2935265:02crwdnd2935265:03crwdne2935265:0 Hitachi HB-B102 Automatic Home Bakery  II Motor Replacement: crwdns2935265:03crwdnd2935265:03crwdnd2935265:03crwdne2935265:0
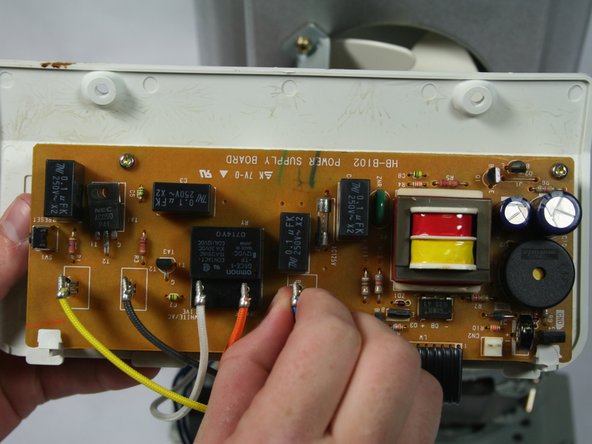
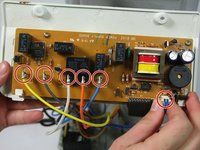
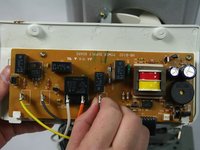
    • You will then have to disconnect the six wires that connect the motherboard to the device. This can be done by firmly grasping a connector and pulling straight out from the unit. Once all of the wires have been disconnected, set aside the control unit.

  4. Hitachi HB-B102 Automatic Home Bakery  II Motor Replacement: crwdns2935265:04crwdnd2935265:01crwdnd2935265:03crwdne2935265:0 Hitachi HB-B102 Automatic Home Bakery  II Motor Replacement: crwdns2935265:04crwdnd2935265:02crwdnd2935265:03crwdne2935265:0 Hitachi HB-B102 Automatic Home Bakery  II Motor Replacement: crwdns2935265:04crwdnd2935265:03crwdnd2935265:03crwdne2935265:0
    • Remove the five 1cm screws that hold the the casing together. There will be two on each side, and one on the back.

  5. Hitachi HB-B102 Automatic Home Bakery  II Motor Replacement: crwdns2935265:05crwdnd2935265:01crwdnd2935265:01crwdne2935265:0
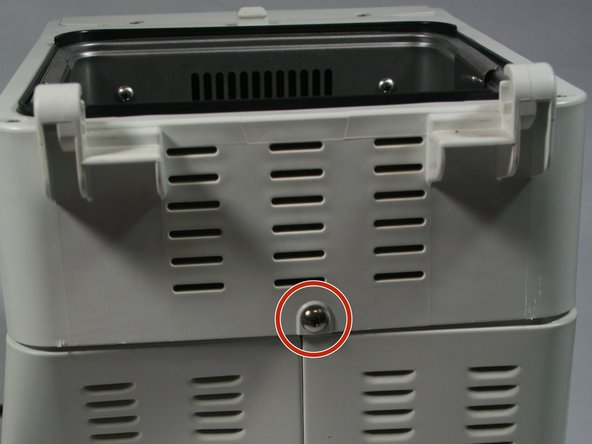
    • Unscrew the four 1.4 cm screws surrounding the slot for the bread pan.

  6. Hitachi HB-B102 Automatic Home Bakery  II Motor Replacement: crwdns2935265:06crwdnd2935265:01crwdnd2935265:02crwdne2935265:0 Hitachi HB-B102 Automatic Home Bakery  II Motor Replacement: crwdns2935265:06crwdnd2935265:02crwdnd2935265:02crwdne2935265:0
    • Now you can remove the top part of the assembly off by pulling straight up. Don't forget to gently pull your wires through.

  7. Hitachi HB-B102 Automatic Home Bakery  II Motor Replacement: crwdns2935265:07crwdnd2935265:01crwdnd2935265:03crwdne2935265:0 Hitachi HB-B102 Automatic Home Bakery  II Motor Replacement: crwdns2935265:07crwdnd2935265:02crwdnd2935265:03crwdne2935265:0 Hitachi HB-B102 Automatic Home Bakery  II Motor Replacement: crwdns2935265:07crwdnd2935265:03crwdnd2935265:03crwdne2935265:0
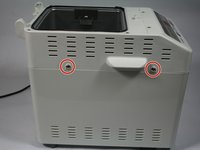
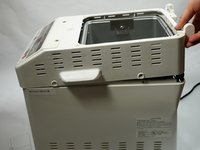
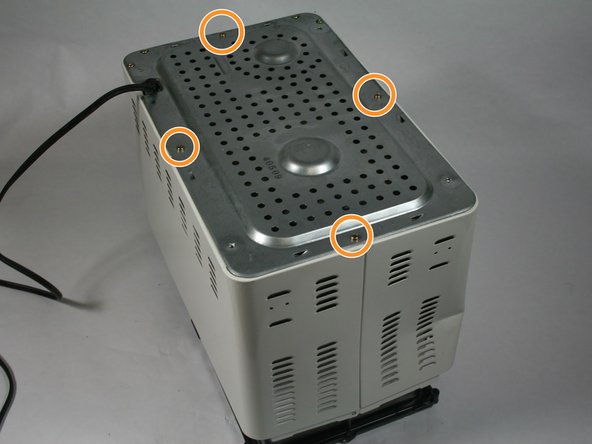
    • Flip the machine over so that the bottom is facing straight up. Then unscrew the four feet on the device with a #2 Phillips head screwdriver. The screws will stay in the rubber feet.

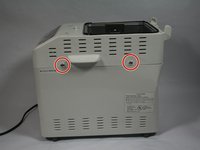
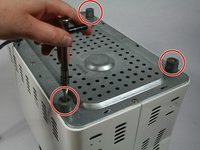
    • Next, remove the four 8mm screws on the four sides of the machine. You do not need to unscrew the screws on the front end corners.

    • Once the feet and screws are undone gently pull the metal plate off.

  8. Hitachi HB-B102 Automatic Home Bakery  II Motor Replacement: crwdns2935265:08crwdnd2935265:01crwdnd2935265:01crwdne2935265:0
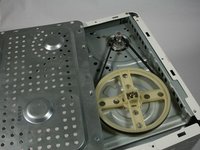
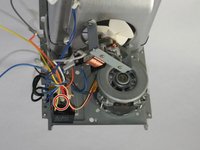
    • Now that the bottom plate and top housing are off, you can gently pull the inner components out of the outer metal housing . This can be done by grabbing hold of the bread pan casing and slowly lifting the entire inner assembly straight up.

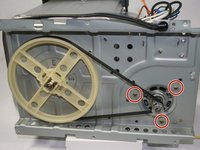
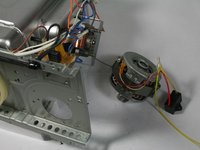
    • You now have access to the belt and motor.

  9. Hitachi HB-B102 Automatic Home Bakery  II Motor Replacement, Motor: crwdns2935265:09crwdnd2935265:01crwdnd2935265:03crwdne2935265:0 Hitachi HB-B102 Automatic Home Bakery  II Motor Replacement, Motor: crwdns2935265:09crwdnd2935265:02crwdnd2935265:03crwdne2935265:0 Hitachi HB-B102 Automatic Home Bakery  II Motor Replacement, Motor: crwdns2935265:09crwdnd2935265:03crwdnd2935265:03crwdne2935265:0
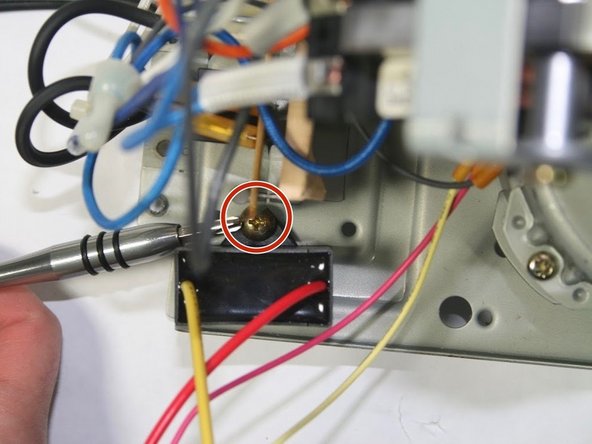
    • Locate the capacitor (aka the black box) to the left of the motor). Unscrew the 1cm screw holding the capacitor in place. The screw will stay with the capacitor.

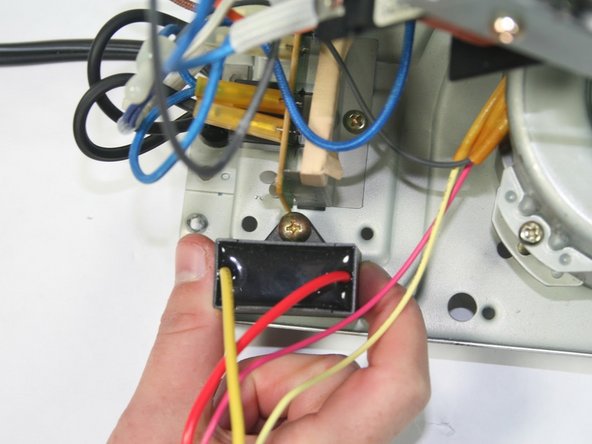
    • Lift the capacitor and place to the side.

  10. Hitachi HB-B102 Automatic Home Bakery  II Motor Replacement: crwdns2935265:010crwdnd2935265:01crwdnd2935265:03crwdne2935265:0 Hitachi HB-B102 Automatic Home Bakery  II Motor Replacement: crwdns2935265:010crwdnd2935265:02crwdnd2935265:03crwdne2935265:0 Hitachi HB-B102 Automatic Home Bakery  II Motor Replacement: crwdns2935265:010crwdnd2935265:03crwdnd2935265:03crwdne2935265:0
    • Flip the bread maker on its side so you can access the bottom. The belt will need to be removed. For help on that please see: Hitachi HB-B102 Automatic Home Bakery II Belt Replacement

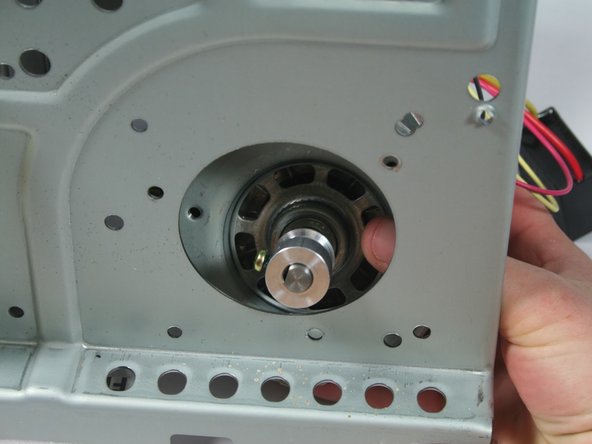
    • Unscrew the three 6mm screws holding the motor to the metal plate.

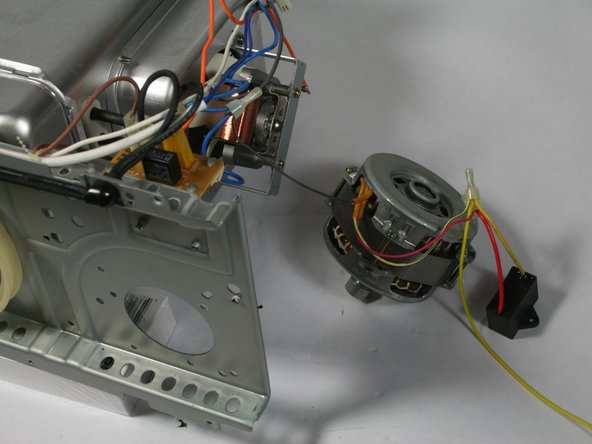
    • Gently pull the motor away from the metal plate.

  11. Hitachi HB-B102 Automatic Home Bakery  II Motor Replacement: crwdns2935265:011crwdnd2935265:01crwdnd2935265:03crwdne2935265:0 Hitachi HB-B102 Automatic Home Bakery  II Motor Replacement: crwdns2935265:011crwdnd2935265:02crwdnd2935265:03crwdne2935265:0 Hitachi HB-B102 Automatic Home Bakery  II Motor Replacement: crwdns2935265:011crwdnd2935265:03crwdnd2935265:03crwdne2935265:0
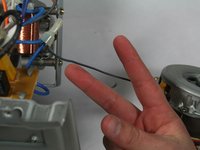
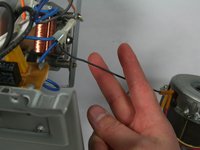
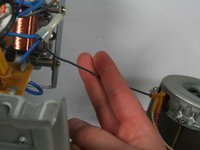
    • Now that you have the motor out, locate the black cable coming out of the motor and linking it to two blue cables.

    • You'll need to cut this wire with scissors or wire cutters.

    • Next, you'll need to wire in your new motor. To do this follow this handy guide: Wire Stripping and Crimping 101

crwdns2915888:0crwdne2915888:0

To reassemble your device, follow these instructions in reverse order.

Ally Swian

crwdns2935283:001/25/17crwdne2935283:0

125 crwdns2915208:0crwdne2915208:0

crwdns2935295:0crwdne2935295:0

crwdns2915084:0crwdne2915084:0

Cal Poly, Team 9-2, Banghart Winter 2017 crwdns2935289:0Cal Poly, Team 9-2, Banghart Winter 2017crwdne2935289:0

CPSU-BANGHART-W17S9G2

crwdns2931471:03crwdne2931471:0

crwdns2935297:07crwdne2935297:0

crwdns2917034:0crwdne2917034:0

The motor is freely turned, though the motor pulley never moves. Could the 8 micro farad motor capacitor bu bad…how do I test it?

Fred Seitz - crwdns2934203:0crwdne2934203:0

crwdns2917038:0crwdne2917038:0

crwdns2936625:0crwdne2936625:0:

crwdns2936751:024crwdne2936751:0 0

crwdns2936753:07crwdne2936753:0 2

crwdns2936753:030crwdne2936753:0 31

crwdns2942667:0crwdne2942667:0 963