crwdns2933423:0crwdne2933423:0
crwdns2947577:0crwdnd2947577:0crwdne2947577:0

Asus K52JC Laptop Hard Drive Replacement

crwdns2942213:0crwdne2942213:0

    1. Asus K52JC Laptop Hard Drive Replacement, Power off and return the device: crwdns2935265:01crwdnd2935265:01crwdnd2935265:01crwdne2935265:0
      • First, turn off your laptop, then disconnect the power supply. Unplug any peripheral devices connected to your laptop.

      • Next, remove the battery from the laptop.

      • In the picture, the battery is not installed.

      crwdns2952109:0crwdne2952109:0

      crwdns2917038:0crwdne2917038:0

    2. Asus K52JC Laptop Hard Drive Replacement, Remove the screws and open the cover: crwdns2935265:02crwdnd2935265:01crwdnd2935265:02crwdne2935265:0 Asus K52JC Laptop Hard Drive Replacement, Remove the screws and open the cover: crwdns2935265:02crwdnd2935265:02crwdnd2935265:02crwdne2935265:0
      • Next, remove the 4 Phillips screws from the service door cover (circled in red).

      • In this photo, the screws have already been removed.

      crwdns2952109:0crwdne2952109:0

      crwdns2917038:0crwdne2917038:0

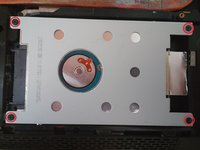
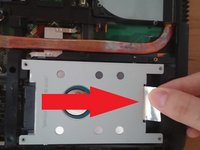
    3. Asus K52JC Laptop Hard Drive Replacement, Remove the hard drive from it's location: crwdns2935265:03crwdnd2935265:01crwdnd2935265:02crwdne2935265:0 Asus K52JC Laptop Hard Drive Replacement, Remove the hard drive from it's location: crwdns2935265:03crwdnd2935265:02crwdnd2935265:02crwdne2935265:0
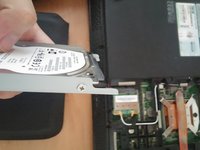
      • Remove the 4 screws circled in red in the photo.

      • Once the screws are removed, slide the hard drive to the right, with the help of the tab.

      crwdns2952109:0crwdne2952109:0

      crwdns2917038:0crwdne2917038:0

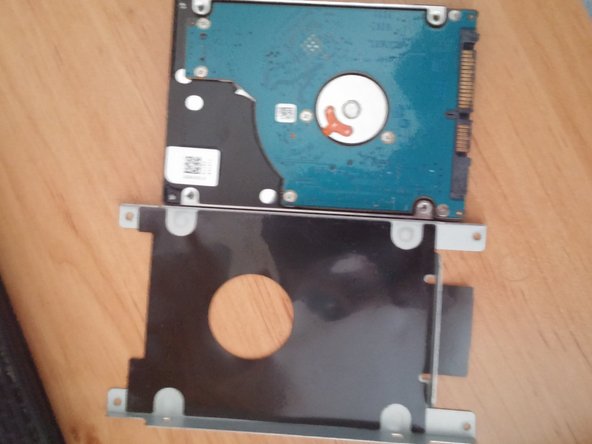
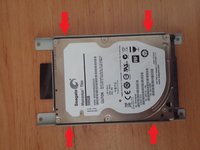
    4. Asus K52JC Laptop Hard Drive Replacement, Remove the hard drive from its metal support bracket: crwdns2935265:04crwdnd2935265:01crwdnd2935265:03crwdne2935265:0 Asus K52JC Laptop Hard Drive Replacement, Remove the hard drive from its metal support bracket: crwdns2935265:04crwdnd2935265:02crwdnd2935265:03crwdne2935265:0 Asus K52JC Laptop Hard Drive Replacement, Remove the hard drive from its metal support bracket: crwdns2935265:04crwdnd2935265:03crwdnd2935265:03crwdne2935265:0
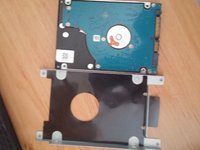
      • Remove the 4 screws located on the side of the support.

      • Then, remove the hard drive form its metallic support.

      • Finally, replace de hard drive with a new one or an SSD.

      crwdns2952109:0crwdne2952109:0

      crwdns2917038:0crwdne2917038:0

crwdns2915888:0crwdne2915888:0

To reassemble your device, follow these steps in reverse order.

crwdns2935221:0crwdne2935221:0

crwdns2935229:02crwdne2935229:0

crwdns2934873:0crwdne2934873:0

fr en

100%

crwdns2934885:0crwdne2934885:0 crwdns2934875:0crwdne2934875:0
crwdns2958738:0crwdne2958738:0 ›

Brendan

crwdns2935283:009/24/16crwdne2935283:0

54,886 crwdns2915208:0crwdne2915208:0

crwdns2935297:03crwdne2935297:0

crwdns2947412:03crwdne2947412:0

You can do this to replace a faulty hard-drive or replace it by a SSD to get better performance. So I did this to replace mine by a new one and I wrote this guide for other people who search how to do it. As you can see, very easy to do.

Brendan - crwdns2934203:0crwdne2934203:0 crwdns2950251:0crwdne2950251:0

crwdns2917038:0crwdne2917038:0

crwdns2936625:0crwdne2936625:0:

crwdns2936751:024crwdne2936751:0 6

crwdns2936753:07crwdne2936753:0 33

crwdns2936753:030crwdne2936753:0 94

crwdns2942667:0crwdne2942667:0 2,521