crwdns2915892:0crwdne2915892:0
Warning!
According to the specific model, the hard drive can be located in two different places or there can be two hard drives in the same two places as mentioned in the guide.
crwdns2942213:0crwdne2942213:0
-
-
-
Close the display and lay it on a flat surface, top-side down.
 crwdns2952109:0crwdne2952109:0
-
-
-
Unlock the battery by sliding the battery lock to the unlock part.
-
-
-
Slide the middle lock to the right and the battery will pop up.
-
-
-
-
Once the battery hatch is unlocked you can now safely remove the battery.
-
-
-
-
-
Use a Philips J1 driver to remove two screws securing the hard drive cover.
-
-
-
Now you can remove, replace or upgrade the hard drive to an SSD if you need to.
-
-
-
Use a Philips J1 driver to remove eight screws securing the bottom case.
-
-
-
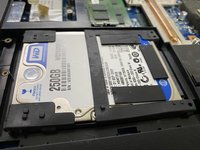
After removing the bottom panel cover, then you should spot the hard drive right here.
-
-
-
Now you can simply upgrade, replace or remove the hard drive right here. To remove it, push it from the two corners and it should come off like in the next picture.
-
-


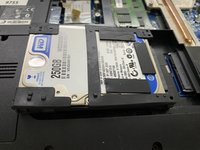
To reassemble your device, follow these instructions in reverse order.
crwdns2935221:0crwdne2935221:0
crwdns2935227:0crwdne2935227:0
