crwdns2933423:0crwdne2933423:0

Hamilton Beach 25460Z Plug Wiring Replacement

crwdns2942213:0crwdne2942213:0

  1. Hamilton Beach 25460Z Plug Wiring Replacement, Plug Wiring: crwdns2935265:01crwdnd2935265:01crwdnd2935265:02crwdne2935265:0 Hamilton Beach 25460Z Plug Wiring Replacement, Plug Wiring: crwdns2935265:01crwdnd2935265:02crwdnd2935265:02crwdne2935265:0
    • Unplug your device before proceeding with disassembly.

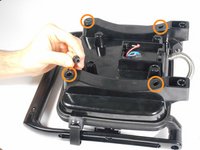
    • Remove the four 14mm screws from the bottom of the Panini Press using the T10 Screwdriver.

  2. Hamilton Beach 25460Z Plug Wiring Replacement: crwdns2935265:02crwdnd2935265:01crwdnd2935265:01crwdne2935265:0
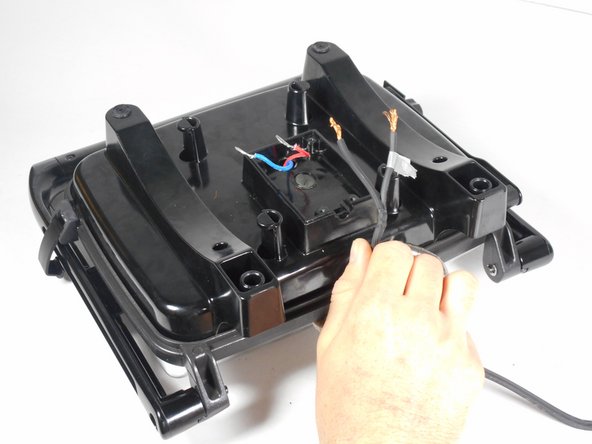
    • Lift up the plastic cover to expose the plug wiring.

    • Mark the plug wire connected to the red wire with a piece of tape. This will be used as a reference for reassembly.

  3. Hamilton Beach 25460Z Plug Wiring Replacement: crwdns2935265:03crwdnd2935265:01crwdnd2935265:03crwdne2935265:0 Hamilton Beach 25460Z Plug Wiring Replacement: crwdns2935265:03crwdnd2935265:02crwdnd2935265:03crwdne2935265:0 Hamilton Beach 25460Z Plug Wiring Replacement: crwdns2935265:03crwdnd2935265:03crwdnd2935265:03crwdne2935265:0
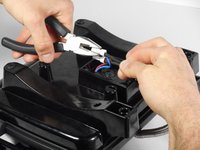
    • Use the pliers to pinch the widest point of the cap. This should be done opposite of the already existing crimps.

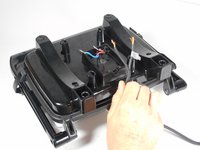
    • Slide off the white cap.

    • Repeat these steps for the second white cap.

  4. Hamilton Beach 25460Z Plug Wiring Replacement: crwdns2935265:04crwdnd2935265:01crwdnd2935265:02crwdne2935265:0 Hamilton Beach 25460Z Plug Wiring Replacement: crwdns2935265:04crwdnd2935265:02crwdnd2935265:02crwdne2935265:0
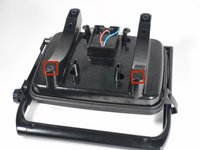
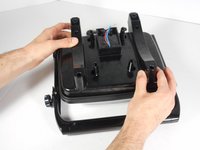
    • Remove the two rubber screw covers from the bottom of the Panini Press.

    • Remove the four uncovered 10mm screws with the PH2 Screwdriver.

  5. Hamilton Beach 25460Z Plug Wiring Replacement: crwdns2935265:05crwdnd2935265:01crwdnd2935265:02crwdne2935265:0 Hamilton Beach 25460Z Plug Wiring Replacement: crwdns2935265:05crwdnd2935265:02crwdnd2935265:02crwdne2935265:0
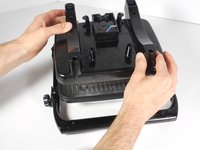
    • Lift the plastic lower heating element up and place to the side for reassembly. You have now disconnected the plug wiring completely.

crwdns2915888:0crwdne2915888:0

To reassemble your device, follow these instructions in reverse order. Make sure to correctly replace the wires using tape you placed earlier as a reference.

crwdns2935229:02crwdne2935229:0

Maxwell Taylor

crwdns2935283:002/08/15crwdne2935283:0

149 crwdns2915208:0crwdne2915208:0

crwdns2935295:0crwdne2935295:0

crwdns2915084:0crwdne2915084:0

Cal Poly, Team 6-27, Amido Winter 2015 crwdns2935289:0Cal Poly, Team 6-27, Amido Winter 2015crwdne2935289:0

CPSU-AMIDO-W15S6G27

crwdns2931471:04crwdne2931471:0

crwdns2935297:06crwdne2935297:0

crwdns2944067:00crwdne2944067:0

crwdns2917038:0crwdne2917038:0

crwdns2936625:0crwdne2936625:0:

crwdns2936751:024crwdne2936751:0 0

crwdns2936753:07crwdne2936753:0 5

crwdns2936753:030crwdne2936753:0 9

crwdns2942667:0crwdne2942667:0 665