crwdns2933423:0crwdne2933423:0
crwdns2947577:0crwdnd2947577:0crwdne2947577:0

HTC One X Battery Replacement

crwdns2942213:0crwdne2942213:0

crwdns2936621:0crwdne2936621:0

    1. HTC One X Battery Replacement, Battery: crwdns2935265:01crwdnd2935265:01crwdnd2935265:03crwdne2935265:0 HTC One X Battery Replacement, Battery: crwdns2935265:01crwdnd2935265:02crwdnd2935265:03crwdne2935265:0 HTC One X Battery Replacement, Battery: crwdns2935265:01crwdnd2935265:03crwdnd2935265:03crwdne2935265:0
      • Switch the phone off.

      • Remove the SIM tray.

      • The back cover is stuck to the phone with adhesive tape.

      • It's helpful to use heat to loosen the adhesive, making removal much easier.

      crwdns2952109:0crwdne2952109:0

      crwdns2917038:0crwdne2917038:0

    2. HTC One X Battery Replacement: crwdns2935265:02crwdnd2935265:01crwdnd2935265:03crwdne2935265:0 HTC One X Battery Replacement: crwdns2935265:02crwdnd2935265:02crwdnd2935265:03crwdne2935265:0 HTC One X Battery Replacement: crwdns2935265:02crwdnd2935265:03crwdnd2935265:03crwdne2935265:0
      • Start opening from the bottom side.

      • For separating the back cover, use only plastic tools.

      crwdns2952109:0crwdne2952109:0

      crwdns2917038:0crwdne2917038:0

    3. HTC One X Battery Replacement: crwdns2935265:03crwdnd2935265:01crwdnd2935265:02crwdne2935265:0 HTC One X Battery Replacement: crwdns2935265:03crwdnd2935265:02crwdnd2935265:02crwdne2935265:0
      • Remove the display assembly from the body of the phone.

      crwdns2952109:0crwdne2952109:0

      crwdns2917038:0crwdne2917038:0

    4. HTC One X Battery Replacement: crwdns2935265:04crwdnd2935265:01crwdnd2935265:02crwdne2935265:0 HTC One X Battery Replacement: crwdns2935265:04crwdnd2935265:02crwdnd2935265:02crwdne2935265:0
      • Remove the seven Philips #0 screws at the top of the panel:

      • Two 2.05 mm screws

      • Three 2.44 mm screws

      • Two 3.35 mm screws

      • Once the screws are removed, gently remove the plastic cover using a plastic opening tool to detach the edges from the front panel.

      crwdns2952109:0crwdne2952109:0

      crwdns2917038:0crwdne2917038:0

    5. HTC One X Battery Replacement: crwdns2935265:05crwdnd2935265:01crwdnd2935265:03crwdne2935265:0 HTC One X Battery Replacement: crwdns2935265:05crwdnd2935265:02crwdnd2935265:03crwdne2935265:0 HTC One X Battery Replacement: crwdns2935265:05crwdnd2935265:03crwdnd2935265:03crwdne2935265:0
      • Disconnect one by one:

      • the Touchscreen flex cable

      • the Volume buttons & Mic flex cable

      • the Dock connector flex cable

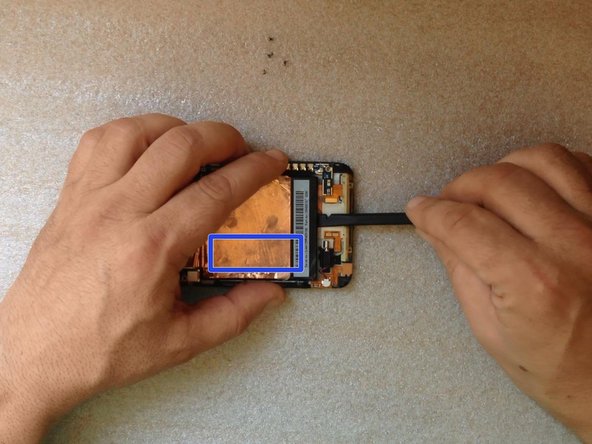
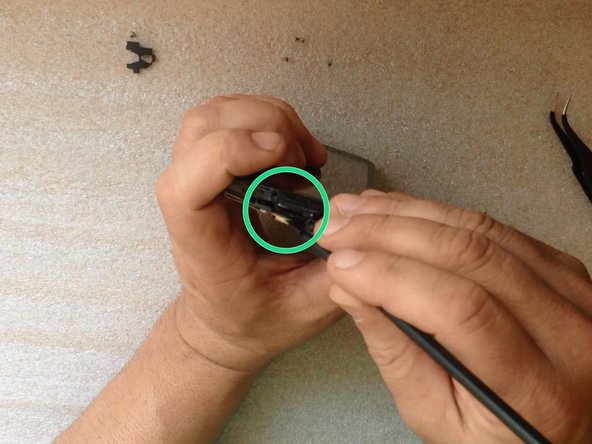
      • Carefully insert a plastic tool under the battery to pry it up from the adhesive. Avoid bending the battery.

      • Be careful, there are flex cables under the battery. At the last picture in this step you can see the cables and the place were is adhesive tape.

      • Now you can separate the Dock flex cable.

      crwdns2952109:0crwdne2952109:0

      crwdns2917038:0crwdne2917038:0

    6. HTC One X Battery Replacement: crwdns2935265:06crwdnd2935265:01crwdnd2935265:02crwdne2935265:0 HTC One X Battery Replacement: crwdns2935265:06crwdnd2935265:02crwdnd2935265:02crwdne2935265:0
      • A piece of copper tape covers the battery and an EMI shield on the motherboard.

      • Carefully pry the EMI shield up at the top of the phone and toward the battery.

      • Carefully peel the copper tape off of the battery and save it to transfer to the new battery.

      crwdns2952109:0crwdne2952109:0

      crwdns2917038:0crwdne2917038:0

    7. HTC One X Battery Replacement: crwdns2935265:07crwdnd2935265:01crwdnd2935265:03crwdne2935265:0 HTC One X Battery Replacement: crwdns2935265:07crwdnd2935265:02crwdnd2935265:03crwdne2935265:0 HTC One X Battery Replacement: crwdns2935265:07crwdnd2935265:03crwdnd2935265:03crwdne2935265:0
      • Lift the motherboard slightly to disconnect two flex cables:

      • the LCD Display flex cable

      • the Navigation buttons flex cable

      • Disconnect the Power On button flex cable at the upper side of the phone

      • Now the mainboard and the battery are free.

      • Disconnect the battery and you are ready to install the new one.

      crwdns2952109:0crwdne2952109:0

      crwdns2917038:0crwdne2917038:0

    8. HTC One X Battery Replacement: crwdns2935265:08crwdnd2935265:01crwdnd2935265:02crwdne2935265:0 HTC One X Battery Replacement: crwdns2935265:08crwdnd2935265:02crwdnd2935265:02crwdne2935265:0
      crwdns2952109:0crwdne2952109:0

      crwdns2917038:0crwdne2917038:0

crwdns2915888:0crwdne2915888:0

To reassemble your device, follow these instructions in reverse order.

crwdns2935221:0crwdne2935221:0

crwdns2935229:013crwdne2935229:0

ZFix

crwdns2935283:012/09/13crwdne2935283:0

197,675 crwdns2915208:0crwdne2915208:0

crwdns2935297:0330crwdne2935297:0

crwdns2935287:0crwdne2935287:0

Master Techs crwdns2935289:0Master Techscrwdne2935289:0

Community

crwdns2931471:0335crwdne2931471:0

crwdns2935297:08,260crwdne2935297:0

crwdns2947412:02crwdne2947412:0

Perfecto! Me vino genial el tutorial y es perfecto, mejor que otros.

hepugh - crwdns2934203:0crwdne2934203:0 crwdns2950251:0crwdne2950251:0

Went very well. I had a dead HTC One X that I replaced 4 years ago. I came across it a few weeks ago and thought to give a new battery a try, to see if I can get the photos off it. It did not charge (no lights) and did not turn on anymore. I ordered a battery from AliExpress and it came in today. Followed this guide, and yes, it turned on again! And charging is also working properly now. So I am happy, now I can get my photos and use the phone as a Android 4.2 testing target for the apps I develop. Wonderful.

Peterdk - crwdns2934203:0crwdne2934203:0 crwdns2950251:0crwdne2950251:0
crwdns2917038:0crwdne2917038:0

crwdns2936625:0crwdne2936625:0:

crwdns2936751:024crwdne2936751:0 4

crwdns2936753:07crwdne2936753:0 22

crwdns2936753:030crwdne2936753:0 108

crwdns2942667:0crwdne2942667:0 47,894