crwdns2933423:0crwdne2933423:0
crwdns2947577:0crwdnd2947577:0crwdne2947577:0

HTC HD2 Camera Replacement

crwdns2869540:0crwdne2869540:0: 8.7천

crwdns2959988:0crwdne2959988:0

crwdns2959990:0crwdne2959990:0
1
crwdns2959992:0crwdne2959992:0
19
crwdns2959994:0crwdne2959994:0
83
crwdns2959996:0crwdne2959996:0
8,674
crwdns2955950:0crwdne2955950:0: 0

crwdns2959998:0crwdne2959998:0

crwdns2960000:0crwdne2960000:0
crwdns2959984:0crwdne2959984:0: 2

crwdns2959974:02crwdne2959974:0

crwdns2959986:0crwdne2959986:0: 9

crwdns2959982:09crwdne2959982:0

crwdns2955944:0crwdne2955944:0: crwdns2931273:0crwdne2931273:0
crwdns2955970:0crwdne2955970:0: crwdns2937801:0crwdne2937801:0
crwdns2869444:0crwdne2869444:0

crwdns2869445:0crwdne2869445:0

HTC HD2 Camera Replacement

crwdns2915892:0crwdne2915892:0

crwdns2959928:0crwdne2959928:0 ↓

This guide is one of the longer processes, second only to the Logic Board, or the screen. Have a reasonably long time set aside to complete this guide.

crwdns2959930:0crwdne2959930:0

crwdns2943215:0crwdne2943215:0

    1. HTC HD2 Camera Replacement, Battery: crwdns2935265:01crwdnd2935265:01crwdnd2935265:01crwdne2935265:0
      • Carefully pull the rear cover from the back of the phone.

      • Place a finger beneath the small lip on the left side of the battery.

      crwdns2952109:0crwdne2952109:0

      crwdns2917038:0crwdne2917038:0

    2. HTC HD2 Camera Replacement: crwdns2935265:02crwdnd2935265:01crwdnd2935265:02crwdne2935265:0 HTC HD2 Camera Replacement: crwdns2935265:02crwdnd2935265:02crwdnd2935265:02crwdne2935265:0
      • Lay the phone down on it's screen.

      • Lift up on the lip and pull the battery from the phone.

      crwdns2952109:0crwdne2952109:0

      crwdns2917038:0crwdne2917038:0

    1. HTC HD2 Camera Replacement, Midframe: crwdns2935265:03crwdnd2935265:01crwdnd2935265:02crwdne2935265:0 HTC HD2 Camera Replacement, Midframe: crwdns2935265:03crwdnd2935265:02crwdnd2935265:02crwdne2935265:0
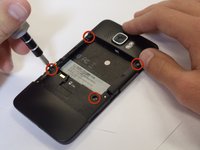
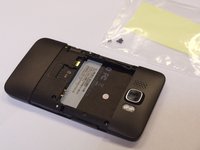
      • Remove the four black 3.5mm T5 screws from the back of the phone.

      crwdns2952109:0crwdne2952109:0

      crwdns2917038:0crwdne2917038:0

    2. HTC HD2 Camera Replacement: crwdns2935265:04crwdnd2935265:01crwdnd2935265:02crwdne2935265:0 HTC HD2 Camera Replacement: crwdns2935265:04crwdnd2935265:02crwdnd2935265:02crwdne2935265:0
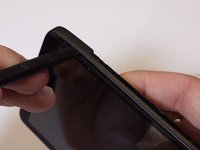
      • Insert the flat end of a spudger between the midframe and the display.

      • Slide the spudger along the seam between the frame and the display.

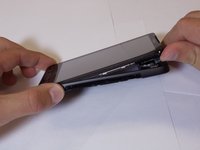
      • Using the spudger for leverage, carefully pry the midframe away from the display assembly.

      • This process will take some effort. Continue to pry slowly and carefully until the frame begins to detach.

      • As it releases, pull the midframe away from the phone.

      • The volume control tab may fall off during removal. It can be easily reattached.

      crwdns2952109:0crwdne2952109:0

      crwdns2917038:0crwdne2917038:0

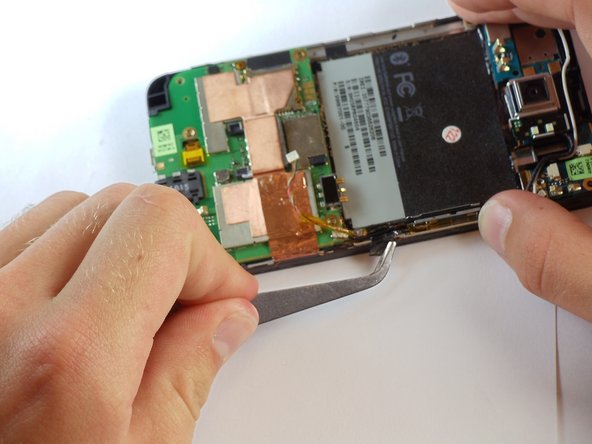
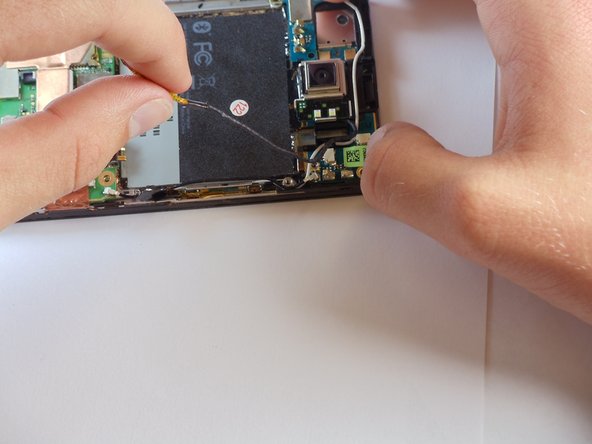
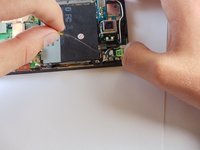
    1. HTC HD2 Camera Replacement, Camera: crwdns2935265:05crwdnd2935265:01crwdnd2935265:03crwdne2935265:0 HTC HD2 Camera Replacement, Camera: crwdns2935265:05crwdnd2935265:02crwdnd2935265:03crwdne2935265:0 HTC HD2 Camera Replacement, Camera: crwdns2935265:05crwdnd2935265:03crwdnd2935265:03crwdne2935265:0
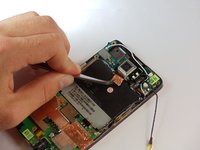
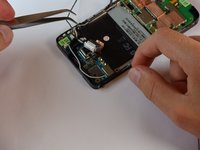
      • Disconnect the flash cable from its socket in the bottom of the motherboard.

      • Carefully pull the cable from its groove in the frame, working your way back to the camera.

      crwdns2952109:0crwdne2952109:0

      crwdns2917038:0crwdne2917038:0

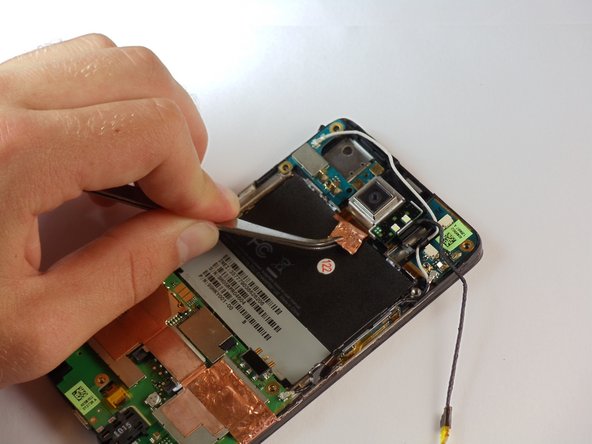
    2. HTC HD2 Camera Replacement: crwdns2935265:06crwdnd2935265:01crwdnd2935265:03crwdne2935265:0 HTC HD2 Camera Replacement: crwdns2935265:06crwdnd2935265:02crwdnd2935265:03crwdne2935265:0 HTC HD2 Camera Replacement: crwdns2935265:06crwdnd2935265:03crwdnd2935265:03crwdne2935265:0
      • Pull the camera flash and cover off of the board.

      • You may need to peel back the sticker that sits behind the battery.

      • Work carefully. Excessive force can damage the camera or motherboard.

      crwdns2952109:0crwdne2952109:0

      crwdns2917038:0crwdne2917038:0

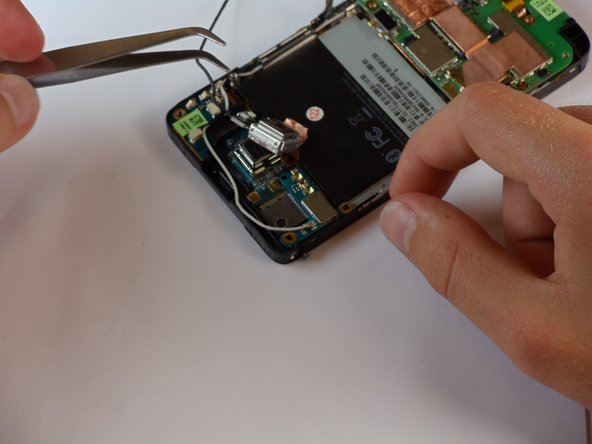
    3. HTC HD2 Camera Replacement: crwdns2935265:07crwdnd2935265:01crwdnd2935265:01crwdne2935265:0
      crwdns2935267:0crwdne2935267:0
      Tweezers
      $4.99
      • Around the camera is a thin shielding. Remove it with tweezers.

      • Using tweezers, remove the primary camera.

      crwdns2952109:0crwdne2952109:0

      crwdns2917038:0crwdne2917038:0

crwdns2915888:0crwdne2915888:0

To reassemble your device, follow these instructions in reverse order.

crwdns2935221:0crwdne2935221:0

crwdns2935229:02crwdne2935229:0

Sam Luedloff

crwdns2935283:004/12/11crwdne2935283:0

727 crwdns2915208:0crwdne2915208:0

crwdns2935297:03crwdne2935297:0

crwdns2935287:0crwdne2935287:0

Cal Poly, Team 24-55, Amido Spring 2011 crwdns2935289:0Cal Poly, Team 24-55, Amido Spring 2011crwdne2935289:0

CPSU-AMIDO-S11S24G55

crwdns2931471:05crwdne2931471:0

crwdns2935297:096crwdne2935297:0

crwdns2947412:00crwdne2947412:0

crwdns2917038:0crwdne2917038:0

crwdns2936625:0crwdne2936625:0:

crwdns2936751:024crwdne2936751:0 1

crwdns2936753:07crwdne2936753:0 19

crwdns2936753:030crwdne2936753:0 83

crwdns2959996:0crwdne2959996:0 8,674