crwdns2915892:0crwdne2915892:0
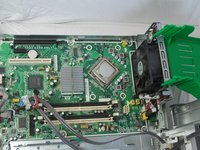
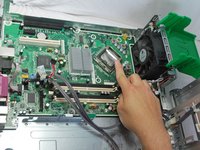
In order to gain access to the CPU, the heat-sink must be removed first. Once the heat-sink is disconnected from the motherboard, the CPU will be exposed with thermal paste on the top of the CPU and the bottom of the heat-sink.
Use this link when applying the thermal paste to the replacement part. How to Apply Thermal Paste
crwdns2942213:0crwdne2942213:0
-
-
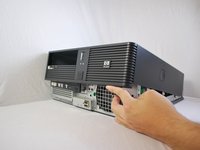
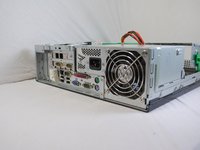
Make sure the computer is unplugged.
-
Make sure all auxiliary cords are disconnected from the desktop. If not, remove them using your hands.
-
Set the desktop down horizontally with the front side facing you.
-
-
-
Hold the desktop with two hands by grasping both sides of the desktop.
-
Press the buttons on both sides using your index fingers.
-
-
-
Slide the top cover about an inch forward using your thumb to push it towards you.
-
Make sure that the bottom is still secured by both hands.
-
Lay the desktop back on the table and pull the case forward as far as it can go.
-
Lift the cover up and off.
-
-
-
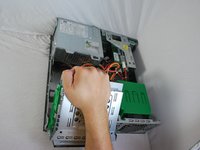
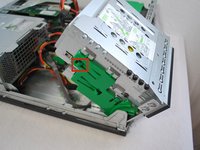
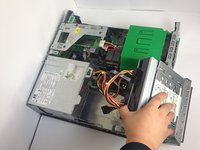
Using your hand, grip the Optical Drive and lift it up into a 45 degree angle.
-
-
-
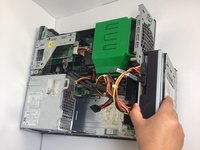
Disconnect the power supply cord and the SATA cord using your hands to pull them out.
-
-
-
Using your left index finger, lift the upper green tab found on the left side of the green piece.
-
Using your opposite hand, use your fingers to push the back of the drive forward and slide it out away from the desktop.
-
-
-
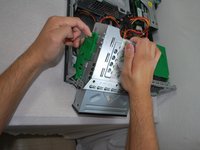
Grasp the optical drive with your right or left hand and pull the drive out towards you.
-
-
-
Using your right hand, grip the CD drive and lift it up to a 90 degree position.
-
-
-
-
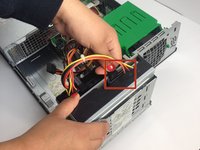
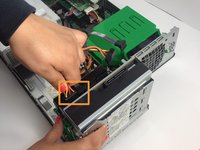
Use your hand, whichever you prefer, to grip the two cords on the CD drive and remove the two cords by pulling up.
-
Repeat the same process to remove the two cords connected to the Hard Drive.
-
-
-
Use your right index finger to pull forward the green flap on the side of the hard drive.
-
At the same time as you are lifting the green flap, use your left hand to lift the hard drive up and out.
-
-
-
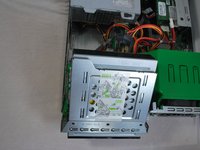
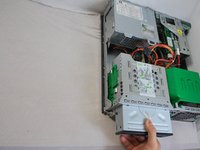
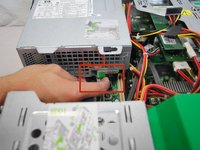
Using your right index finger, press the tab with the green sticker located underneath the power supply.
-
While pressing the tab, lift up the power supply the same way you lifted up the optical drive.
-
-
-
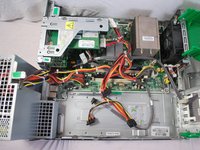
Remove the two cables on the motherboard by grasping the cables with your hand and pulling the cables up and out.
-
Repeat the same process to remove the internal card power cable.
-
This is the same process as preformed when you previously removed the power cables from the optical drive and the hard drive.
-
Some cables may have small clips securing them in place. If so, be sure to press these clips inward using your fingers before pulling them out.
-
-
-
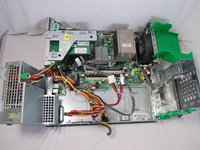
Continue to rotate the power supply to a 90 degree angle pointing upward.
-
Gripping the power supply with your hand, lift the power supply up to remove from the desktop.
-
-
-
Pull out the tab with the green sticker using your index finger.
-
-
-
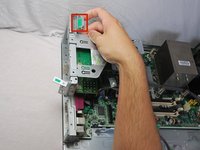
Using your index finger, pull up the green tab on the left side of the cards.
-
-
-
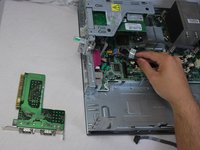
Use your right hand to remove the cable that is attached to the COMS card by grasping the cables and pulling it out.
-
-
-
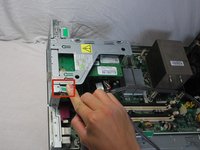
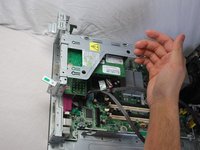
Hold the back frame of the case with your left hand, and grab the larger section of the COMs card, or the bottom card, with your right hand.
-
Wiggle the card a little and pull the COMs card straight out towards you.
-
-
-
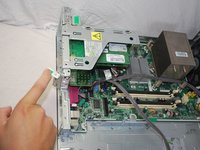
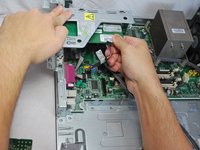
Grab the larger section of the phone line connection card, or the bottom card, with your right hand while your left hand holds the back frame of the case.
-
Wiggle the card a little and pull the phone line connection card straight out.
-
-
-
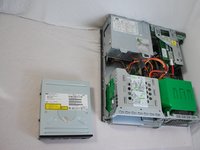
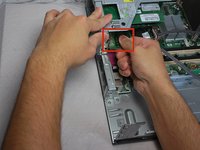
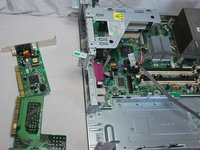
Using your hand, firmly grab the base card by the main green section while holding down the case with your opposite hand.
-
While holding the base card, wiggle it until it is released from the motherboard and pull straight out and set it aside.
-
-
-
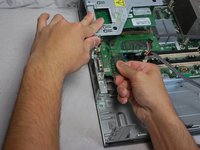
Using a Torx-Security T-15 screw driver, loosen the screws a little at a time evenly on each screw (process described below):
-
This process is done by slightly unscrewing a screw at one corner and moving to the screw at the diagonal corner next to unscrew slightly.
-
Then move to the opposite corners and repeat the process.
-
Continue until all of the screw are completely removed.
-
-
-
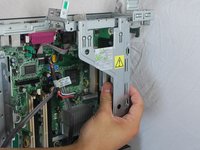
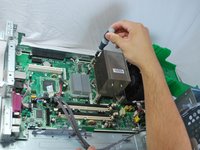
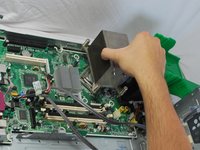
Once all the screws are loose, grip the heat sink using your hand and lift it up.
-
Gently place the heat sink next the desktop.
-
-
-
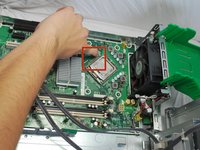
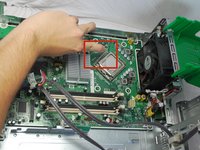
Using your finger, push the lever, located on the right side of the CPU, down and out.
-
-
-
Using your index finger, lift up the bracket surrounding the CPU.
-
-
-
Carefully and gently grab opposite sides of the CPU only touching on the outer green portions.
-
Lift the CPU up and off using your hands.
-


To reassemble your device, follow these instructions in reverse order. The only exception is to apply thermo paste on top of the CPU before putting the heat sink back on.
crwdns2935221:0crwdne2935221:0
crwdns2935229:04crwdne2935229:0
crwdns2935287:0crwdne2935287:0

Cal Poly, Team 6-23, Maness Winter 2014 crwdns2935289:0Cal Poly, Team 6-23, Maness Winter 2014crwdne2935289:0
CPSU-MANESS-W14S6G23
crwdns2931471:04crwdne2931471:0
crwdns2935297:010crwdne2935297:0