crwdns2933423:0crwdne2933423:0

HP m8226x Power Supply Replacement

crwdns2942213:0crwdne2942213:0

  1. HP m8226x Power Supply Replacement, HP m8226x Power Supply: crwdns2935265:01crwdnd2935265:01crwdnd2935265:03crwdne2935265:0 HP m8226x Power Supply Replacement, HP m8226x Power Supply: crwdns2935265:01crwdnd2935265:02crwdnd2935265:03crwdne2935265:0 HP m8226x Power Supply Replacement, HP m8226x Power Supply: crwdns2935265:01crwdnd2935265:03crwdnd2935265:03crwdne2935265:0
    • Turn off your computer and remove the power cord by pulling it straight out of its socket.

  2. HP m8226x Power Supply Replacement: crwdns2935265:02crwdnd2935265:01crwdnd2935265:03crwdne2935265:0 HP m8226x Power Supply Replacement: crwdns2935265:02crwdnd2935265:02crwdnd2935265:03crwdne2935265:0 HP m8226x Power Supply Replacement: crwdns2935265:02crwdnd2935265:03crwdnd2935265:03crwdne2935265:0
    • Remove the two screws holding the right (from the back) case door to the computer.

  3. HP m8226x Power Supply Replacement: crwdns2935265:03crwdnd2935265:01crwdnd2935265:03crwdne2935265:0 HP m8226x Power Supply Replacement: crwdns2935265:03crwdnd2935265:02crwdnd2935265:03crwdne2935265:0 HP m8226x Power Supply Replacement: crwdns2935265:03crwdnd2935265:03crwdnd2935265:03crwdne2935265:0
    • Remove the side case door by pulling the tab towards the back of the computer with your hand.

    • Pull the door outward to remove it.

  4. HP m8226x Power Supply Replacement: crwdns2935265:04crwdnd2935265:01crwdnd2935265:02crwdne2935265:0 HP m8226x Power Supply Replacement: crwdns2935265:04crwdnd2935265:02crwdnd2935265:02crwdne2935265:0
    • Remove the four screws holding in the power supply.

  5. HP m8226x Power Supply Replacement: crwdns2935265:05crwdnd2935265:01crwdnd2935265:01crwdne2935265:0
    • Lay the computer on its side to make it easier to remove the wiring.

  6. HP m8226x Power Supply Replacement: crwdns2935265:06crwdnd2935265:01crwdnd2935265:03crwdne2935265:0 HP m8226x Power Supply Replacement: crwdns2935265:06crwdnd2935265:02crwdnd2935265:03crwdne2935265:0 HP m8226x Power Supply Replacement: crwdns2935265:06crwdnd2935265:03crwdnd2935265:03crwdne2935265:0
    • Remove the computer processor's power cord by pinching the clip on the connector and pulling it straight out.

  7. HP m8226x Power Supply Replacement: crwdns2935265:07crwdnd2935265:01crwdnd2935265:03crwdne2935265:0 HP m8226x Power Supply Replacement: crwdns2935265:07crwdnd2935265:02crwdnd2935265:03crwdne2935265:0 HP m8226x Power Supply Replacement: crwdns2935265:07crwdnd2935265:03crwdnd2935265:03crwdne2935265:0
    • Remove the power cord from the optical disc drive by pulling it straight out.

  8. HP m8226x Power Supply Replacement: crwdns2935265:08crwdnd2935265:01crwdnd2935265:03crwdne2935265:0 HP m8226x Power Supply Replacement: crwdns2935265:08crwdnd2935265:02crwdnd2935265:03crwdne2935265:0 HP m8226x Power Supply Replacement: crwdns2935265:08crwdnd2935265:03crwdnd2935265:03crwdne2935265:0
    • If the hard drive doesn't have a SATA port connector then move to step 9.

    • Disconnect the SATA port connector from the hard drive by pulling it straight out.

  9. HP m8226x Power Supply Replacement: crwdns2935265:09crwdnd2935265:01crwdnd2935265:02crwdne2935265:0 HP m8226x Power Supply Replacement: crwdns2935265:09crwdnd2935265:02crwdnd2935265:02crwdne2935265:0
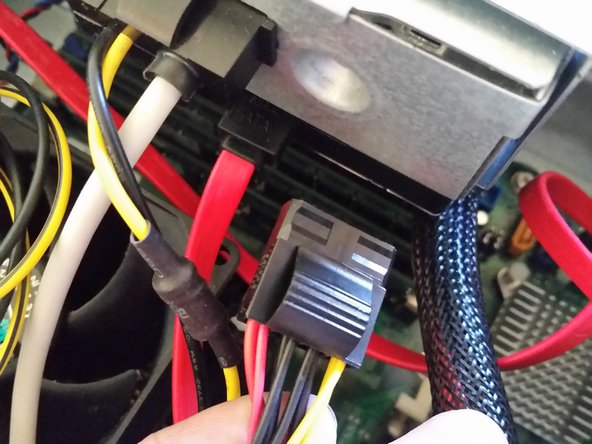
    • If the hard drive has a 4-pin Molex connector, pinch the two clips on the connector and pull it straight out to remove it.

  10. HP m8226x Power Supply Replacement: crwdns2935265:010crwdnd2935265:01crwdnd2935265:03crwdne2935265:0 HP m8226x Power Supply Replacement: crwdns2935265:010crwdnd2935265:02crwdnd2935265:03crwdne2935265:0 HP m8226x Power Supply Replacement: crwdns2935265:010crwdnd2935265:03crwdnd2935265:03crwdne2935265:0
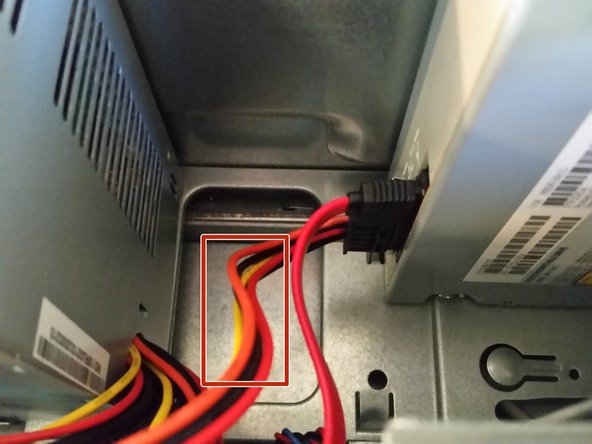
    • Remove the power to the motherboard by pinching the clip and pulling it straight out.

  11. HP m8226x Power Supply Replacement: crwdns2935265:011crwdnd2935265:01crwdnd2935265:02crwdne2935265:0 HP m8226x Power Supply Replacement: crwdns2935265:011crwdnd2935265:02crwdnd2935265:02crwdne2935265:0
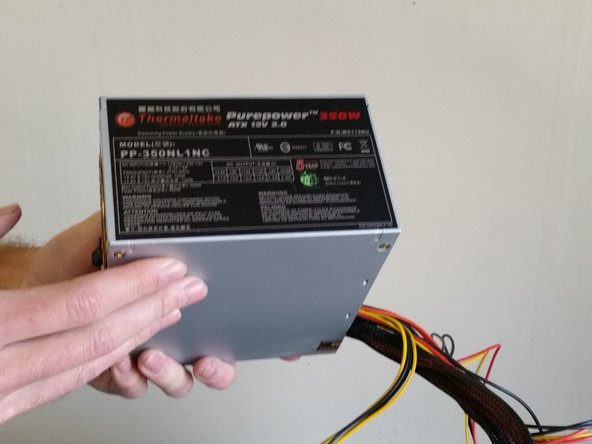
    • Remove the power supply by pushing it out from the back of the computer and lifting it out of the computer.

crwdns2915888:0crwdne2915888:0

To reassemble your device, follow these instructions in reverse order.

crwdns2935227:0crwdne2935227:0

Scott Fisher

crwdns2935283:003/30/16crwdne2935283:0

128 crwdns2915208:0crwdne2915208:0

crwdns2935295:0crwdne2935295:0

crwdns2915084:0crwdne2915084:0

Michigan Tech, Team 1-5, Lauer Spring 2016 crwdns2935289:0Michigan Tech, Team 1-5, Lauer Spring 2016crwdne2935289:0

MTU-LAUER-S16S1G5

crwdns2934841:01crwdne2934841:0

crwdns2935303:01crwdne2935303:0

crwdns2944067:00crwdne2944067:0

crwdns2917038:0crwdne2917038:0

crwdns2936625:0crwdne2936625:0:

crwdns2936751:024crwdne2936751:0 1

crwdns2936753:07crwdne2936753:0 6

crwdns2936753:030crwdne2936753:0 19

crwdns2942667:0crwdne2942667:0 804