crwdns2942213:0crwdne2942213:0
-
-
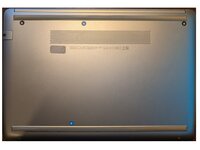
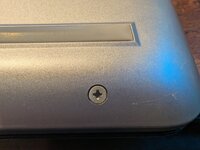
Remove screws on underside
-
There are two at the front
-
And four under the rubberised feet, which need peeling back before accessing the screws
-
-
-
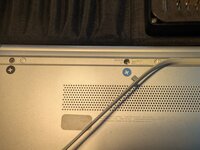
With the screws removed, we can now go about prying the bottom case apart from the top assembly
-
At the non hinge side of the laptop, carefully insert a prying tool in-between the two pieces and lift up
-
Continue to pry up the clips on this side until the entire front is unclipped
-
Then move to a side, I normally use the i/o side, but either will do. Continue slowly prying up the upper piece while trying not to damage the ports
-
When the bottom starts to lift away, move to the other side of the laptop. Again, pry the bottom case up until it becomes loose. Take extra care around the usb c port, as it is quite delicate.
-
Once this is complete, you should be able to lift the back case off
-
-
-
-
You should find the battery in the bottom right corner of the chassis
-
It can be removed by loosening the four screws and simply lifting out
-
-
-
To reassemble the laptop, screw the new battery in place
-
Slide the I/o side into place and push until you hear a click (don't worry if you don't)
-
Then move to the other side and carefully slid the case over the usb c and SD card reader, before pushing both sides together.
-
Finally, push the clips at the front together.
-
-
-
To finish putting the laptop back together, screw the button cover back on using the same screws as you removed earlier
-