crwdns2915892:0crwdne2915892:0
Replacing the LCD display is a more costly task, but it is certainly not too difficult.
crwdns2942213:0crwdne2942213:0
-
-
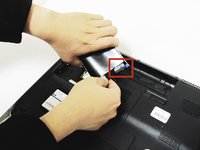
Slide the switch to the left until the release clicks.
-
-
-
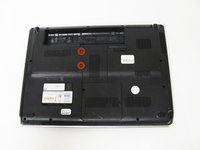
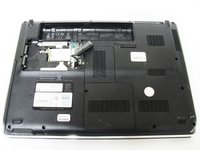
Remove the two 5mm Phillips screws on the hard drive cover using a Phillips #00 screwdriver.
-
-
-
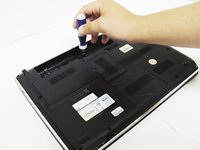
Pull up on the two plastic flaps on the hard drive enclosure to remove it.
-
-
-
Gently lift the ribbon cable away from the hard drive enclosure to free the drive.
-
-
-
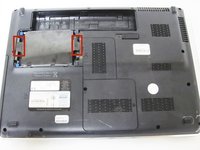
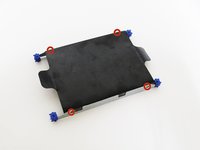
Locate four 2mm Phillips screws on the side of the enclosure and remove them using a Phillips #00 screwdriver.
-
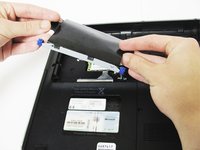
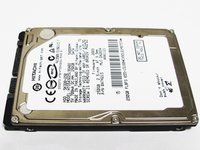
Slide the hard drive out of the enclosure to complete the removal process.
-
-
-
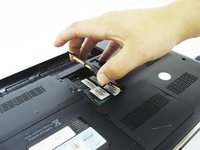
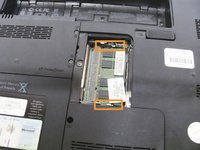
Remove the one 4mm Phillips screw from the RAM cover using a Phillips #00 screwdriver.
-
-
-
-
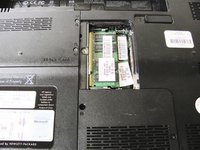
Remove the RAM cover to reveal the module's underneath.
-
-
-
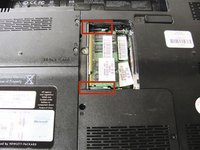
Push the two metal tabs on the side of the RAM module outwards, towards the battery and CMOS compartments (up and down).
-
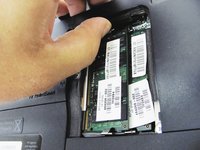
Once the module is released, gently pull the module upwards.
-
Repeat for the RAM module underneath the first one.
-
-
-
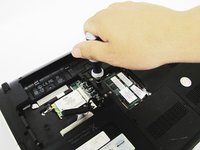
Begin by unscrewing the three 3mm Phillips head screws inside the battery bay with the Phillips #00 screwdriver.
-
-
-
Remove the five remaining 2mm screws using a Phillips #00 screwdriver.
-
-
-
Unscrew the 4mm Phillips screw inside the hard drive bay.
-
-
-
Locate the hole in between the hard drive and RAM compartments.
-
Unscrew the 4mm Phillips head screw from this hole.
-
-
-
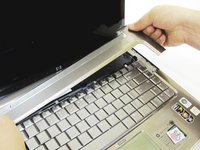
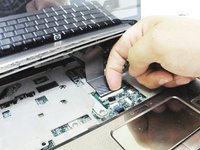
Flip the laptop, and use the plastic opening tool on the side seam to remove the top cover.
-
-
crwdns2935267:0crwdne2935267:0Flathead 3/32" or 2.5 mm Screwdriver$5.49
-
Use a 2.5mm flathead screwdriver to remove the four 3mm screws on top of the keyboard.
-
-
-
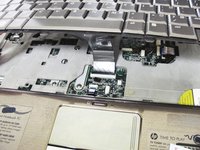
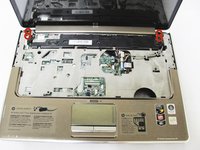
Dislodge the keyboard to access the underside.
-
-
-
Locate the ribbon cable connection between the keyboard and motherboard.
-
Pull upwards on the small black bar to release the ribbon cable and remove it.
-
-
-
The keyboard is now ready for replacement.
-
-
-
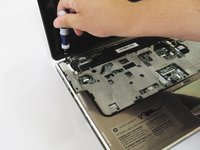
Locate four 3mm screws in the upper corners of the keyboard tray and remove them using a #00 Phillips screwdriver.
-
-
-
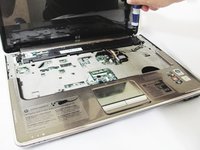
Locate the two ribbon cable connectors that attach the speaker assembly to the motherboard.
-
Using your fingers, carefully detach the ribbon cables from the motherboard by pulling them straight out on the connector.
-
-
-
Remove the speaker assembly from the keyboard tray.
-
-
-
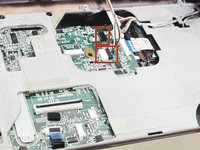
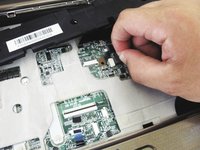
Locate the large display ribbon connector near the upper left corner of the keyboard tray and remove the ribbon by pulling straight out on the connector.
-
-
-
Locate the two final ribbon connectors for the display on the motherboard and remove them similarly by pulling straight outward on the connectors.
-
You are now free to remove the display from the computer.
-


To reassemble your device, follow these instructions in reverse order.
To reassemble your device, follow these instructions in reverse order.
crwdns2935221:0crwdne2935221:0
crwdns2935229:012crwdne2935229:0

crwdns2915084:0crwdne2915084:0

Cal Poly, Team 9-15, Regan Spring 2014 crwdns2935289:0Cal Poly, Team 9-15, Regan Spring 2014crwdne2935289:0
CPSU-REGAN-S14S9G15
crwdns2931471:04crwdne2931471:0
crwdns2935297:010crwdne2935297:0
crwdns2947410:01crwdne2947410:0
Where can i buy the display?