crwdns2915892:0crwdne2915892:0
The WLAN repair guide will assist the user in removal and installation of the WLAN module for the HP Stream 13-c110nr.
crwdns2942213:0crwdne2942213:0
-
-
Close the device.
-
Remove AC adapter plug from electrical outlet.
-
Remove AC adapter from device.
-
Turn the device off.
-
Unplug all external devices from device.
-
-
-
Turn the device upside down with the back facing towards you.
-
-
-
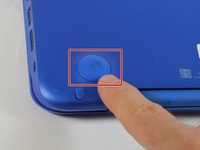
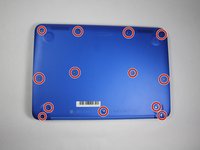
Use a pick to remove the two (2) large computer feet along the back edge of the device.
-
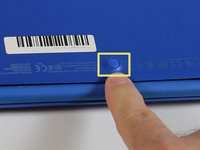
Use a pick to remove the two (2) small computer feet.
-
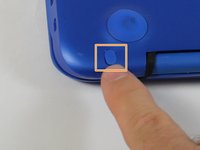
Use a pick to remove the one (1) screw cover.
-
Place rubber computer feet in safe place for reassembly.
-
-
crwdns2935267:0crwdne2935267:0Magnetic Project Mat$19.95
-
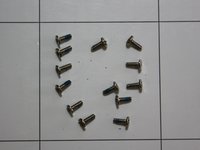
Remove the thirteen (13) Phillips P0 PM2.5x6.0 mm screws.
-
Place the thirteen (13) screws on magnetic mat for reassembly.
-
-
-
Turn the device over with the front facing towards you.
-
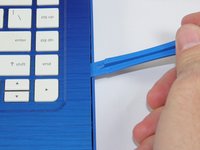
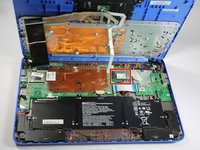
Open the device as shown.
-
-
-
-
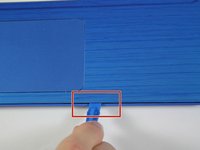
Insert the Spudger between the Top Cover and Bottom Cover to lift the front edge until it separates from the Bottom Cover.
-
-
-
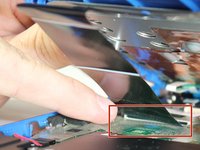
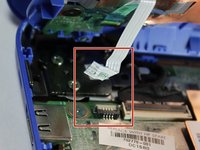
Disconnect the Power connector cable.
-
-
-
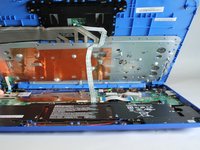
Remove the Keyboard/Top Cover from the device.
-
-
-
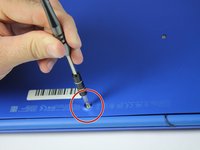
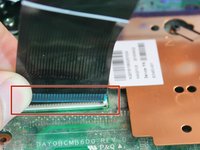
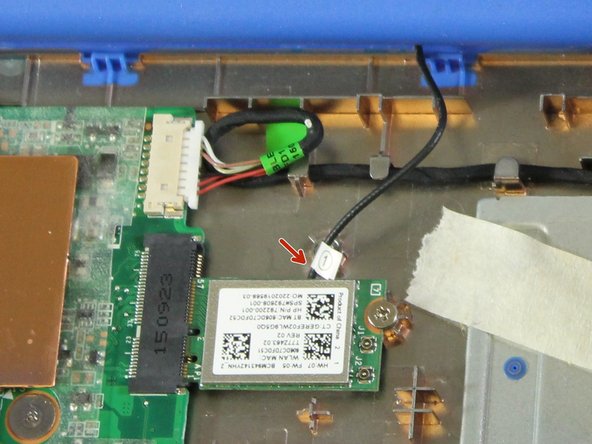
Disconnect the WLAN antenna cable from the WLAN module.
-
-
-
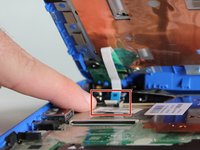
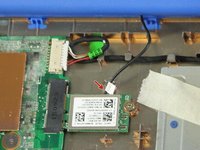
Remove one (1) Phillips P0 PM2.0x3.0 mm screw.
-
Place one (1) screw on magnetic mat for reassembly.
-


To reassemble your device, follow these instructions in reverse order.
To reassemble your device, follow these instructions in reverse order.
crwdns2915084:0crwdne2915084:0

Appalachian State University, Team S1-G2, Menagarishvili Spring 2019 crwdns2935289:0Appalachian State University, Team S1-G2, Menagarishvili Spring 2019crwdne2935289:0
APSU-MENAGARISHVILI-S19S1G2
crwdns2931471:04crwdne2931471:0
crwdns2935297:015crwdne2935297:0