crwdns2933423:0crwdne2933423:0

HP Split x2 Screen Replacement

crwdns2942213:0crwdne2942213:0

  1. HP Split x2 Screen Replacement, Rear Cover: crwdns2935265:01crwdnd2935265:01crwdnd2935265:01crwdne2935265:0
    • Opening the device voids the manufacturer warranty.

    • Power down the HP Split x2 before beginning the repair

    • Separate the tablet from the keyboard by pushing the slider to the left and lifting the tablet from the keyboard.

  2. HP Split x2 Screen Replacement: crwdns2935265:02crwdnd2935265:01crwdnd2935265:03crwdne2935265:0 HP Split x2 Screen Replacement: crwdns2935265:02crwdnd2935265:02crwdnd2935265:03crwdne2935265:0 HP Split x2 Screen Replacement: crwdns2935265:02crwdnd2935265:03crwdnd2935265:03crwdne2935265:0
    • Remove the four white caps on the bottom edge of the tablet.

    • Use a tweezer to grasp white caps.

    • The white caps are easily lost. Store them in a secure place.

  3. HP Split x2 Screen Replacement: crwdns2935265:03crwdnd2935265:01crwdnd2935265:01crwdne2935265:0
    • Use a Phillips #000 screwdriver to remove the four 3mm screws.

  4. HP Split x2 Screen Replacement: crwdns2935265:04crwdnd2935265:01crwdnd2935265:02crwdne2935265:0 HP Split x2 Screen Replacement: crwdns2935265:04crwdnd2935265:02crwdnd2935265:02crwdne2935265:0
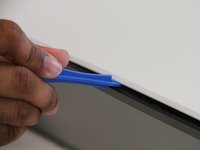
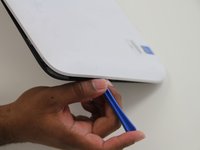
    • Use a plastic opening tool to pry the tabs on the top, left and right sides of the tablet.

    • Only the top and sides have tabs. Remove all tabs before lifting screen.

  5. HP Split x2 Screen Replacement: crwdns2935265:05crwdnd2935265:01crwdnd2935265:02crwdne2935265:0 HP Split x2 Screen Replacement: crwdns2935265:05crwdnd2935265:02crwdnd2935265:02crwdne2935265:0
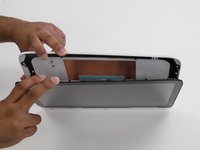
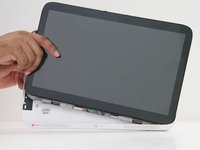
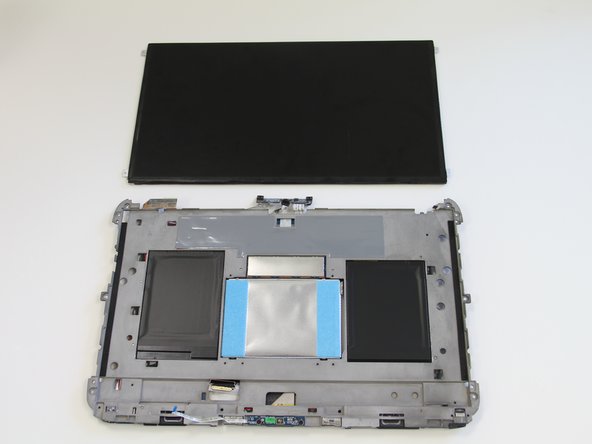
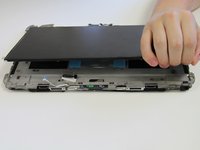
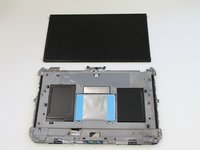
    • Separate the cover and the screen.

    • Gently lift the screen out of the cover.

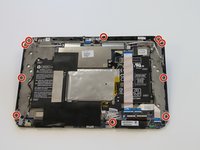
  6. HP Split x2 Screen Replacement, Screen: crwdns2935265:06crwdnd2935265:01crwdnd2935265:02crwdne2935265:0 HP Split x2 Screen Replacement, Screen: crwdns2935265:06crwdnd2935265:02crwdnd2935265:02crwdne2935265:0
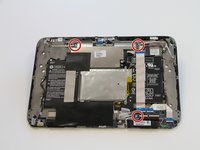
    • Use a J0 screwdriver to remove the ten 4mm Phillips screws.

  7. HP Split x2 Screen Replacement: crwdns2935265:07crwdnd2935265:01crwdnd2935265:02crwdne2935265:0 HP Split x2 Screen Replacement: crwdns2935265:07crwdnd2935265:02crwdnd2935265:02crwdne2935265:0
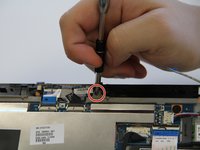
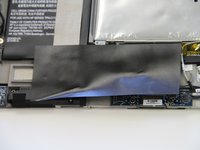
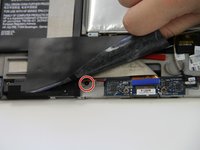
    • Peel back the large black tape.

    • Remove the 4mm Phillips screw.

  8. HP Split x2 Screen Replacement: crwdns2935265:08crwdnd2935265:01crwdnd2935265:03crwdne2935265:0 HP Split x2 Screen Replacement: crwdns2935265:08crwdnd2935265:02crwdnd2935265:03crwdne2935265:0 HP Split x2 Screen Replacement: crwdns2935265:08crwdnd2935265:03crwdnd2935265:03crwdne2935265:0
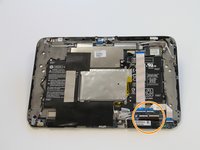
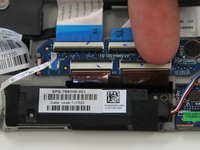
    • Remove three 2 mm zero insertion force (ZIF) connectors. Lift the black tab in front and then remove the ribbon from the rear.

    • Remove two larger zero insertion force (ZIF) connectors. Lift the black tab in front and then remove the ribbon from the rear.

  9. HP Split x2 Screen Replacement: crwdns2935265:09crwdnd2935265:01crwdnd2935265:03crwdne2935265:0 HP Split x2 Screen Replacement: crwdns2935265:09crwdnd2935265:02crwdnd2935265:03crwdne2935265:0 HP Split x2 Screen Replacement: crwdns2935265:09crwdnd2935265:03crwdnd2935265:03crwdne2935265:0
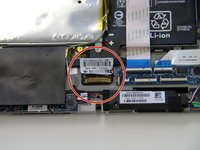
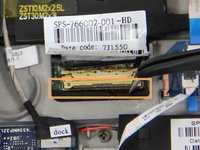
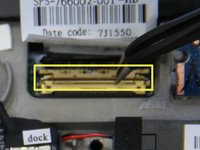
    • The last attachment to the screen is the bronze colored display cable connector.

    • Use a pair of tweezers to lift the metal bar and swing it to the other side on top of the cable.

    • Pull in the direction of the cable to remove the connector.

  10. HP Split x2 Screen Replacement: crwdns2935265:010crwdnd2935265:01crwdnd2935265:01crwdne2935265:0
    • Glue is holding the device together along the edges. The glue is can be very strong. A heat gun may be required to loosen the glue for removal of the digitizer to prevent damage to the screen.

    • Apply pressure to to the sides of the tablet.

    • Separate the digitizer from the the body of the tablet.

  11. HP Split x2 Screen Replacement: crwdns2935265:011crwdnd2935265:01crwdnd2935265:02crwdne2935265:0 HP Split x2 Screen Replacement: crwdns2935265:011crwdnd2935265:02crwdnd2935265:02crwdne2935265:0
    • Glue is holding the screen on at the four corners.

    • Lift the screen up, breaking any adhesion forced by the glue.

    • Replace the old screen with a new one.

crwdns2915888:0crwdne2915888:0

To reassemble your device, follow these instructions in reverse order.

crwdns2935229:011crwdne2935229:0

Ricky Huitema

crwdns2935283:009/24/15crwdne2935283:0

449 crwdns2915208:0crwdne2915208:0

crwdns2935297:02crwdne2935297:0

crwdns2915084:0crwdne2915084:0

Texas Tech, Team 22-5, Rauch Fall 2015 crwdns2935289:0Texas Tech, Team 22-5, Rauch Fall 2015crwdne2935289:0

TTU-RAUCH-F15S22G5

crwdns2931471:03crwdne2931471:0

crwdns2935297:02crwdne2935297:0

crwdns2944067:05crwdne2944067:0

This is not helpful because the one I am working on has no screws.

Matt Brown - crwdns2934203:0crwdne2934203:0

I also have a Split x2 with no screws

dbmacaulay -

I want change my screen because My screen is broken but I do not know , where I can buy my screen

Nohora Chitiva - crwdns2934203:0crwdne2934203:0

ebay or amazon

Andrei Isari -

Is HP Touch Screen Digitizer Glass for HP Split X2 The same as the screen being replaced here?? I need to know

Nwatu Chineme Edger - crwdns2934203:0crwdne2934203:0

crwdns2917038:0crwdne2917038:0

crwdns2936625:0crwdne2936625:0:

crwdns2936751:024crwdne2936751:0 2

crwdns2936753:07crwdne2936753:0 9

crwdns2936753:030crwdne2936753:0 32

crwdns2942667:0crwdne2942667:0 13,121