crwdns2933423:0crwdne2933423:0

HP ProOne 600 G1 Fan Replacement

crwdns2942213:0crwdne2942213:0

  1. HP ProOne 600 G1 Fan Replacement, Back Removal: crwdns2935265:01crwdnd2935265:01crwdnd2935265:02crwdne2935265:0 HP ProOne 600 G1 Fan Replacement, Back Removal: crwdns2935265:01crwdnd2935265:02crwdnd2935265:02crwdne2935265:0
    • Push the unlock tabs on the back of the monitor in and towards each other while sliding the back cover up.

  2. HP ProOne 600 G1 Fan Replacement: crwdns2935265:02crwdnd2935265:01crwdnd2935265:02crwdne2935265:0 HP ProOne 600 G1 Fan Replacement: crwdns2935265:02crwdnd2935265:02crwdnd2935265:02crwdne2935265:0
    • Loosen the two 1/2" screws , with the T15 Torx Screwdriver, on each side of the stand. Remove stand.

  3. HP ProOne 600 G1 Fan Replacement: crwdns2935265:03crwdnd2935265:01crwdnd2935265:01crwdne2935265:0
    • Take out the single 3/8" screw, with the T15 Torx Screwdriver, from the middle of the backplate.

  4. HP ProOne 600 G1 Fan Replacement: crwdns2935265:04crwdnd2935265:01crwdnd2935265:01crwdne2935265:0
    • Remove the backplate by pulling it back towards you.

    • Small plastic tabs hold in the backplate, pull these up to remove it.

  5. HP ProOne 600 G1 Fan Replacement, Fan: crwdns2935265:05crwdnd2935265:01crwdnd2935265:03crwdne2935265:0 HP ProOne 600 G1 Fan Replacement, Fan: crwdns2935265:05crwdnd2935265:02crwdnd2935265:03crwdne2935265:0 HP ProOne 600 G1 Fan Replacement, Fan: crwdns2935265:05crwdnd2935265:03crwdnd2935265:03crwdne2935265:0
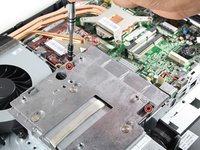
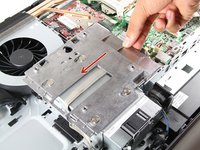
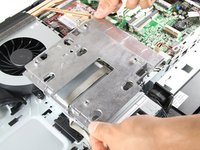
    • Remove both 3/8" screws using the T15 Torx Screwdriver from the metal plate, and slide the plate to the left.

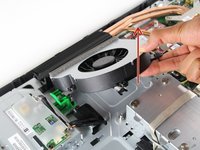
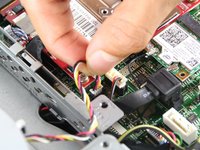
  6. HP ProOne 600 G1 Fan Replacement: crwdns2935265:06crwdnd2935265:01crwdnd2935265:03crwdne2935265:0 HP ProOne 600 G1 Fan Replacement: crwdns2935265:06crwdnd2935265:02crwdnd2935265:03crwdne2935265:0 HP ProOne 600 G1 Fan Replacement: crwdns2935265:06crwdnd2935265:03crwdnd2935265:03crwdne2935265:0
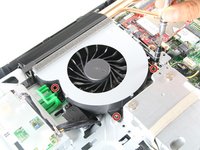
    • Unscrew three surrounding 1/4" screws, with the T15 Torx Screwdriver. Pull out the fan and attached wires.

crwdns2915888:0crwdne2915888:0

To reassemble your device, follow these instructions in reverse order.

Victor Chacon

crwdns2935283:010/01/15crwdne2935283:0

113 crwdns2915208:0crwdne2915208:0

crwdns2935295:0crwdne2935295:0

crwdns2915084:0crwdne2915084:0

Cal Poly, Team 1-20, Maness Fall 2015 crwdns2935289:0Cal Poly, Team 1-20, Maness Fall 2015crwdne2935289:0

CPSU-MANESS-F15S1G20

crwdns2931471:04crwdne2931471:0

crwdns2935297:012crwdne2935297:0

crwdns2944067:00crwdne2944067:0

crwdns2917038:0crwdne2917038:0

crwdns2936625:0crwdne2936625:0:

crwdns2936751:024crwdne2936751:0 2

crwdns2936753:07crwdne2936753:0 11

crwdns2936753:030crwdne2936753:0 25

crwdns2942667:0crwdne2942667:0 1,866