crwdns2933423:0crwdne2933423:0

HP ProBook 4520s Hard Drive Replacement

crwdns2942213:0crwdne2942213:0

  1. HP ProBook 4520s Hard Drive Replacement, Battery: crwdns2935265:01crwdnd2935265:01crwdnd2935265:02crwdne2935265:0 HP ProBook 4520s Hard Drive Replacement, Battery: crwdns2935265:01crwdnd2935265:02crwdnd2935265:02crwdne2935265:0
    • Flip the 4520s upside-down with the front toward you.

    • Push the two latches below the battery inwards at the same time.

  2. HP ProBook 4520s Hard Drive Replacement: crwdns2935265:02crwdnd2935265:01crwdnd2935265:01crwdne2935265:0
    • Remove the battery by holding the latches and sliding the battery away from you.

  3. HP ProBook 4520s Hard Drive Replacement, Switch Cover: crwdns2935265:03crwdnd2935265:01crwdnd2935265:02crwdne2935265:0 HP ProBook 4520s Hard Drive Replacement, Switch Cover: crwdns2935265:03crwdnd2935265:02crwdnd2935265:02crwdne2935265:0
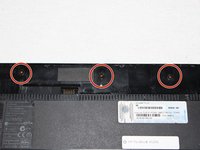
    • Use a Phillips #1 screwdriver to remove three 2mm screws where the battery was located.

  4. HP ProBook 4520s Hard Drive Replacement: crwdns2935265:04crwdnd2935265:01crwdnd2935265:02crwdne2935265:0 HP ProBook 4520s Hard Drive Replacement: crwdns2935265:04crwdnd2935265:02crwdnd2935265:02crwdne2935265:0
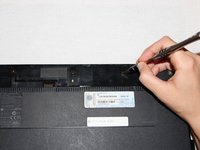
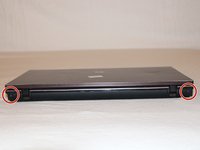
    • Flip the 4520s over and rotate it so the back is facing you.

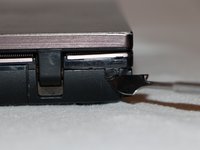
    • Use a metal spudger to peel off two rubber caps located on either side of the battery port.

  5. HP ProBook 4520s Hard Drive Replacement: crwdns2935265:05crwdnd2935265:01crwdnd2935265:01crwdne2935265:0
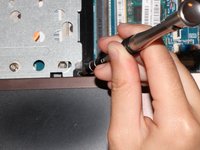
    • Use a Phillips #1 screwdriver to remove the 3mm screws behind the caps.

  6. HP ProBook 4520s Hard Drive Replacement: crwdns2935265:06crwdnd2935265:01crwdnd2935265:03crwdne2935265:0 HP ProBook 4520s Hard Drive Replacement: crwdns2935265:06crwdnd2935265:02crwdnd2935265:03crwdne2935265:0 HP ProBook 4520s Hard Drive Replacement: crwdns2935265:06crwdnd2935265:03crwdnd2935265:03crwdne2935265:0
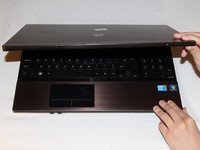
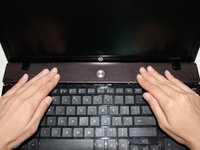
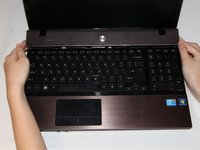
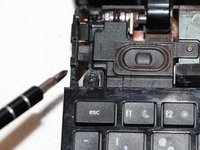
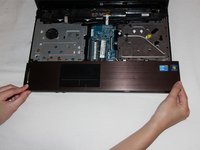
    • Rotate the 4520s and then open it with the screen facing you.

    • The switch cover is located above the keyboard. Push the switch cover away from you until it comes loose from the 4520s.

    • Lift the switch cover away from the 4520s and set it aside.

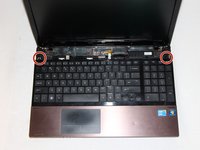
  7. HP ProBook 4520s Hard Drive Replacement, Keyboard: crwdns2935265:07crwdnd2935265:01crwdnd2935265:02crwdne2935265:0 HP ProBook 4520s Hard Drive Replacement, Keyboard: crwdns2935265:07crwdnd2935265:02crwdnd2935265:02crwdne2935265:0
    • Use a Phillips #1 screwdriver to remove the two 7mm screws located on either side of the keyboard panel.

  8. HP ProBook 4520s Hard Drive Replacement: crwdns2935265:08crwdnd2935265:01crwdnd2935265:01crwdne2935265:0
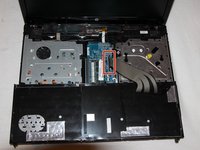
    • Slide the keyboard panel away from you to free it from the 4520s.

    • Do not yank the keyboard panel away from the 4520s. This may damage the cable.

  9. HP ProBook 4520s Hard Drive Replacement: crwdns2935265:09crwdnd2935265:01crwdnd2935265:02crwdne2935265:0 HP ProBook 4520s Hard Drive Replacement: crwdns2935265:09crwdnd2935265:02crwdnd2935265:02crwdne2935265:0
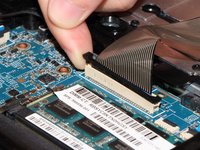
    • Gently raise up the keyboard and flip it over to reveal a ribbon cable.

    • Release the ribbon cable by carefully lifting the black tab upwards, one side at a time.

    • Remove the cable and lift the keyboard panel up. Set it aside.

    • When reassembling, feed the ribbon cable into the port. Press down on the tab to pinch the cable in place.

  10. HP ProBook 4520s Hard Drive Replacement, Palm Rest: crwdns2935265:010crwdnd2935265:01crwdnd2935265:02crwdne2935265:0 HP ProBook 4520s Hard Drive Replacement, Palm Rest: crwdns2935265:010crwdnd2935265:02crwdnd2935265:02crwdne2935265:0
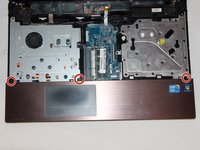
    • Use a Phillips #1 screwdriver to remove the three 3mm screws along the top of the palm rest.

  11. HP ProBook 4520s Hard Drive Replacement: crwdns2935265:011crwdnd2935265:01crwdnd2935265:02crwdne2935265:0 HP ProBook 4520s Hard Drive Replacement: crwdns2935265:011crwdnd2935265:02crwdnd2935265:02crwdne2935265:0
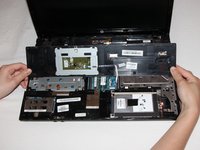
    • Slide the palm rest to the right to release it and then rotate it back gently.

    • Do not yank the palm rest away from the 4520s. This may damage the cable.

  12. HP ProBook 4520s Hard Drive Replacement: crwdns2935265:012crwdnd2935265:01crwdnd2935265:02crwdne2935265:0 HP ProBook 4520s Hard Drive Replacement: crwdns2935265:012crwdnd2935265:02crwdnd2935265:02crwdne2935265:0
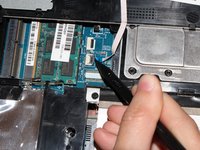
    • Release the ribbon cable by opening the black hinge on the port using a spudger.

    • Remove the cable and set the palm rest aside.

  13. HP ProBook 4520s Hard Drive Replacement, Hard Drive: crwdns2935265:013crwdnd2935265:01crwdnd2935265:03crwdne2935265:0 HP ProBook 4520s Hard Drive Replacement, Hard Drive: crwdns2935265:013crwdnd2935265:02crwdnd2935265:03crwdne2935265:0 HP ProBook 4520s Hard Drive Replacement, Hard Drive: crwdns2935265:013crwdnd2935265:03crwdnd2935265:03crwdne2935265:0
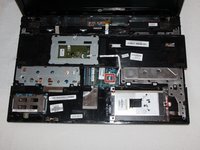
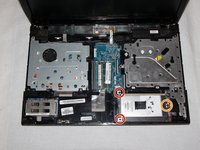
    • The hard drive is contained in the housing on the lower right.

    • Remove two 5mm screws on the left using a Phillips #1 screwdriver.

    • Fully loosen the captive screw on the right using a Phillips #1 screwdriver.

  14. HP ProBook 4520s Hard Drive Replacement: crwdns2935265:014crwdnd2935265:01crwdnd2935265:02crwdne2935265:0 HP ProBook 4520s Hard Drive Replacement: crwdns2935265:014crwdnd2935265:02crwdnd2935265:02crwdne2935265:0
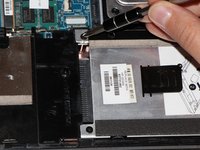
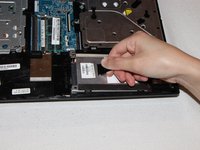
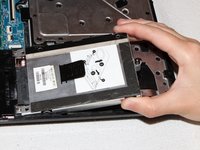
    • Disconnect the hard drive by pulling the tab to the right.

    • Lift the housing out from the 4520s.

  15. HP ProBook 4520s Hard Drive Replacement: crwdns2935265:015crwdnd2935265:01crwdnd2935265:02crwdne2935265:0 HP ProBook 4520s Hard Drive Replacement: crwdns2935265:015crwdnd2935265:02crwdnd2935265:02crwdne2935265:0
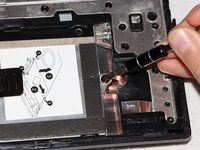
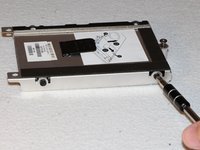
    • Use a Phillips #1 screwdriver to remove the four 3mm screws on the sides of the housing.

  16. HP ProBook 4520s Hard Drive Replacement: crwdns2935265:016crwdnd2935265:01crwdnd2935265:01crwdne2935265:0
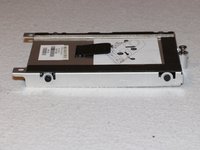
    • Lift the housing away from the hard drive.

    • The hard drive is 2.5".

crwdns2915888:0crwdne2915888:0

To reassemble your device, follow these instructions in reverse order.

crwdns2935229:052crwdne2935229:0

May Lin

crwdns2935283:009/21/16crwdne2935283:0

837 crwdns2915208:0crwdne2915208:0

crwdns2935295:0crwdne2935295:0

crwdns2915084:0crwdne2915084:0

UC Davis, Team 1-3, Oliver Fall 2016 crwdns2935289:0UC Davis, Team 1-3, Oliver Fall 2016crwdne2935289:0

UCD-OLIVER-F16S1G3

crwdns2931471:05crwdne2931471:0

crwdns2935297:08crwdne2935297:0

crwdns2944067:05crwdne2944067:0

Yes. I should have included that.

Robert Spencer Harrison -

Thank you so much lol

You taught me that i didn’t have to throw and break this darn machine to get the hard drive out :P

M

Maria Sergent - crwdns2934203:0crwdne2934203:0

Thank you!

This guide works well for the 4320s as well, though there are a few small differences.

The battery compartment has 4 screws and there are none on the back.

The keyboard is held by 4 screws.

The touchpad has the same type of connector as the keyboard.

The hard drive cage is held by a #1 Philips and two #0 Philips instead of #1.

Carl - crwdns2934203:0crwdne2934203:0

Thank you kindly for such a easy to follow step by step tutorial. Never thought this rooky would be able to repair my own laptop

You guys rock

Eugene B - crwdns2934203:0crwdne2934203:0

crwdns2917038:0crwdne2917038:0

crwdns2936625:0crwdne2936625:0:

crwdns2936751:024crwdne2936751:0 1

crwdns2936753:07crwdne2936753:0 20

crwdns2936753:030crwdne2936753:0 121

crwdns2942667:0crwdne2942667:0 38,519