crwdns2933423:0crwdne2933423:0

HP ProBook 440 G9 Daughter Board Replacement

crwdns2942213:0crwdne2942213:0

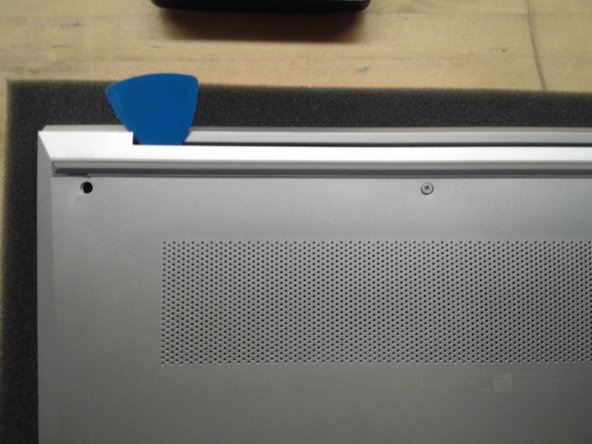
  1. HP ProBook 440 G9 Daughter Board Replacement, Remove Bottom Cover: crwdns2935265:01crwdnd2935265:01crwdnd2935265:02crwdne2935265:0 HP ProBook 440 G9 Daughter Board Replacement, Remove Bottom Cover: crwdns2935265:01crwdnd2935265:02crwdnd2935265:02crwdne2935265:0
    • Use Phillips #01 screwdriver to unscrew all 6 threaded screws.

    • Do not remove screws from bottom cover as they are intended to stay attached to the bottom cover.

    • Use guitar pick tool to unclip the back cover all around the edges starting from the top.

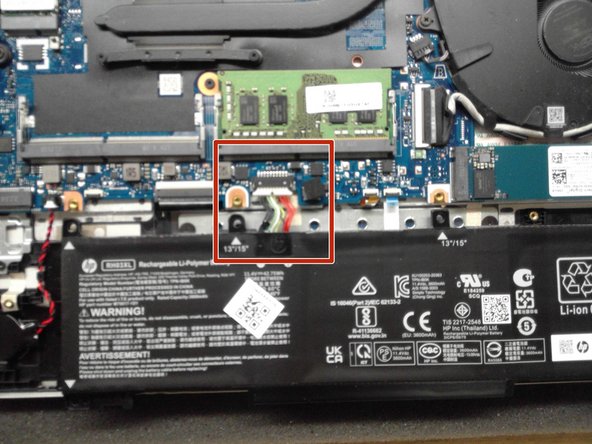
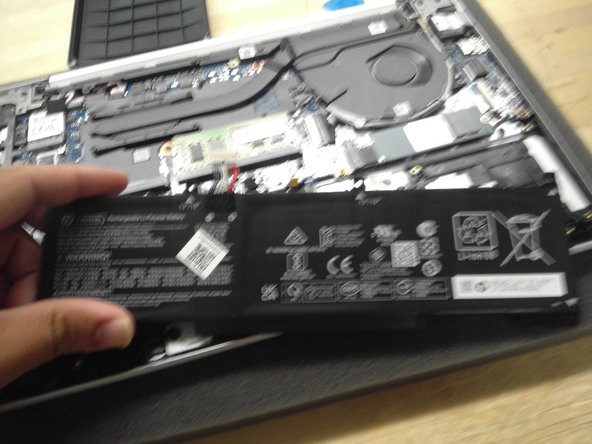
  2. HP ProBook 440 G9 Daughter Board Replacement, Remove Battery: crwdns2935265:02crwdnd2935265:01crwdnd2935265:03crwdne2935265:0 HP ProBook 440 G9 Daughter Board Replacement, Remove Battery: crwdns2935265:02crwdnd2935265:02crwdnd2935265:03crwdne2935265:0 HP ProBook 440 G9 Daughter Board Replacement, Remove Battery: crwdns2935265:02crwdnd2935265:03crwdnd2935265:03crwdne2935265:0
    • Remove all 4 screws from the battery.

    • Disconnect the Battery Connector from the motherboard using the side tabs on the connector.

    • Possible spark may occur at the Battery Connector port if laptop is not fully powered off when replacing the laptop battery.

    • Remove the battery from the laptop.

  3. HP ProBook 440 G9 Daughter Board Replacement, Remove Solid State Drive: crwdns2935265:03crwdnd2935265:01crwdnd2935265:03crwdne2935265:0 HP ProBook 440 G9 Daughter Board Replacement, Remove Solid State Drive: crwdns2935265:03crwdnd2935265:02crwdnd2935265:03crwdne2935265:0 HP ProBook 440 G9 Daughter Board Replacement, Remove Solid State Drive: crwdns2935265:03crwdnd2935265:03crwdnd2935265:03crwdne2935265:0
    • Use Phillips #00 to remove screw from SSD.

    • SSD will lift up at a 45 degree angle when screw is removed.

    • Remove SSD from the SSD slot.

    • When reinserting the SSD plug in at a 45 degree angle and then screw down with the new screw.

  4. HP ProBook 440 G9 Daughter Board Replacement, Disconnect Ribbon Cables: crwdns2935265:04crwdnd2935265:01crwdnd2935265:01crwdne2935265:0
    • Remove ribbon cables from daughter board.

    • Use Phillips #01 screwdriver to remove 4 screws from daughter board.

    • Remove the Ethernet port piece and set to the side.

    • Use Phillips #01 screwdriver to remove 3 screws from hinge.

    • One of the hinge screws is under the silver display cable.

    • Lift the display hinge to release the daughter board.

    • Lift the daughter board on the left part of the board to detach from the laptop port cutouts.

crwdns2915888:0crwdne2915888:0

To reassemble your device, follow these instructions in reverse order.

Joel

crwdns2935283:004/30/18crwdne2935283:0

470 crwdns2915208:0crwdne2915208:0

crwdns2935297:05crwdne2935297:0

crwdns2947412:00crwdne2947412:0

crwdns2917038:0crwdne2917038:0

crwdns2936625:0crwdne2936625:0:

crwdns2936751:024crwdne2936751:0 2

crwdns2936753:07crwdne2936753:0 5

crwdns2936753:030crwdne2936753:0 26

crwdns2942667:0crwdne2942667:0 185