crwdns2915892:0crwdne2915892:0
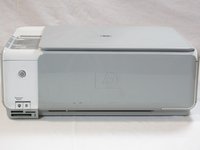
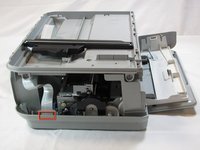
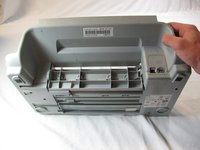
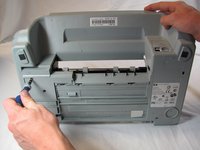
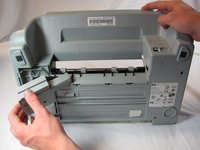
The feed roller assembly is a critical component responsible for smoothly feeding paper through the printer. Over time, these rollers may wear out or accumulate debris, leading to paper jams and print quality issues. Whether you're troubleshooting an issue with paper feeding or looking to replace a worn-out roller, this step-by-step walkthrough will help you navigate the disassembly process with a Photosmart c3180 printer.
crwdns2942213:0crwdne2942213:0
-
-
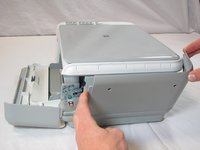
Rotate the printer 90 degrees counter clockwise so that the side panel next to control panel is facing you.
-
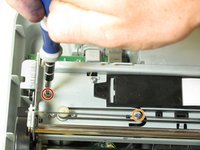
Remove the two T10 12mm Torx screws from the left side panel.
-
-
-
Firmly pull the the back of the side panel until it separates from the body of the printer.
-
Rotate the side panel upwards while pulling it towards yourself to remove the panel.
-
-
-
Rotate the printer 90 degrees clockwise.
-
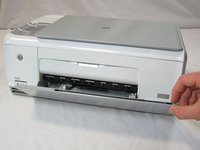
Grasp the paper tray and rotate it down.
-
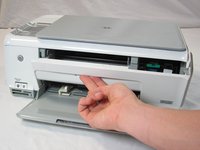
Insert your fingers into the slot in the printer door and pull to rotate the gate down.
-
-
-
Rotate the printer 90 degrees clockwise.
-
Remove the two T10 12 mm Torx screws.
-
Grasp both sides of the side panel and pull it forward to remove the panel.
-
-
-
Rotate the printer 90 degrees counter clockwise.
-
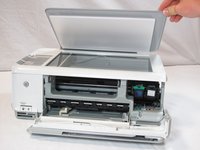
Lift the scanner lid to expose the scanner glass.
-
-
-
Remove the two T10 12 mm Torx screws.
-
-
-
Rotate the printer 90 degrees counter clockwise.
-
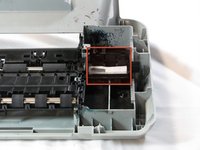
Inside the printer is a small white tab. Press it inward with a spudger until a pop is heard.
-
Remove the front panel by grasping its front and pulling away from the printer.
Änderung des Textes: die kleine Lasche verriegelt die kleine Frontblende: mit leichtem Druck Richtung “rechte Druckerseite entriegeln, gleichzeitig jene Blende nach vorn lösen.
-
-
-
Rotate the printer 90 degrees clockwise.
-
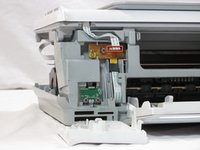
Remove the cable connecting the top panel of the printer to the power button assembly.
-
-
-
Carefully lift the top panel of the printer away from the printer body.
nur die dünne weiße Abdeckung, die graue bleibt noch; zuerst hinten anheben, vorn ist mittig eine Nase zu lösen.
-
-
-
Set aside the top panel of the printer.
-
Remove the two T10 12 mm Torx screws from the top front of the printer
zunächst links seitlich das feine weiße Flachbandkabel vorsichtig aus seinem Stecker ziehen: hat keine Verriegelung o.ä.
-
-
-
Rotate the Printer 90 degrees counter clockwise.
-
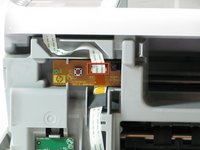
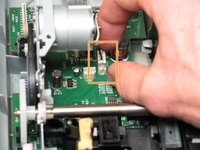
Remove the scanner cable from the main circuit board.
-
-
-
Rotate the printer 90 degrees clockwise.
-
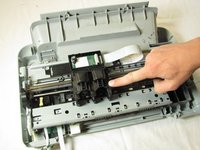
Using both hands, lift the scanner tray from the body of the printer.
-
-
-
-
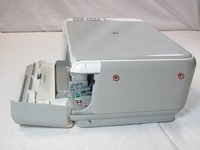
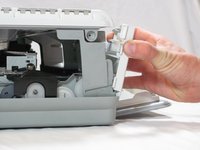
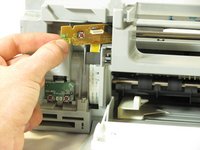
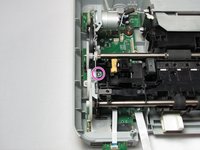
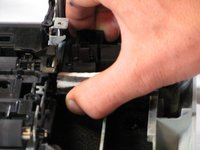
Remove the power button circuit board from the support frame by pinching the left side, and pulling forward and to the left simultaneously.
-
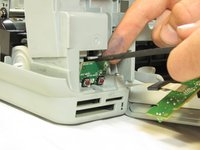
Push up on the tab holding the secondary control circuit board with the spudger and pull it forward to remove it.
-
-
-
Remove the two T10 12 mm Torx screws.
-
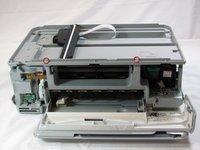
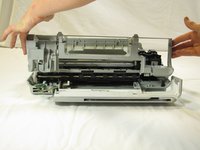
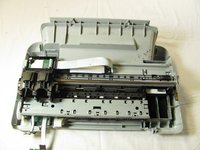
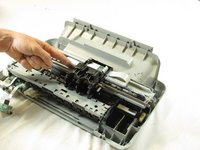
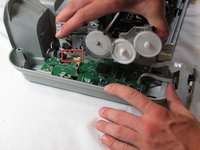
Lift the support frame off of the printer body with both hands.
-
-
-
Remove the printer door and paper tray by putting them in the closed position and not laying flat then rotating them upwards lift the left side up.
-
-
-
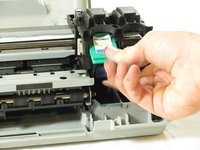
Remove both of the ink cartridges by grabbing the front of the ink cartridge and pulling down.
-
-
-
Remove the T10 6 mm Torx screw on the left side of the track assembly.
-
Remove the T10 12 mm Torx screw on the left side of the track assembly.
-
-
-
Gently push the ink cartridge carriage to the left side of the printer.
-
-
-
Remove the two T10 12 mm Torx screws.
-
Remove the two T10 6 mm Torx screws.
-
-
-
Rotate the printer 90 degrees counter clockwise.
-
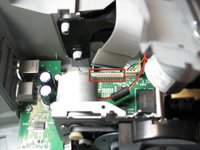
Remove the cable connecting the ink cartridge carriage to the main circuit board.
-
-
-
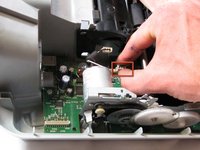
Carefully remove the connector holding the drive motor wires to the main circuit board.
-
-
-
Slide the ink cartridge carriage all the way to the right side of the printer.
-
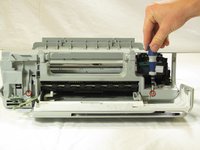
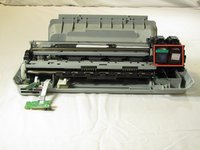
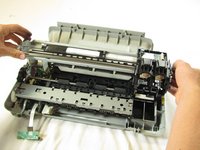
Using both hands, carefully lift the ink cartridge track off of the main body of the printer.
-
-
-
Set aside the ink cartridge carriage.
-
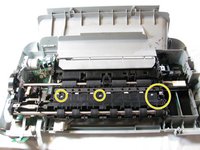
Remove the three T10 12mm Torx screws holding the paper guide to the printer body.
-
Lift the paper guide directly up to remove it and set it aside.
-
-
-
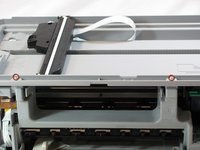
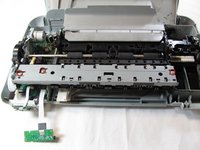
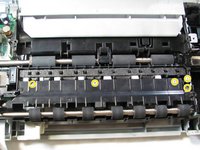
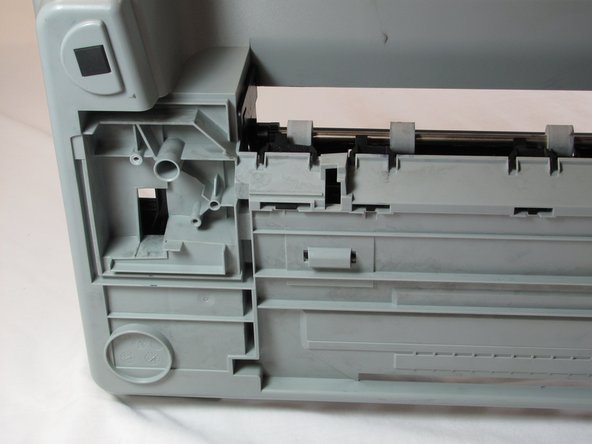
Remove the five T10 12mm Torx screws from the roller holder.
-
-
-
Remove the plastic gear cover by pulling it away from the printer body and lifting it up.
-
-
-
Remove the metal tab by rotating it away from the body of the printer and pulling up.
-
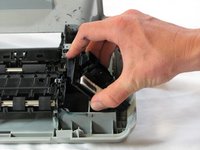
Remove the brush by grasping it firmly by the base and lift straight up.
-
-
-
Remove the pad holder by lifting it straight up.
-
-
-
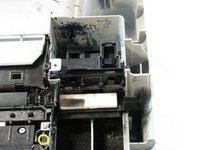
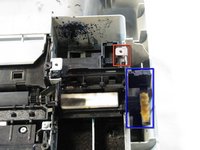
Remove the connector holding the feed roller motor to the logic board by pulling it strait up
-
Remove the T10 12mm Torx screw on the roller panel.
-
-
-
Disconnect the page sensor from the logic board by pulling straight up on the connector.
-
-
-
Rotate the printer 180 degrees and turn it up on to the front side, so that the back of the printer is facing up and the bottom facing you.
-
Push in the tab on the left side of the back panel and pull outward to remove the back panel.
Doubtful many will read through steps beforehand to complete the tear down, but the rotation isn’t necessary. Back panel can be removed keeping the printer horizontal. In the next step, if this screw is removed at the beginning, parts will simply drop out if you lift printer up vertically (or might need a little help from you). No need to worry about the loose feed roller assembly.
-
-
-
Tilt the printer up until the bottom of the printer can be seen.
-
Remove the T10 12mm Torx screw from the bottom panel.
-
Grasp the top edge of the bottom panel and pull to remove it.
-
-
-
Remove the black plastic cross member from the bottom of the printer.
-
-
-
Turn the printer back down so that it is sitting on the bottom panel and rotate the printer 180 degrees.
-
-
-
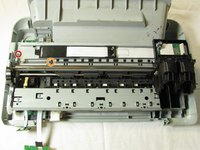
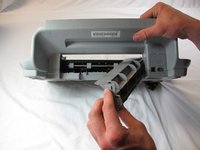
Remove the printer head cleaner by lifting the front of the printer head cleaner above the track and slide it forward.
If you place a small screwdriver blade over the front left guide and under the print head cleaner and then slide the cleaner forward (so that it rides over the guide rail) it will come out easily.
That worked. Thank you. I thought I wasn’t going to be able to get it out without breaking something. But when I saw your comment I gave it a try and it worked perfectly.
-
-
-
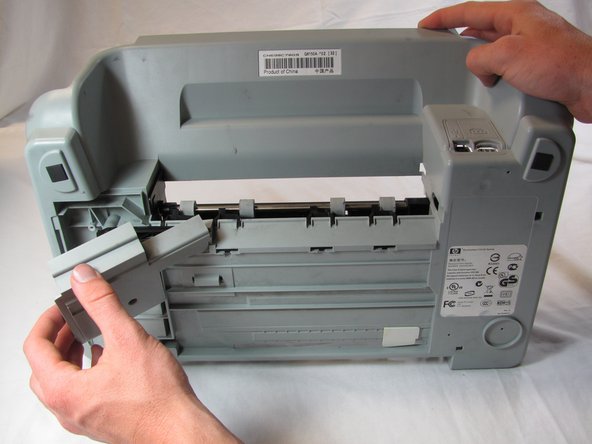
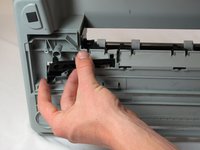
Grasp the left side of the feed roller assembly and pull towards the front of the printer and up to free the metal tab from the slot.
-
-
-
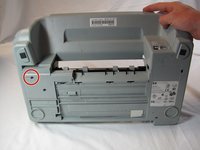
Lift the feed roller assembly straight up to remove it.
Dieser letzte Arbeitsschritt kann wohl nur zum endgültigen Zerlegen des Geräts dienen.
Den Mechanismus der Transportrollen etc wieder zum Funktionieren zu bringen, erweist sich
als höchst schwierig - nicht zu empfehlen.
Dem Autor sei aber allerhöchster Dank gesagt, dass er sich die Mühe gemacht hat, alle Montageschritte
klar zu beschreiben und auch mit Bildern zu ergänzen - sogar einige Pop-up Hinweise sind dabei.
Bravo und nochmals Dank für eine so saubere Arbeit. Garofalo
While removing this a small plastic shaft with gears on both ends fell out not sure where to put it back
Same happened to me. Did you find out where to re-insert it?
Same thing with that gear assembly; if I can’t figure out where it goes, it means a new printer!
-


To reassemble your device, follow these instructions in reverse order.
To reassemble your device, follow these instructions in reverse order.
crwdns2935221:0crwdne2935221:0
crwdns2935229:020crwdne2935229:0
crwdns2915084:0crwdne2915084:0

Cal Poly, Team 20-30, Maness Fall 2011 crwdns2935289:0Cal Poly, Team 20-30, Maness Fall 2011crwdne2935289:0
CPSU-MANESS-F11S20G30
crwdns2931471:04crwdne2931471:0
crwdns2935297:025crwdne2935297:0
crwdns2947412:07crwdne2947412:0
i got everything taken apart and fix my problem but now i cannot get the printer head cleaner gear to set in place and work like it supposed to. any advise?
Beautiful description, thank you. I disassembled the printer, cleaned everything thourouly and put everything back, but I realized that the feed roller is stuck. I don't know which step went wrong. Any suggestions?
m ayuda este tipo d informacion muchas gracias saludos n-n
The HP Photosmart c4580 has enough in common with this model that this guide enabled me to get into the head cleaner reservoir and remove the years of accumulated ink gumming up the works - thanks!
Helped me, thank you
Wow! I would have never been able to fix this without your guide. For me the paper would not pick up. I went up to step 22 and then I needed to glue the gear back on the shaft. You can see my video here. THANK YOU!
Got everything apart on this Chinese puzzle assembly, couldn’t believe how filthy it was inside. As I was lifting the roller assembly out a small gear assembly dropped off the right side of the assembly and I can’t figure out where it goes. If I can’t get that part back where it belongs, then all this work was for nothing, I’ve got a big bag of printer parts and the cost of a new printer. Is this an HP ploy to force the purchase of a new printer?