crwdns2915892:0crwdne2915892:0
The scanner is found underneath the scanner glass. If this piece stops moving, you will not be able to scan anything. It may need to be cleaned or replaced at this point.
crwdns2942213:0crwdne2942213:0
-
-
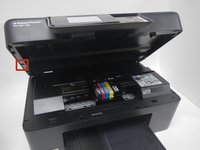
Open the top of the printer. The printer should appear as shown.
-
-
-
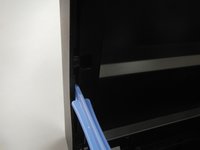
Use the blue plastic opening tool to pry the trim pieces all the way around the printer.
-
Loosen the pieces around the edges before pulling to remove from the printer.
-
Pull the (4) trim pieces off and set them aside.
-
-
-
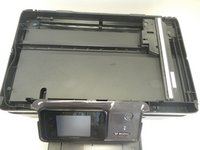
Using the blue plastic opening tool, pull from the middle and then slide back to remove the side panels.
-
-
-
-
Using the T9 Torx Security screwdriver bit, unscrew the five 12mm screws shown.
-
-
-
The scanner flap is attached by a clip that can be dislodged by pulling it gently away from the printer.
-
Keeping the scanner flap upright, slide it toward the unattached clip in order to dislodge the second clip.
-
Both clips will come unattached and you can set the scanner flap aside.
-
-
-
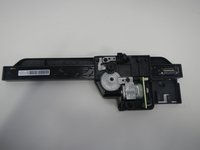
Lift the scanner glass piece from the printer and set it aside.
-
-
-
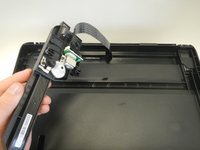
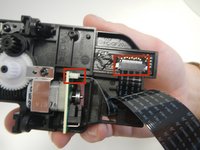
Gently pick up the scanner piece as shown to see the bottom side and wiring.
-
-
-
Gently remove the 2 wire ribbons shown by pulling them away from the scanner piece.
-


To reassemble your device, follow these instructions in reverse order.
To reassemble your device, follow these instructions in reverse order.
crwdns2935221:0crwdne2935221:0
crwdns2935229:02crwdne2935229:0
crwdns2915084:0crwdne2915084:0

Michigan Tech, Team 1-2, Lauer Fall 2014 crwdns2935289:0Michigan Tech, Team 1-2, Lauer Fall 2014crwdne2935289:0
MTU-LAUER-F14S1G2
crwdns2931471:03crwdne2931471:0
crwdns2935297:05crwdne2935297:0