crwdns2915892:0crwdne2915892:0
This is a guide on replacing the Solid State Drive (SSD) of an HP Pavillion 15z-eh000 laptop. Whether replacing a faulty drive or upgrading for more storage, this guide aims to simplify the process. Before starting, ensure the laptop is: entirely powered off, does not have the power cord connected, and has no external devices connected. Use a workstation that is clean and static-free. While working with electronics, It is recommended to wear an anti-static wrist strap to prevent electrostatic discharge. Make sure to avoid contact with pins, leads, or circuitry.
crwdns2942213:0crwdne2942213:0
-
-
Remove the two M2.0 × 5.0 Phillips screws along the bottom of the cover.
-
Remove the four Phillips M2.5 × 6.5 screws under the rubber foot pads.
-
-
-
Use an opening tool to pry open the bottom case, starting from the hinge.
-
Follow along the edge and use the opening tool to lever it open.
-
-
-
-
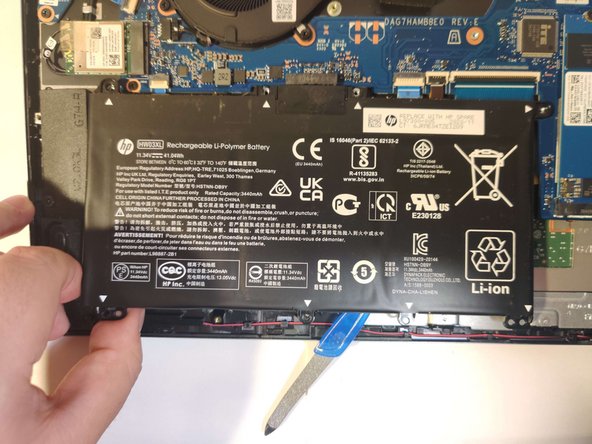
Remove the six Phillips M2.0 × 4.0 screws holding the battery in place.
-
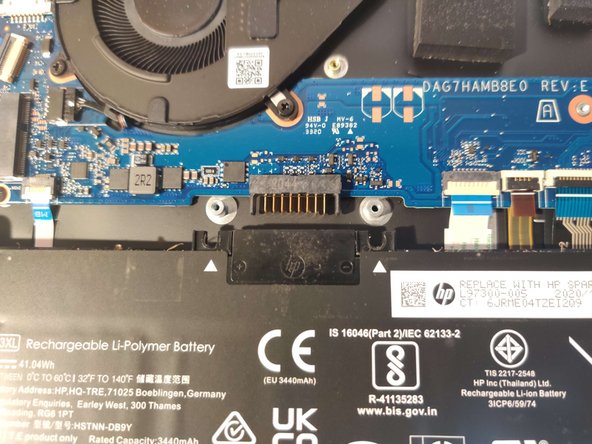
Lift the battery slightly and pull it to disconnect it from the connector on the motherboard.
-
-
-
Finally, remove the Phillips M2.0 × 2.5 screw that secures the SSD to the motherboard.
-
Grasp the SSD by the edges and gently pull it out from its slot.
-


To reassemble your device, follow these instructions in reverse order.
To reassemble your device, follow these instructions in reverse order.

crwdns2915084:0crwdne2915084:0

CSU Los Angeles, Team 3-42, Briggs Fall 2022 crwdns2935289:0CSU Los Angeles, Team 3-42, Briggs Fall 2022crwdne2935289:0
CSULA-BRIGGS-F22S3G42
crwdns2934841:01crwdne2934841:0
crwdns2935303:01crwdne2935303:0