crwdns2915892:0crwdne2915892:0
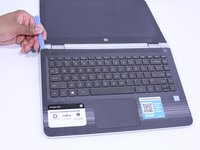
If the display is damaged or malfunctioning, use this guide to replace it.
crwdns2942213:0crwdne2942213:0
-
-
Shut down the computer.
-
Disconnect the power and all external devices connected to the computer.
-
-
-
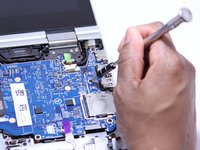
Use a Metal Spudger and remove the rubber foot closet from the bottom of the laptop.
-
-
-
Remove all of the screws located on the bottom of the laptop:
-
5 Phillips 2.4 x 5.7 mm screws
-
5 Phillips 2.0 x 5.0 mm screws
“5 Phillips 2.4 x 5.7 mm screws”
“5 Phillips 2.0 x 5.0 mm screws”
I think the color for the sizes are mixed up, because the one near the screen bending part are the bigger ones, yet it says they are the “2.0 x 5.0 mm” but they are the bigger ones.
If I’m wrong, tell me because I’m not sure if thats the ways they’re named because I’m not an expert at screw sizes.
-
-
-
Turn the computer over onto its base, with the computer open and the keyboard facing upward.
-
-
-
Use the Plastic Opening Tool to separate the keyboard from the base of the laptop.
-
-
-
Raise the keyboard slightly to access the touch pad and keyboard cables.
-
-
crwdns2935267:0crwdne2935267:0Heavy-Duty Spudger$4.99
-
Disconnect the ribbon cables attaching the touch pad and keyboard to the system board (motherboard).
-
Using the Heavy-Duty Spudger lift up the plastic locks connecting the ribbon cable to the motherboard.
-
Use the blue plastic tab on the ribbon cable to pull it out from the lock on the motherboard.
-
-
-
Lift the keyboard away from the base of the laptop.
-
-
-
-
Using the Phillips 00 Screwdriver, remove 6 Phillips 2.0 x 4.6 mm screws from the perimeter of the battery.
-
-
-
(You don't NEED to remove this shielding as you can remove the board with it still there.)
-
Remove the adhesive strip.
-
Lift the shield away from the base of the laptop.
-
-
crwdns2935267:0crwdne2935267:0Heavy-Duty Spudger$4.99
-
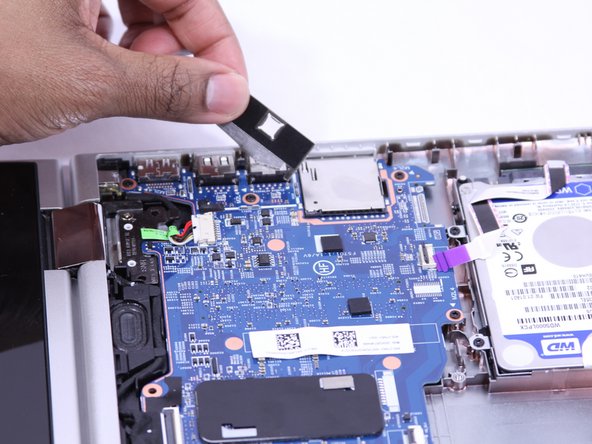
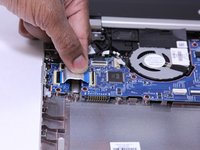
Disconnect the ribbon cables attached to the system board (motherboard).
-
Using the Heavy-Duty Spudger lift up the plastic locks connecting the ribbon cable to the motherboard.
-
Use the plastic tab on the ribbon cable to pull it out from the lock on the motherboard.
-
-
-
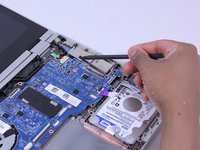
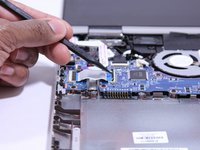
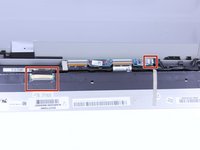
Disconnect the fastened cables from the system board (motherboard) by carefully pushing the cable's plastic edges using the Heavy Duty Spudger.
-
-
-
Pull the clipped cables from system board (motherboard).
-
-
-
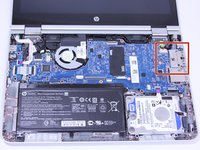
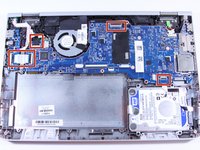
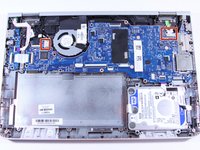
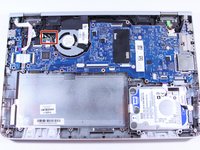
Remove the system board (motherboard).
-
Using the Phillips 00 Screw Driver, remove 9 Phillips 2.0 x 4.7 mm screws with "M2L4" next to them.
-
Using the Phillips 00 Screw Driver, remove the silver screw.
-
-
this step i do not understand. because you do no have to remove the motherboard for a screen replacement.
This is the procedure for replacing the FAN, not the screen, and the board absolutely must be removed to replace the fan.
-
-
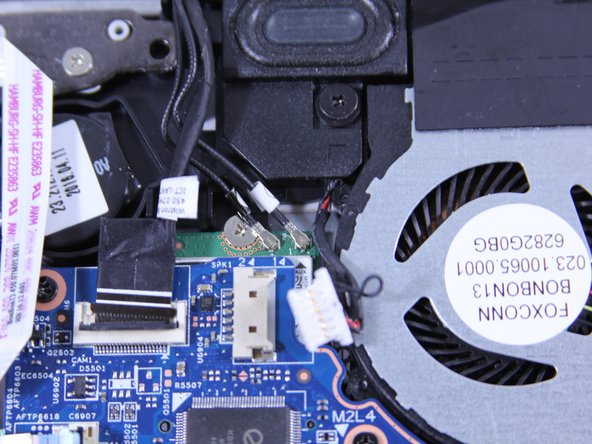
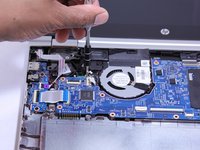
Using a Heavy Duty Spudger, disconnect the black and red RTC battery cable on the left side of the system board (motherboard).
-
-
-
Release the system board (motherboard) from the base enclosure.
-
-
-
Using the Phillips 00 Screw Driver, remove 5 Phillips 2.5 x 4.2 screws from the hinges from the laptop's base.
-
-
-
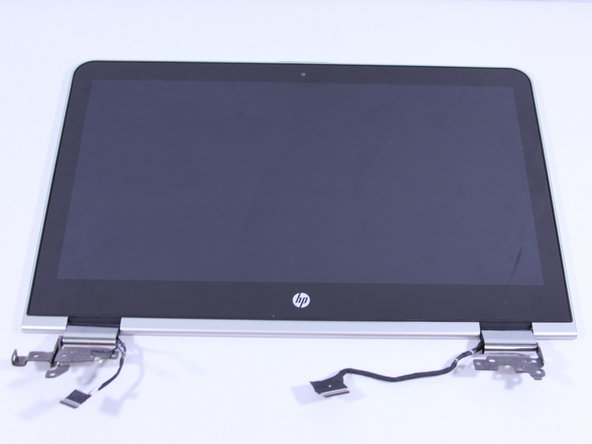
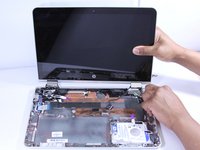
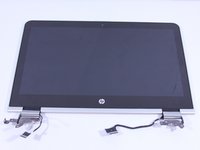
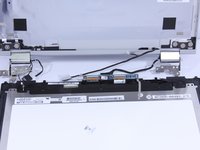
Gently pull the display away from the base panel to unhinge.
-
-
-
Use a Metal Spudger to pry the display panel from the outer casing.
If this is all it takes to take apart the display, why did we go through the whole process of removing the motherboard?
-
-
-
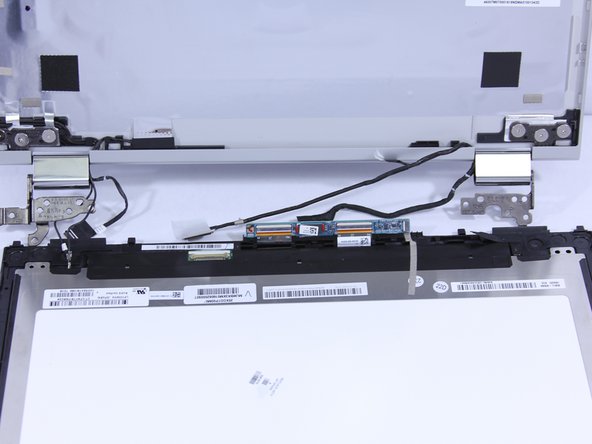
Open the display panel to expose the connecting cables.
-
-
-
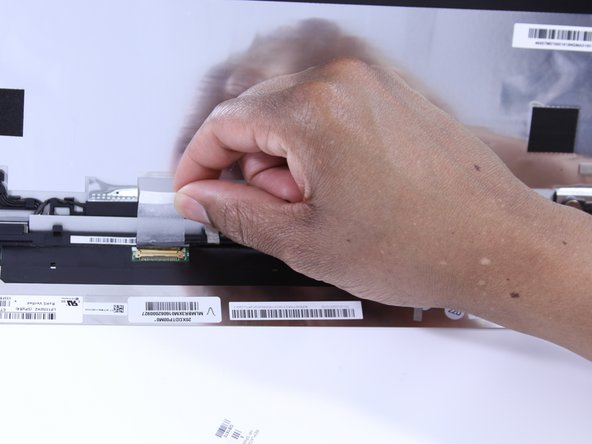
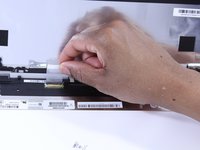
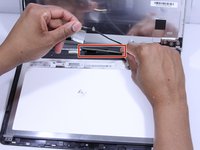
Peel off the adhesive tape and remove the connected cable from the screen.
-
-
-
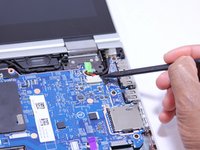
Lift the circuit board out of the way to expose the wire underneath. Remove the wire from the base of the laptop.
-


Follow these instructions in reverse order to reassemble your device.
Follow these instructions in reverse order to reassemble your device.
crwdns2935221:0crwdne2935221:0
crwdns2935229:05crwdne2935229:0

crwdns2915084:0crwdne2915084:0

UW Tacoma, Team 1-6, Rose Winter 2017 crwdns2935289:0UW Tacoma, Team 1-6, Rose Winter 2017crwdne2935289:0
UWT-ROSE-W17S1G6
crwdns2931471:04crwdne2931471:0
crwdns2935297:08crwdne2935297:0
crwdns2947412:05crwdne2947412:0
Question, why not just do step 21 on?
You can. Fold the computer all the way over and go from there. The only advantage to opening the bottom would be to disconnect the battery: a highly recommended procedure.
A little extra pulling the mother board out. But I guess better safe then sorry. All in all this was a good guide!
REMEMBER if your new touch screen does not work (no touch screen) go into the device manager and uninstall i2c hid device. restart the laptop and the driver (and touch) should work again.
I was able to install a new screen. However, the “touch” does not work. I tried the uninstall i2c hid (and also HID- compliant touch screen) trick, but no luck. My guess is its my fault during install. Before I go diving back in for a loose connection, does anyone know which connection I should focus on?