crwdns2915892:0crwdne2915892:0
Before using this guide, make sure to review the troubleshooting page for the HP Pavilion x360 14m-ba011dx. The speakers may not actually need to be replaced depending on the problem, which is why it is good to trouble shoot first.
With this guide, users will be able to remove and replace the speakers on the HP Pavilion x360 14m-ba011dx laptop. The model number for this device is 1KT47UA. Removal of the speakers will be needed if they are not producing sound or the sound is inconsistent.
crwdns2942213:0crwdne2942213:0
-
-
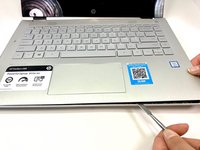
Remove the top left and right rubber pads closest to the hinge of screen using a plastic spudger to locate the screws underneath.
-
Remove the following 6 screws from the bottom of the device using a Phillips #00 Screwdriver:
-
Remove two 7.5 mm screws.
-
Remove three 5 mm screws.
-
Remove one 6.5 mm screw.
-
-
-
Push into the two screw holes that were under the rubber pads with the screwdriver to pop the keyboard out just a little.
-
-
-
-
Separate the keyboard from the rest of the device using a metal spudger around edges.
-
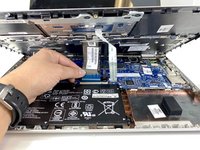
Pull up gently just until you can see the cables attaching the keyboard to the motherboard.
-
Flip the small white flaps holding the cables to the motherboard open to unplug the cords.
-
-
-
Disconnect the wires labeled 1 and 2 out.
-
-
-
Disconnect two ZIF connectors from the motherboard.
-
Remove three 4mm screws using a Phillips #00 Screwdriver.
-
-
-
Gently remove the speakers from the device.
-
To reassemble your device, follow these instructions in reverse order.
To reassemble your device, follow these instructions in reverse order.


