crwdns2915892:0crwdne2915892:0
With this guide, the user will be able to access the RAM and either remove or add more RAM cards to the HP Pavilion x360 14m-ba011dx laptop. More RAM cards might be needed for your computer to run higher memory programs. The HP pavilion x360 14m-ba011dx laptop comes from the factory with an 8GB RAM card, however, there are 2 slots available for extra RAM capability.
crwdns2942213:0crwdne2942213:0
-
-
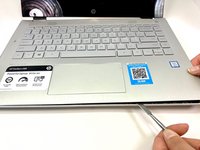
Remove the top left and right rubber pads closest to the hinge of screen using a plastic spudger to expose the screws underneath.
-
Remove the following 6 screws from the bottom of the device using a Phillips #00 Screwdriver:
-
Two 7.5 mm screws.
-
Three 5 mm screws.
-
One 6.5 mm screw.
-
-
-
Push into the two screw holes that were under the rubber pads with the screwdriver to pop the keyboard out just a little.
-
-
-
Separate the keyboard from the rest of the device using a metal or plastic spudger around the edges.
-
Pull up gently just until you can see the cables attaching the keyboard to the motherboard.
-
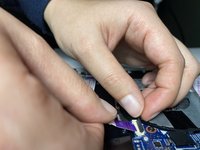
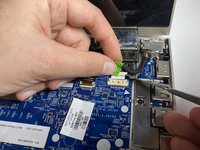
Flip the small white flaps holding the cables to the motherboard open to unplug the cords.
-
-
-
-
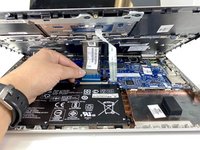
Remove the purple cable attaching the battery to the motherboard by flipping the black flap and pulling the cable out.
-
Remove seven 4 mm screws using a Phillips #00 Screwdriver.
-
-
-
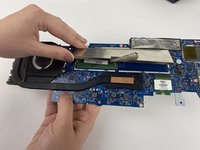
Remove the battery by gently pushing battery up, then pulling.
-
-
-
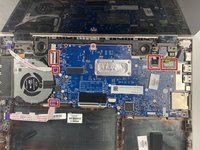
Unclip the 5 cables connecting the motherboard to the computer.
-
-
-
Remove ten 4 mm screws using a Phillips #00 screwdriver.
-
-
crwdns2935267:0crwdne2935267:0Tweezers$4.99
-
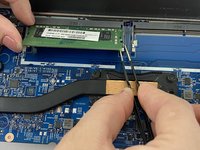
Flip the motherboard upside down and remove the silver box covering the RAM sticks.
-
Using your fingers or a pair of tweezers, pull the edges of the card to the side and lift the RAM out of the motherboard.
-


To reassemble your device, follow these instructions in reverse order.
To reassemble your device, follow these instructions in reverse order.
crwdns2935221:0crwdne2935221:0
crwdns2935227:0crwdne2935227:0
crwdns2915084:0crwdne2915084:0

Embry-Riddle Aeronautical University, Team S7-G5, Rauch Spring 2020 crwdns2935289:0Embry-Riddle Aeronautical University, Team S7-G5, Rauch Spring 2020crwdne2935289:0
ERAU-RAUCH-S20S7G5
crwdns2931471:03crwdne2931471:0
crwdns2935297:010crwdne2935297:0
crwdns2947410:01crwdne2947410:0
Don't forget the WIFI chip in step 7, take out the silver screw first before taking off the motherboard.