crwdns2915892:0crwdne2915892:0
If you are unable to play a CD/DVD on your laptop, there is most likely damage to the optical drive. Use this guide to help replace the drive in order to restore the laptop back to normal working conditions.
crwdns2942213:0crwdne2942213:0
-
-
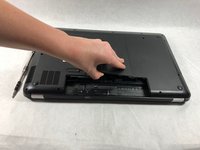
Slide the battery removal switch towards the center of the laptop until the battery pops out.
-
-
-
Remove the battery from the computer.
-
-
-
Unscrew the two 4mm Phillips #0 screws found in the surface panel.
-
-
-
-
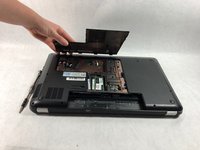
Using the spudger, pry the surface panel off starting from the side where the battery was located.
-
Pry the remainder of the panel off by sliding the spudger underneath the panel and gently lifting.
-
-
-
Lift the pried surface panel off of the computer.
-
-
-
Use the screwdriver to remove the 4mm Phillips #0 screw holding the optical drive in.
-
-
-
Use your fingers to grab the optical drive.
-


To reassemble your device, follow these instructions in reverse order.
To reassemble your device, follow these instructions in reverse order.
crwdns2915084:0crwdne2915084:0

UMass Dartmouth, Team S6-G3, Peak Spring 2019 crwdns2935289:0UMass Dartmouth, Team S6-G3, Peak Spring 2019crwdne2935289:0
UMASSD-PEAK-S19S6G3
crwdns2931471:03crwdne2931471:0
crwdns2935297:05crwdne2935297:0
crwdns2947412:02crwdne2947412:0
What do you do when the DVD drive will NOT slide out? That’s my problem. There’s no disk inside; the unit is simply stuck shut. Now what do you do?
For me, the DVD drive connection had, what I think was soda, inside of the port and it acted like a sort of glue so brute force may be the option.
After a deep cleaning of the connections, it worked like new.