crwdns2915892:0crwdne2915892:0
This guide would be used if your screen gets damaged or no longer functions. All screws are a PH00 size. It would be advisable to keep track of which screws go where, as there are a lot of screws that will be removed over the course of this guide. Be sure to wear the anti-static guard strap, as that will protect the circuitry from permanent damage from static electricity.
crwdns2942213:0crwdne2942213:0
-
-
Flip over the device so that the bottom is facing you.
-
Locate the battery on the bottom of your laptop.
-
-
-
Slide the tab all the way over to the left until battery pops out. Lift out and remove battery.
-
-
-
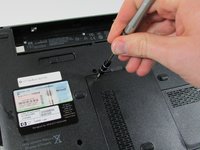
Remove the RAM port cover by unscrewing the two screws.
-
-
-
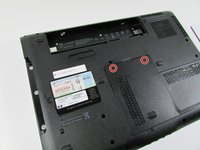
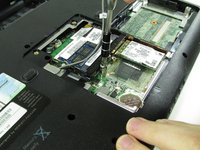
Use a Phillips #00 screwdriver to remove the two screws securing Hard Disk Drive (HDD) cover.
-
-
-
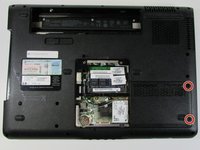
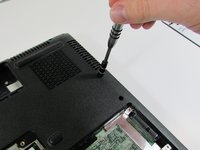
Use a Phillips #00 screwdriver to remove the 25 screws securing the bottom of the computer.
-
-
-
-
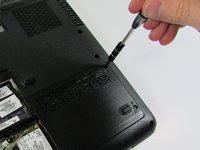
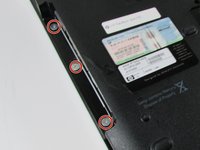
Using the Phillips #0 screwdriver remove the 2 screws.
-
-
-
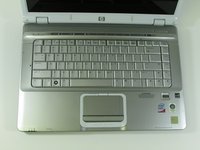
Flip over HP Pavilion dv6700 so that the top is facing you.
-
Open up HP Pavilion dv6700.
-
-
-
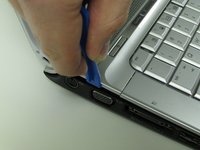
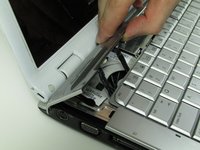
Use an iFixit opening tool to pry open the plastic bar above the keyboard.
-
-
-
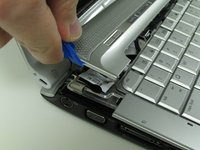
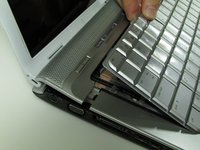
Pull out and up on keyboard to remove it.
-
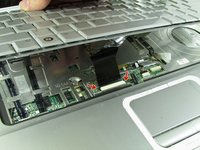
Slide the two black locks on the side of the keyboard cable connection port up to release the cable.
-
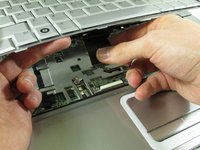
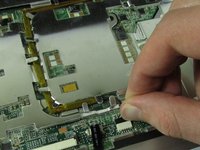
Grip the ribbon cable near the connection point and gently but firmly pull it out.
-
-
-
Flip over the plastic bar.
-
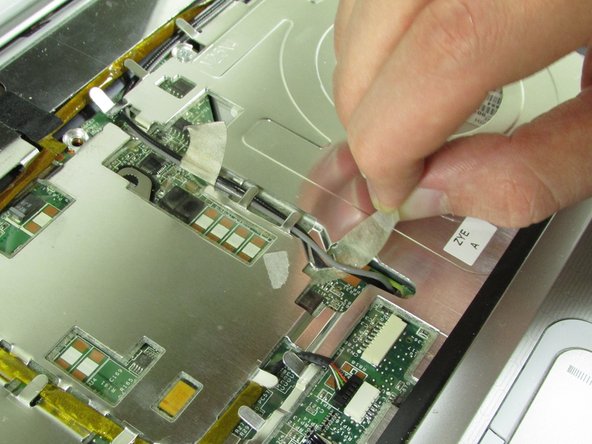
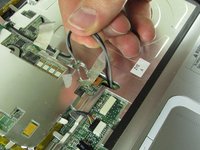
Detach the display connector.
-
-
-
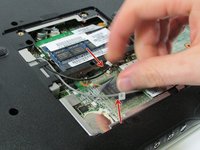
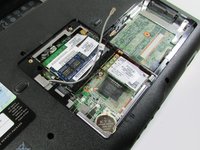
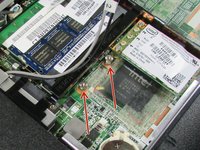
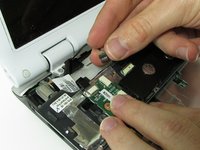
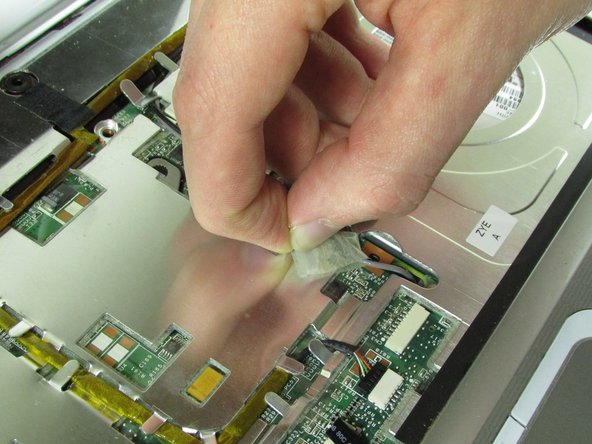
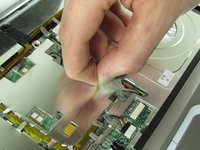
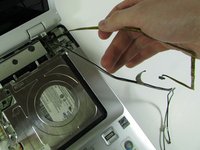
Pull up on the WiFi wires and out from under the metal tabs.
-
-
-
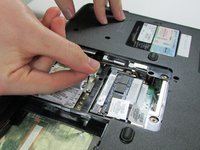
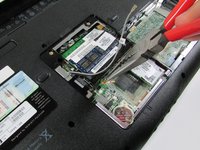
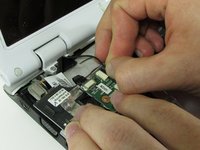
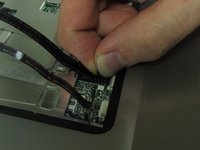
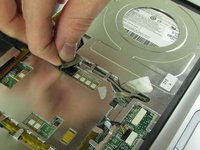
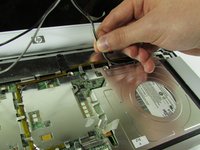
Disconnect the connector from the port.
-
Remove the wire from under the metal tabs.
-
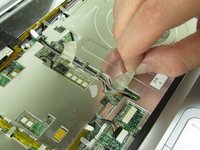
Let wire hang loose after removing under the tabs.
-
-
-
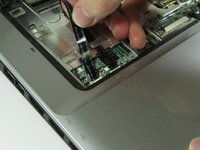
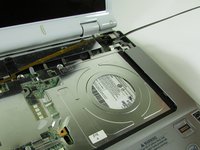
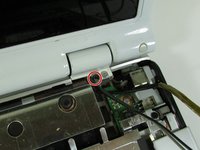
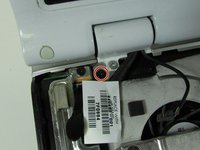
Use a Phillips #00 screwdriver to remove the black screw located in the top right corner near the display.
-
-
-
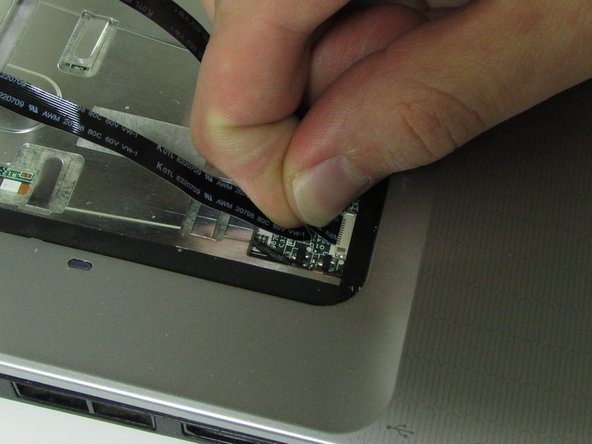
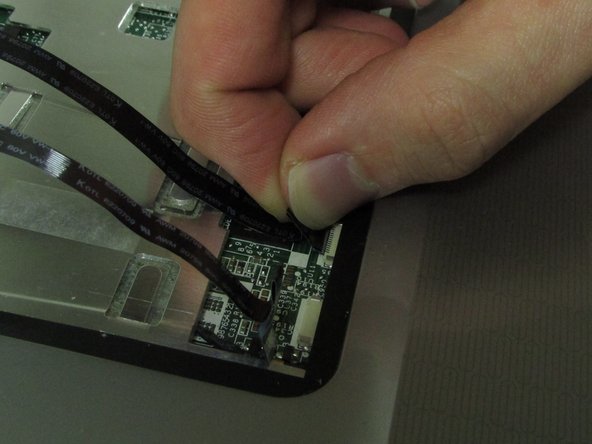
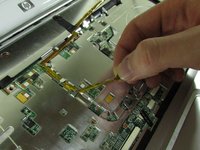
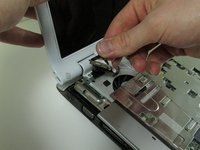
Pull upward on the screen connector tab.
-
-
-
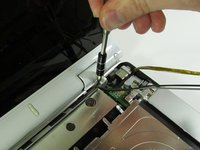
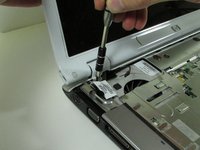
Use a Phillips #00 screwdriver to remove the black screw securing the screen.
-
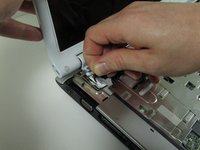
Lift the screen off and set it aside.
-


To reassemble your device, follow these instructions in reverse order.
To reassemble your device, follow these instructions in reverse order.
crwdns2935221:0crwdne2935221:0
crwdns2935229:02crwdne2935229:0
crwdns2915084:0crwdne2915084:0

University of Illinois Urbana-Champaign, Team 1-118, Wolske Fall 2015 crwdns2935289:0University of Illinois Urbana-Champaign, Team 1-118, Wolske Fall 2015crwdne2935289:0
UICU-WOLSKE-F15S1G118
crwdns2934841:01crwdne2934841:0
crwdns2935297:06crwdne2935297:0