crwdns2933423:0crwdne2933423:0

HP Pavilion G60-630US Hard Drive Replacement

crwdns2942213:0crwdne2942213:0

  1. HP Pavilion G60-630US Hard Drive Replacement, Battery: crwdns2935265:01crwdnd2935265:01crwdnd2935265:03crwdne2935265:0 HP Pavilion G60-630US Hard Drive Replacement, Battery: crwdns2935265:01crwdnd2935265:02crwdnd2935265:03crwdne2935265:0 HP Pavilion G60-630US Hard Drive Replacement, Battery: crwdns2935265:01crwdnd2935265:03crwdnd2935265:03crwdne2935265:0
    • Make sure the laptop is powered off and unplugged first.

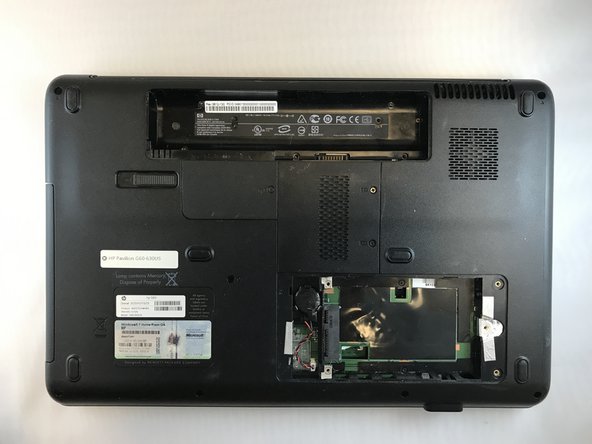
    • Turn your laptop over so the bottom is facing up.

    • Locate the battery latch and slide the latch switch all the way to the left.

    • The latch will lock and stay in place.

  2. HP Pavilion G60-630US Hard Drive Replacement: crwdns2935265:02crwdnd2935265:01crwdnd2935265:03crwdne2935265:0 HP Pavilion G60-630US Hard Drive Replacement: crwdns2935265:02crwdnd2935265:02crwdnd2935265:03crwdne2935265:0 HP Pavilion G60-630US Hard Drive Replacement: crwdns2935265:02crwdnd2935265:03crwdnd2935265:03crwdne2935265:0
    • Carefully lift the battery out and away from the laptop.

  3. HP Pavilion G60-630US Hard Drive Replacement, Hard Drive: crwdns2935265:03crwdnd2935265:01crwdnd2935265:01crwdne2935265:0
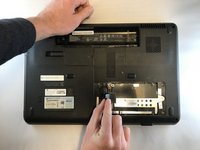
    • Remove the two 5.5 mm JIS#0 screws from the hard drive cover.

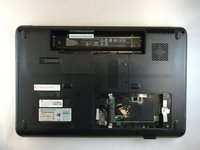
    • Remove cover from the back of the laptop.

  4. HP Pavilion G60-630US Hard Drive Replacement: crwdns2935265:04crwdnd2935265:01crwdnd2935265:01crwdne2935265:0
    • Remove three 5.5 mm JIS#0 screws.

  5. HP Pavilion G60-630US Hard Drive Replacement: crwdns2935265:05crwdnd2935265:01crwdnd2935265:01crwdne2935265:0
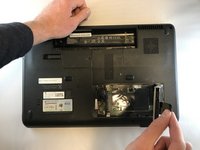
    • Gently, slide the whole hard drive to the right with your fingers.

  6. HP Pavilion G60-630US Hard Drive Replacement: crwdns2935265:06crwdnd2935265:01crwdnd2935265:03crwdne2935265:0 HP Pavilion G60-630US Hard Drive Replacement: crwdns2935265:06crwdnd2935265:02crwdnd2935265:03crwdne2935265:0 HP Pavilion G60-630US Hard Drive Replacement: crwdns2935265:06crwdnd2935265:03crwdnd2935265:03crwdne2935265:0
    • Lift up on black tap attached to the hard drive to remove the hard drive.

crwdns2915888:0crwdne2915888:0

To reassemble your device, follow these instructions in reverse order.

Nicole Welter

crwdns2935283:009/27/17crwdne2935283:0

213 crwdns2915208:0crwdne2915208:0

crwdns2935297:02crwdne2935297:0

crwdns2915084:0crwdne2915084:0

Eastern Washington University, Team S1-G6, Carnegie Fall 2017 crwdns2935289:0Eastern Washington University, Team S1-G6, Carnegie Fall 2017crwdne2935289:0

EWU-CARNEGIE-F17S1G6

crwdns2931471:03crwdne2931471:0

crwdns2935297:03crwdne2935297:0

crwdns2944067:00crwdne2944067:0

crwdns2917038:0crwdne2917038:0

crwdns2936625:0crwdne2936625:0:

crwdns2936751:024crwdne2936751:0 1

crwdns2936753:07crwdne2936753:0 3

crwdns2936753:030crwdne2936753:0 15

crwdns2942667:0crwdne2942667:0 721