crwdns2915892:0crwdne2915892:0
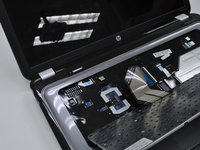
This guide aims to teach you how to replace a motherboard for the HP Pavilion G6-1d16dx, a necessary step if your computer has overheated and shorted the board. Unlike a PC, the HP Pavilion G6-1d16dx is a compact machine that has tightly integrated components, so be sure to take your time.
The motherboard is the main printed circuit board (also known as PCB) for computers and electronics. It connects all the components in the device, allowing them to communicate. A faulty motherboard may not allow devices to communicate properly or receive enough power.
Before using this guide, make sure that the laptop is receiving enough cooling, and is drawing enough air into the chassis (also known as the frame). Typically, the fans on a laptop get clogged with dust and debris overtime, making it harder to pull in air and cool the components properly. The dust can be removed by using short compressed air burst through the laptops vents, or by opening up the chassis and using a soft brush or cotton swabs to physically clean off debris. Be sure to test the laptop afterwards to confirm the motherboard is the issue.
Before beginning, make sure the laptop is powered off, and is disconnected from any external power source.
crwdns2942213:0crwdne2942213:0
-
-
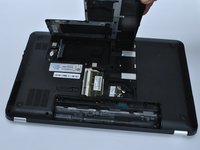
Flip the computer so that the bottom side is facing up, and locate the battery above the screen hinges.
-
-
-
Slide the switch under the battery compartment to release the battery.
-
-
-
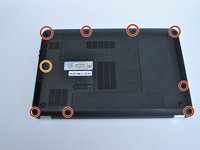
Unscrew the two silver screws holding the protective cover in place until they make a clicking noise.
-
-
-
-
Unsnap the Cover by lifting the edge along the battery compartment.
-
Remove all of the body screws.
-
Remove the rubber cap and the screw underneath it.
-
-
-
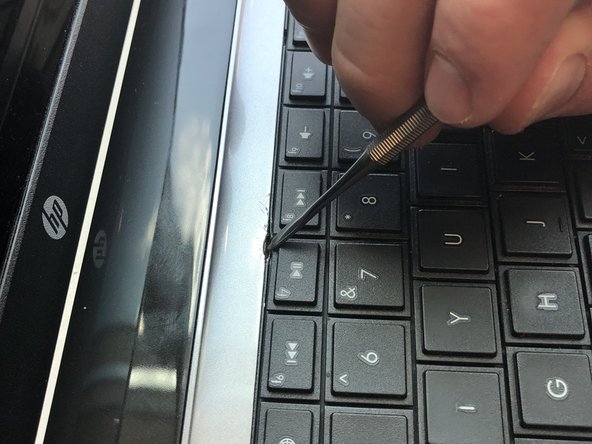
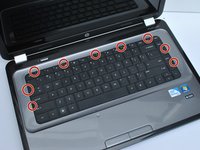
Using a metal tool, depress the center tab and pry up the keyboard by pivoting the tool towards the screen.
-
-
-
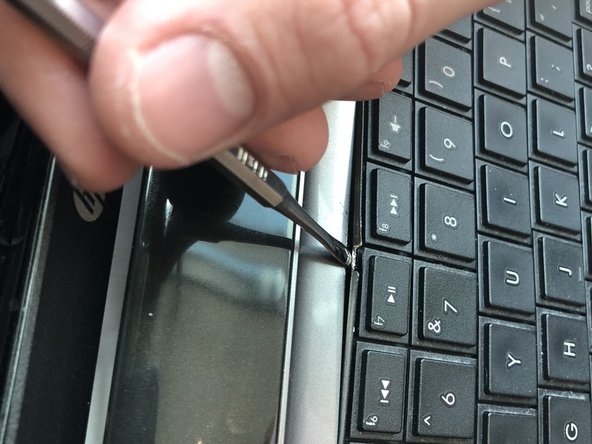
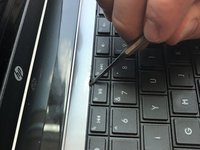
Slide the tool that is now under the keyboard sideways along the edge and use another tool to depress the other tabs along the edge of the keyboard.
-
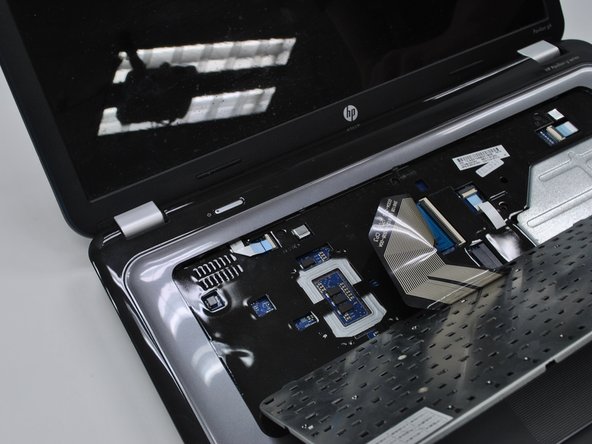
Lift off the keyboard
-
-
-
Flip up the black tab holding the keyboard in place via the ribbon cable and pull out the cable
-
-
-
Remove the two remaining ribbon cables.
-
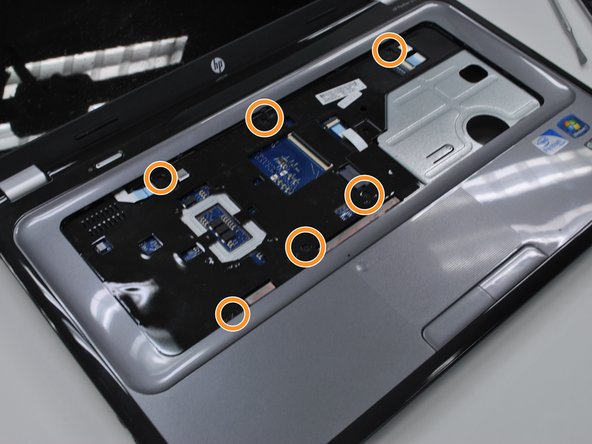
Remove the screws holding in the protective cover underneath the keyboard.
-
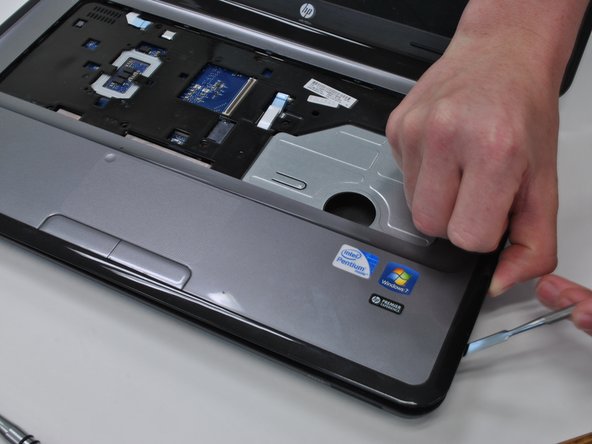
Pop the cover off using any flat metal tool, starting with where you took out the optical drive
-
-
-
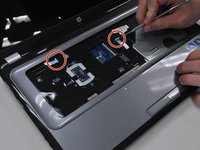
Unplug the ribbon cable on the right side of the motherboard.
-
-
-
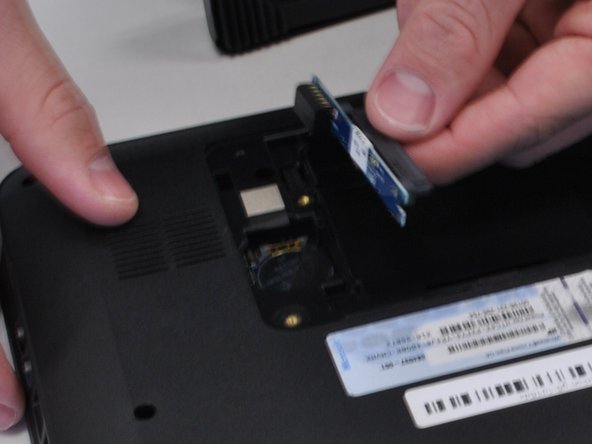
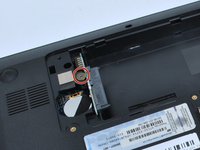
Underneath the computer, unscrew the hard drive connector screw, and pop out the hard drive plug-in.
-
-
-
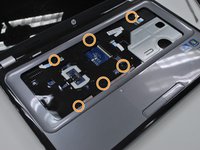
Unscrew all mother board screws and lift the motherboard out of the body.
-


To reassemble your device, follow these instructions in reverse order.
crwdns2935221:0crwdne2935221:0
crwdns2935229:04crwdne2935229:0
crwdns2935287:0crwdne2935287:0

Linn Benton Community College, Team S2-G6, Johnson Spring 2018 crwdns2935289:0Linn Benton Community College, Team S2-G6, Johnson Spring 2018crwdne2935289:0
LBCC-JOHNSON-S18S2G6
crwdns2931471:04crwdne2931471:0
crwdns2935297:08crwdne2935297:0