crwdns2933423:0crwdne2933423:0
crwdns2947577:0crwdnd2947577:0crwdne2947577:0

HP Pavilion G6 Screen Replacement

crwdns2942213:0crwdne2942213:0

    1. HP Pavilion G6  Screen Replacement, Remove the battery: crwdns2935265:01crwdnd2935265:01crwdnd2935265:03crwdne2935265:0 HP Pavilion G6  Screen Replacement, Remove the battery: crwdns2935265:01crwdnd2935265:02crwdnd2935265:03crwdne2935265:0 HP Pavilion G6  Screen Replacement, Remove the battery: crwdns2935265:01crwdnd2935265:03crwdnd2935265:03crwdne2935265:0
      • Close the laptop and flip it over.

      • Slide the release pin to pop the battery.

      • Remove the battery completely.

      crwdns2952109:0crwdne2952109:0

      crwdns2917038:0crwdne2917038:0

    2. HP Pavilion G6  Screen Replacement, Remove the screw covers: crwdns2935265:02crwdnd2935265:01crwdnd2935265:03crwdne2935265:0 HP Pavilion G6  Screen Replacement, Remove the screw covers: crwdns2935265:02crwdnd2935265:02crwdnd2935265:03crwdne2935265:0 HP Pavilion G6  Screen Replacement, Remove the screw covers: crwdns2935265:02crwdnd2935265:03crwdnd2935265:03crwdne2935265:0
      crwdns2935267:0crwdne2935267:0
      Tweezers
      $4.99
      • Open the laptop and locate the screw covers.

      • Remove the screw covers at the bottom of the screen with tweezers.

      • Keep them somewhere safe as you will need to stick them back after the repair.

      crwdns2952109:0crwdne2952109:0

      crwdns2917038:0crwdne2917038:0

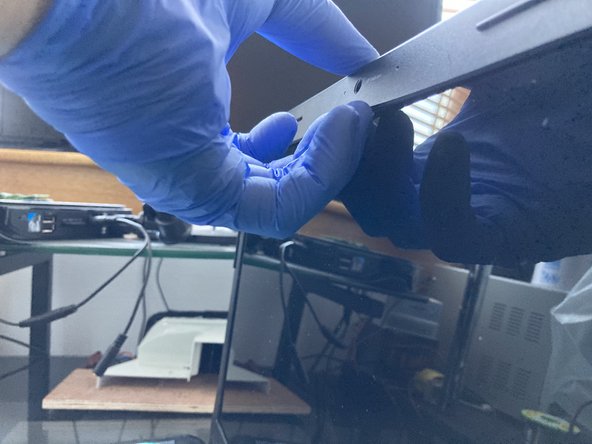
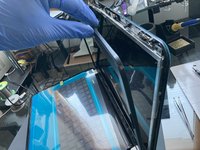
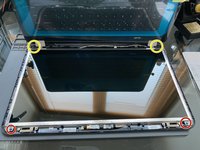
    3. HP Pavilion G6  Screen Replacement, Remove the plastic frame: crwdns2935265:03crwdnd2935265:01crwdnd2935265:03crwdne2935265:0 HP Pavilion G6  Screen Replacement, Remove the plastic frame: crwdns2935265:03crwdnd2935265:02crwdnd2935265:03crwdne2935265:0 HP Pavilion G6  Screen Replacement, Remove the plastic frame: crwdns2935265:03crwdnd2935265:03crwdnd2935265:03crwdne2935265:0
      • Unscrew the exposed 2 x Philips screws and set them aside.

      • Starting from the top, pry up the plastic frame with your fingernails or a pry bar.

      • If you are using a pry bar, it can scratch the screen. Apply gentle pressure until the plastic frame pop out all around the frame. Don't force it!

      • Finally, remove the frame.

      crwdns2952109:0crwdne2952109:0

      crwdns2917038:0crwdne2917038:0

    4. HP Pavilion G6  Screen Replacement, Release the screen from the frame: crwdns2935265:04crwdnd2935265:01crwdnd2935265:03crwdne2935265:0 HP Pavilion G6  Screen Replacement, Release the screen from the frame: crwdns2935265:04crwdnd2935265:02crwdnd2935265:03crwdne2935265:0 HP Pavilion G6  Screen Replacement, Release the screen from the frame: crwdns2935265:04crwdnd2935265:03crwdnd2935265:03crwdne2935265:0
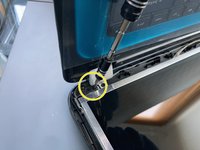
      • Remove the black Philips screw from the top on each side.

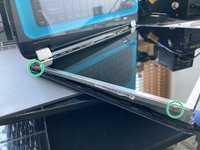
      • Remove the bottom screw from the hinge to make an easier access to the screws on the side of the screen.

      • Now that the frame is loose, you can remove the 4 x Philips screws holding the screen in the frame.

      crwdns2952109:0crwdne2952109:0

      crwdns2917038:0crwdne2917038:0

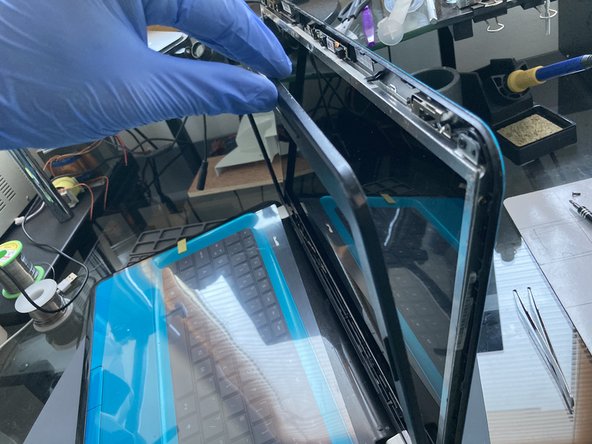
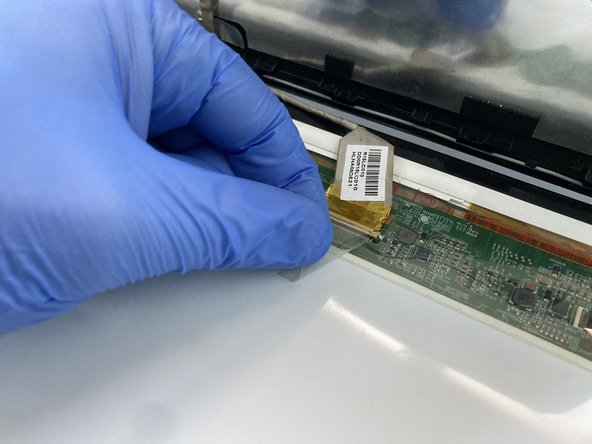
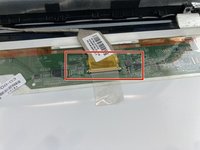
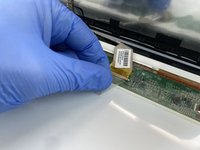
    5. HP Pavilion G6  Screen Replacement, Disconnect the screen connector: crwdns2935265:05crwdnd2935265:01crwdnd2935265:03crwdne2935265:0 HP Pavilion G6  Screen Replacement, Disconnect the screen connector: crwdns2935265:05crwdnd2935265:02crwdnd2935265:03crwdne2935265:0 HP Pavilion G6  Screen Replacement, Disconnect the screen connector: crwdns2935265:05crwdnd2935265:03crwdnd2935265:03crwdne2935265:0
      • Turn the laptop back up and carefully tilt the screen out from the frame and rest it on the keyboard.

      • Don't try to fully remove it yet as it is still attached to the motherboard by the screen cable!

      • Gently lift up the adhesive and disconnect the screen connector. That is the screen released and ready for a change for a new one.

      crwdns2952109:0crwdne2952109:0

      crwdns2917038:0crwdne2917038:0

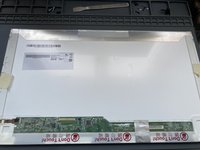
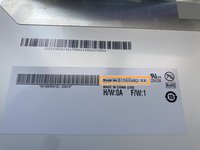
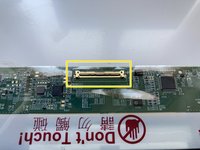
    6. HP Pavilion G6  Screen Replacement, Check the model number before ordering: crwdns2935265:06crwdnd2935265:01crwdnd2935265:02crwdne2935265:0 HP Pavilion G6  Screen Replacement, Check the model number before ordering: crwdns2935265:06crwdnd2935265:02crwdnd2935265:02crwdne2935265:0
      • Before ordering a new screen make sure that you order the correct model number that is compatible with your old screen.

      • Check the cable connector to make sure you order the correct screen with the correct number of pins.

      crwdns2952109:0crwdne2952109:0

      crwdns2917038:0crwdne2917038:0

crwdns2915888:0crwdne2915888:0

To reassemble your device, follow these instructions in reverse order.

crwdns2935221:0crwdne2935221:0

crwdns2935229:02crwdne2935229:0

honakrisi

crwdns2935283:001/28/20crwdne2935283:0

4,573 crwdns2915208:0crwdne2915208:0

crwdns2935297:09crwdne2935297:0

crwdns2947412:00crwdne2947412:0

crwdns2917038:0crwdne2917038:0

crwdns2936625:0crwdne2936625:0:

crwdns2936751:024crwdne2936751:0 6

crwdns2936753:07crwdne2936753:0 30

crwdns2936753:030crwdne2936753:0 89

crwdns2942667:0crwdne2942667:0 2,345