crwdns2915892:0crwdne2915892:0
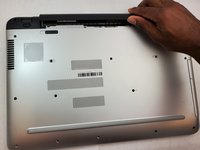
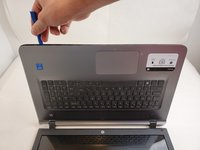
This guide will teach you how to remove the back cover of the laptop. This guide will be important for a lot of other replacement guides.
crwdns2942213:0crwdne2942213:0
-
-
Slide the battery lock to the right until you see the open lock symbol.
-
-
-
Slide the battery release to the left until the battery pops up.
-
-
-
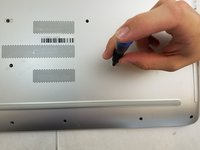
Using the metal spudger, pry up the screw covers.
-
-
-
-
Remove the fifteen 7mm screws holding the back casing on using the Phillips #00 screwdriver.
-
-
-
Remove the 7mm screw holding the disc drive in place using the Phillips #00 head screwdriver.
-
-
-
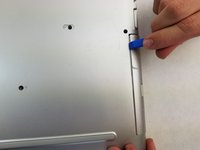
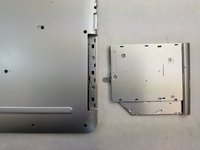
Using an iFixit opening tool, push the disc drive away from the outer case.
-
-
-
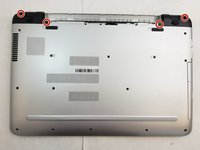
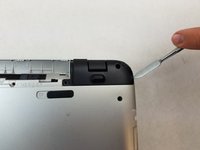
Remove the four 7mm screws holding the back resting plates on using the Phillips #00 screwdriver.
-
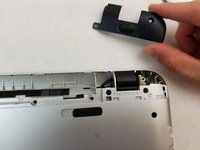
Using a metal spudger, lift up on the back resting plate until it pops off.
-
-
-
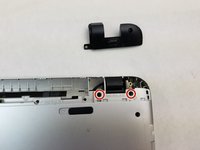
Remove the two 7 mm screws behind the plate using a Phillips #00 screwdriver.
-
-
-
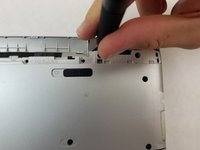
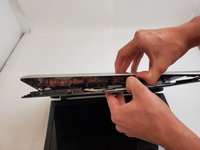
Pry up on the case with an iFixit opening tool until you can feel a snap.
-
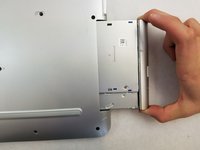
Pry around the remainder until you can separate the case from the keyboard with your hands.
-
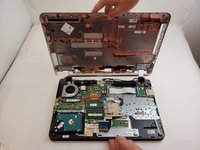
Gently separate the two.
-


To reassemble your device, follow these instructions in reverse order.
To reassemble your device, follow these instructions in reverse order.
crwdns2935221:0crwdne2935221:0
crwdns2935229:04crwdne2935229:0

crwdns2915084:0crwdne2915084:0

Embry-Riddle Aeronautical University, Team S2-G121, Watkins Fall 2019 crwdns2935289:0Embry-Riddle Aeronautical University, Team S2-G121, Watkins Fall 2019crwdne2935289:0
ERAU-WATKINS-F19S2G121
crwdns2931471:03crwdne2931471:0
crwdns2935297:06crwdne2935297:0