crwdns2915892:0crwdne2915892:0
The cooling fan is one of the most important components of the computer. If the fan fails, your processor can overheat and damage the motherboard. This guide will help show you how to replace this safely.
crwdns2942213:0crwdne2942213:0
-
-
Press and hold the release switch, and then slide the battery out. Insert the new battery into the slot and you're done!
-
-
-
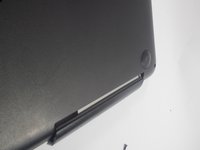
In the battery compartment, find the phillips screw that is holding the rear panel onto the computer. Unscrew it.
-
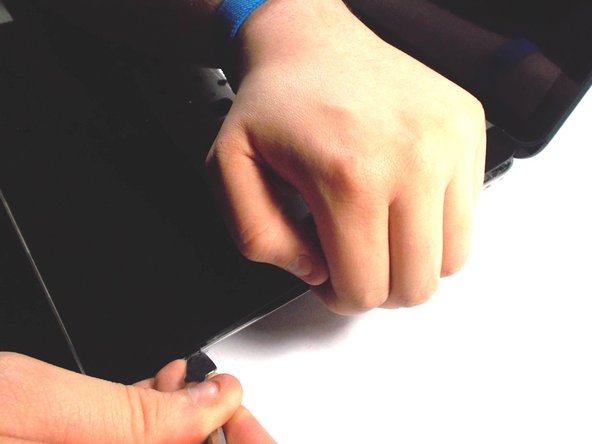
With the battery compartment closest to you, push the panel away from you. Once it slides back until it stops, gently lift it and put it to the side.
-
Please note that this particular screw does not completely come out, it stays with the rear panel and that is ok.
-
-
crwdns2935267:0crwdne2935267:0Tweezers$4.99
-
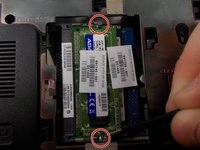
On each side of each RAM card, there will be a thin strip of metal that is holding the chip down. Using tweezers or another thin tool, gently push these pins apart.
-
The first RAM card should pop up on its own. Gently remove this card, and look for the two strips of metal holding the bottom card down.
-
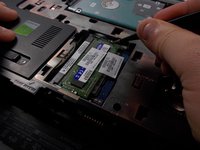
Push the pins apart just like for card one. Just like the first card, this one will pop up and you can remove it.
-
-
crwdns2935267:0crwdne2935267:0Tweezers$4.99
-
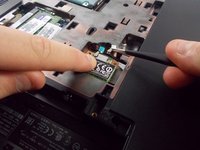
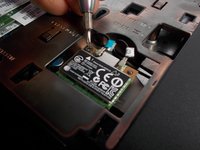
Undo the two clips attached to the wifi chip by pulling up gently with a pair of tweezers.
-
Unscrew the 9mm phillips screw holding the wifi chip in place.
-
Gently remove the wifi chip from its socket and place it to the side.
-
-
-
-
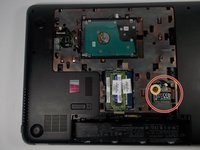
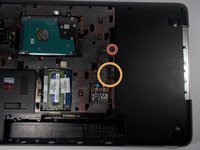
With the battery compartment closest to you, there will be a 9mm screw next in the center-right of the back plate, labeled with a keyboard symbol and a disk symbol. Remove this phillips screw.
-
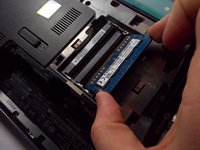
In the opening next to the screw, gently push out against the disk drive, and remove it from the disk drive compartment.
-
-
-
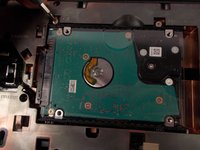
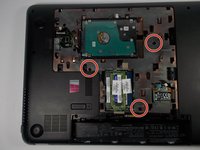
Remove the two silver phillips screws from the hard drive.
-
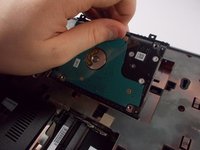
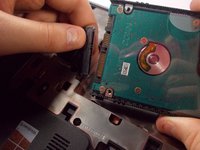
Using the plastic tab, remove the hard drive from its socket.
-
Unplug the hard drive from the wire connecting it to the motherboard.
-
-
crwdns2935267:0crwdne2935267:0Tweezers$4.99
-
Unscrew each marked 9mm screw on the rear plate. This will allow you to pull the keyboard off.
-
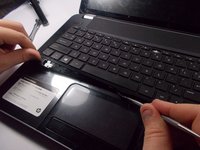
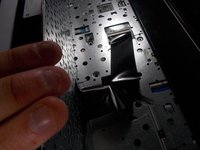
With a pair of tweezers or other thin object, push in and slightly to the left (away from the disk drive compartment). On the face of the computer (the keyboard side), you will see part of the keyboard get pushed up. Using the spudger, wedge the keyboard and slide the spudger along all four corners.
-
If you meet alot of resistance, go back and make sure you have undone every screw marked with a keyboard symbol.
-
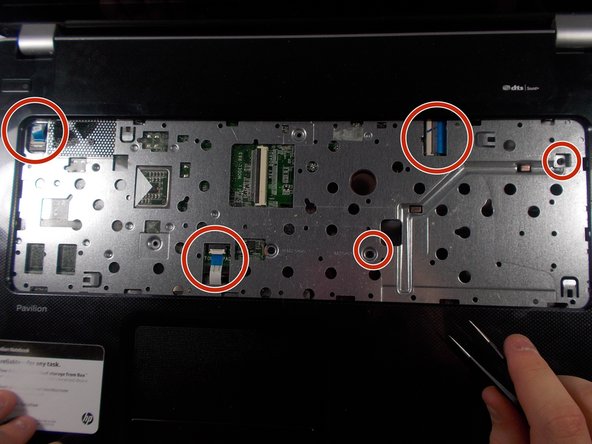
Once the keyboard has been popped out, using the tweezers, undo the latch locking the keyboard's ribbon cable in place. Then remove the keyboard.
-
-
crwdns2935267:0crwdne2935267:0Tweezers$4.99
-
Using your tweezers, undo all ribbon cable you see where the keyboard was removed.
-
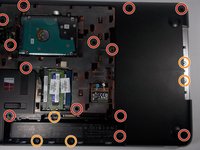
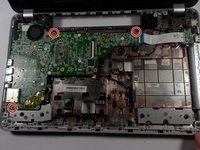
Remove all 9mm screws from the rear panel of your computer. They are marked red in the first picture.
-
Remove all 5mm screws from the rear panel of your computer. They are marked orange in the first picture.
-
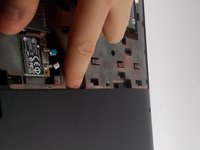
Using your fingers, push the bottom of the battery compartment out slightly, making a small gab in the face plate on the opposite side.
-
Using the spudger, undo all clips around the outer edge of the computer, popping the front face plate out of the enclosure. If you meet resistance, you most likely forgot to remove a screw, check for any that are still there, and remove them.
-
Once the front plate has been popped out, look close to make sure all connections are disconnected from it before pulling it away from the computer.
-
-
-
Unscrew each 9mm screw on the motherboard.
-
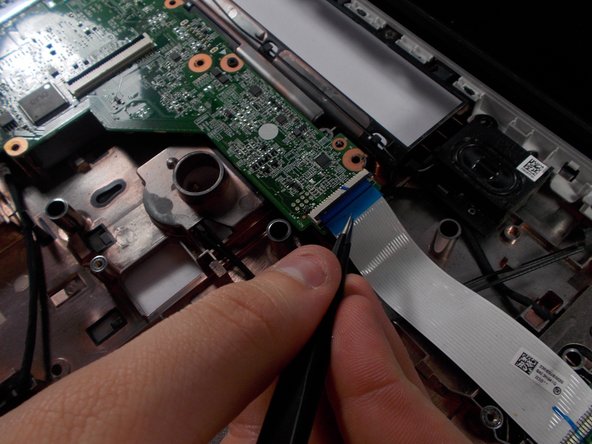
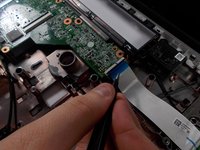
Unplug each ribbon cable connection to the motherboard. Also unplug every connector to the motherboard.
-
-
-
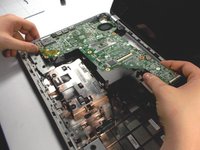
Gently lift the mother board up and in the direction opposite the USB, VGA, and Fan.
-
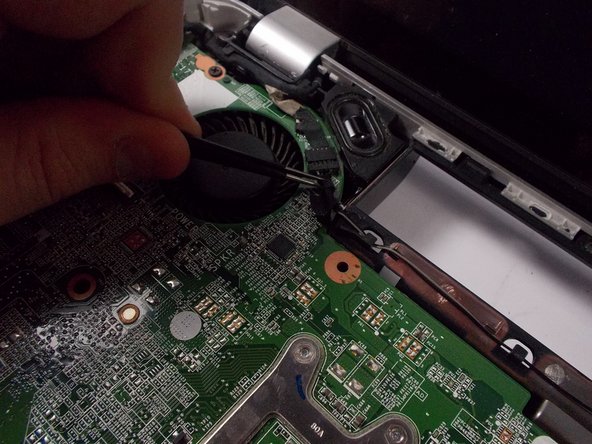
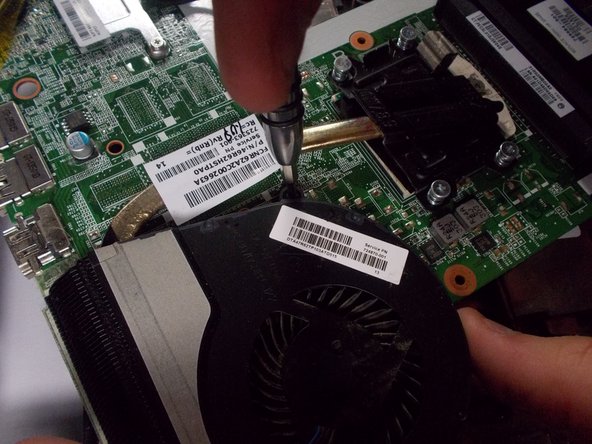
Rotate the motherboard, and unscrew the fan on the bottom.
-
Remove the old fan, carefully scrape off the thermal paste from the CPU.
-
Apply a new layer of thermal paste to the CPU, and attach the new cooling fan.
-


To reassemble your device, follow these instructions in reverse order.
To reassemble your device, follow these instructions in reverse order.
crwdns2935221:0crwdne2935221:0
crwdns2935229:06crwdne2935229:0
crwdns2915084:0crwdne2915084:0

UMass Dartmouth, Team 1-6, Miles Spring 2016 crwdns2935289:0UMass Dartmouth, Team 1-6, Miles Spring 2016crwdne2935289:0
UMASSD-MILES-S16S1G6
crwdns2931471:03crwdne2931471:0
crwdns2935297:09crwdne2935297:0