crwdns2915892:0crwdne2915892:0
The HP Pavilion headphone jack is an audio port that sends and/or receives audio signals to connect devices like headphones, external speakers, or headsets. Replace your 15-p214dx Headphone Jack if the jack is loose, broken, or if there is an internal problem, such as a detached or damaged solder connection to the motherboard. A solder connects electronic components to the conductive pathways on a printed circuit board (PCB). Some other common reasons for replacement include sound coming only from one side, no sound at all, or scratchy audio quality. This guide will show you how to maneuver through your computer and replace the headphone jack successfully.
Once your circuit board is removed, you must dispose of it properly.
crwdns2942213:0crwdne2942213:0
-
-
Place your laptop on a flat surface with the bottom facing upwards. The HP logo should be facing downwards.
-
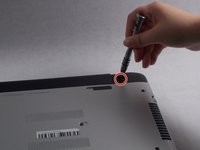
Locate the disk drive screw. It is a 7mm screw that can be found to the upper left on label on the bottom of the computer and is marked with a disk drive symbol.
-
Remove this screw using a Philips #0 screwdriver.
-
-
-
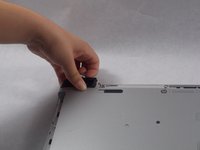
Place your thumbnail between the disk drive exterior and your laptop's bottom cover.
-
Pull outwards to slide the disk drive out of its slot.
-
-
-
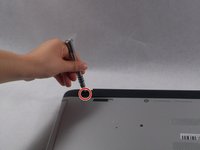
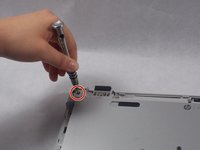
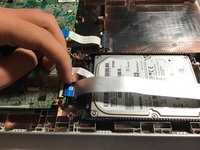
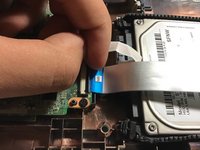
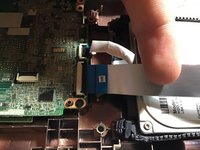
Using a magnetic screwdriver with a Philips #0 head, remove all of the visible screws on your laptop's bottom face. These screws are all about 7.5mm long.
-
-
-
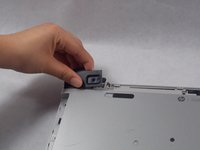
Remove the 5.5mm screws holding the computer's end caps in place. The end caps are located to the left and right of the battery.
-
-
-
Lift both end caps from their respective corners.
-
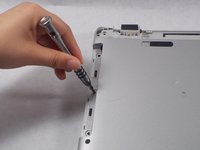
Use a Philips #0 screwdriver to remove the 4.3mm screw that is underneath both end caps.
-
-
-
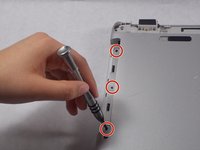
Use a Philips #0 screwdriver to remove the three 5.5mm screws in on the edge of the disk drive slot.
-
-
-
Flip your computer so that the bottom is now on the surface. Open the laptop like you normally would if you were about to use it.
-
Use a plastic opening tool to separate the top cover from the bottom cover.
-
-
-
While lifting the top cover, undo the clip holding the keyboard cable in place.
-
Slide the cable out of its port.
-
-
-
Undo the clip holding the touchpad cable in place.
-
Remove the touchpad cable from its port.
-
-
-
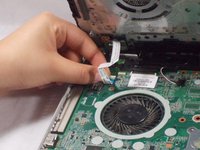
Undo the clip holding the power button cable in place.
-
Disconnect the power button cable from its port.
-
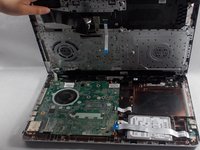
Gently lift the top cover to remove it from the computer.
-
-
-
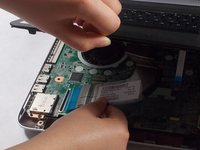
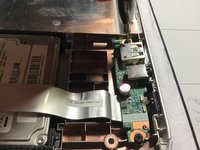
Undo the clip holding the small circuit cable.
-
Gently pull the cable out from the clip.
-
-
-
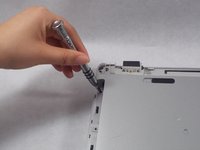
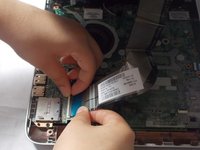
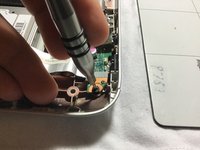
Using a magnetic screwdriver with a Philips #0 head, remove both screws that are holding down the circuit These screws are all about 5.5mm long.
-
-
-
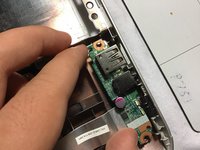
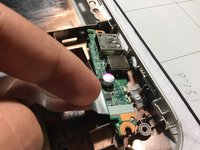
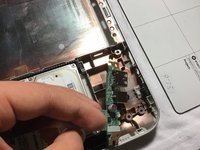
Once the circuit is unmounted gently remove the circuit board to be replaced.
-


To reassemble your device, follow these instructions in reverse order.
To reassemble your device, follow these instructions in reverse order.
crwdns2935221:0crwdne2935221:0
crwdns2935227:0crwdne2935227:0
crwdns2915084:0crwdne2915084:0

UMass Dartmouth, Team S2-G1, Simcock Spring 2019 crwdns2935289:0UMass Dartmouth, Team S2-G1, Simcock Spring 2019crwdne2935289:0
UMASSD-SIMCOCK-S19S2G1
crwdns2931471:04crwdne2931471:0
crwdns2935297:08crwdne2935297:0