crwdns2915892:0crwdne2915892:0
WARNING: The computer should be off (no power running), unplugged and the battery must be removed to prevent electrical shock.
If the hard drive needs to be replaced in the HP Pavilion 15-n210dx use this guide. The keyboard needs to be removed before opening up the laptop to get to the hard drive.
The hard drive, also known as hard drive disk (HDD) or solid state drive (SSD), is a hardware component of a computer that stores files and programs. If a lack of storage is causing hardware problems, make sure the new one has a larger storage capacity when you are replacing the old one. Other indications that the hard drive needs to be replaced, is the emitting of noises, crashes, or frequent error messages.
Back up the hard drive before starting the replacement to ensure files are safe. Once the new hard drive is installed, restore the files.
Tools that are needed is a Y0 screwdriver and a metal spudger.
crwdns2942213:0crwdne2942213:0
-
-
Push the pins towards each other using your thumbs. The battery will pop out a little bit. Remove it using your hand.
-
-
-
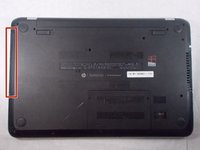
Turn over the laptop and remove the single screw using a Tri-point Y0 screwdriver.
-
-
-
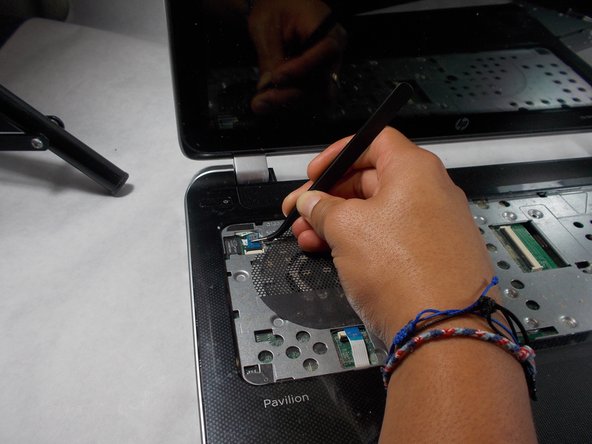
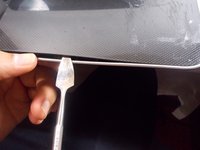
Open the laptop and use a spudger gently to get under the keyboard. Loosen the keyboard on all sides and then lift it up.
-
-
-
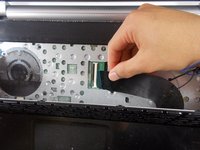
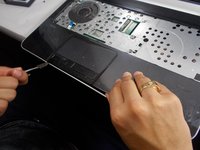
Use the spudger to unhinge the fastener and remove the connector.
-
-
-
-
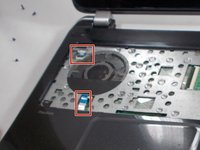
Use the Tri-point Y0 screwdriver to remove all screws on the metal sheet, then remove the metal sheet.
-
-
crwdns2935267:0crwdne2935267:0Tweezers$4.99
-
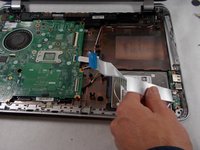
Remove the two blue wire connectors using the reverse tweezers and lift up on the two wires to disconnect them.
-
-
-
Using the Phillips #0 screwdriver, remove the twelve (12) screws from the back panel.
-
-
-
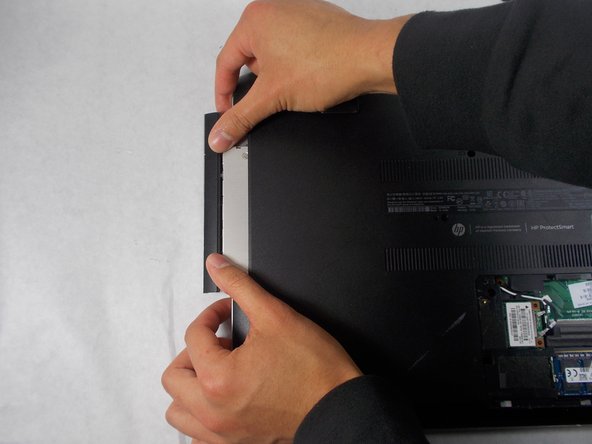
Remove the optic drive by pushing the edge with your thumbs to open it. Once open use two hands to remove it entirely.
-
-
-
Remove the screws that become exposed after removing the optic drive using a Phillips #0 screwdriver.
-
-
-
Wedge the metal spudger between the black and silver plastic.
-
Slide the spudger along the edge of the laptop to help in ease of separation. Next use your hands to separate the black plastic from the silver plastic.
-
-
-
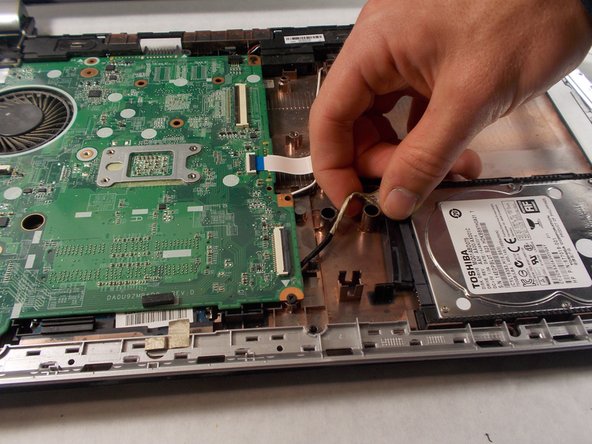
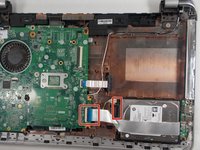
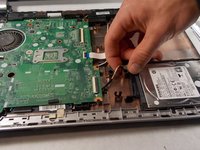
Remove the two connectors that are attached to the hard drive by lifting up and away from the connected port.
-
-
-
Remove the hard drive by lifting up on the back side of it.
-


To reassemble your device, follow these instructions in reverse order.
To reassemble your device, follow these instructions in reverse order.
crwdns2935221:0crwdne2935221:0
crwdns2935229:02crwdne2935229:0
crwdns2915084:0crwdne2915084:0

UMass Dartmouth, Team 3-8, Sinclaire Fall 2021 crwdns2935289:0UMass Dartmouth, Team 3-8, Sinclaire Fall 2021crwdne2935289:0
UMASSD-SINCLAIRE-F21S3G8
crwdns2931471:04crwdne2931471:0
crwdns2935297:06crwdne2935297:0