crwdns2915892:0crwdne2915892:0
Over time, laptop cooling fans can become clogged with dust, fail due to mechanical wear, or stop working entirely. This can lead to overheating, reduced performance, unexpected shutdowns, and potential long-term damage to internal components such as the CPU and GPU. A faulty cooling fan not only shortens the lifespan of the device but may also result in expensive repairs or even permanent hardware failure.
This guide provides a step-by-step process to safely replace the cooling fan in an HP Pavilion 15-cs3003ca, restoring proper cooling functionality and preventing further damage.
Before You Begin:
💡 Backup Your Data: While this repair does not directly affect storage, it is always recommended to back up your important files before working on internal components.
⚠️ Anti-Static Precaution: Internal laptop components are sensitive to electrostatic discharge (ESD). If available, wear an anti-static wrist strap and work on a non-conductive surface to avoid accidental damage.
⚠️ Potential Hazards:
- Internal clips on the back panel may be fragile—handle with care to avoid breakage.
- Small screws are easy to lose—store them in a labeled tray for easy reassembly.
- Unplug the battery before beginning any work to prevent short circuits.
Once you have taken these precautions, you can proceed with confidence to replace the faulty cooling fan and improve your laptop’s performance and longevity.
crwdns2942213:0crwdne2942213:0
-
-
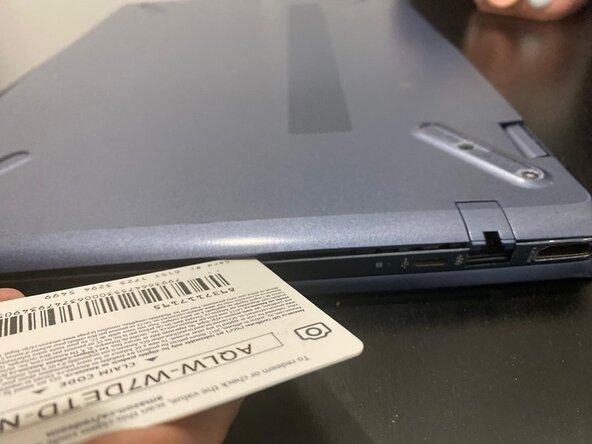
Unplug the power adapter, remove all connected peripherals (USB drives, external monitors, etc.), and place the laptop on a clean, static-free surface to avoid dust and static damage.
-
If available, wear an anti-static wrist strap to prevent electrostatic discharge (ESD) from damaging internal components.
-
-
-
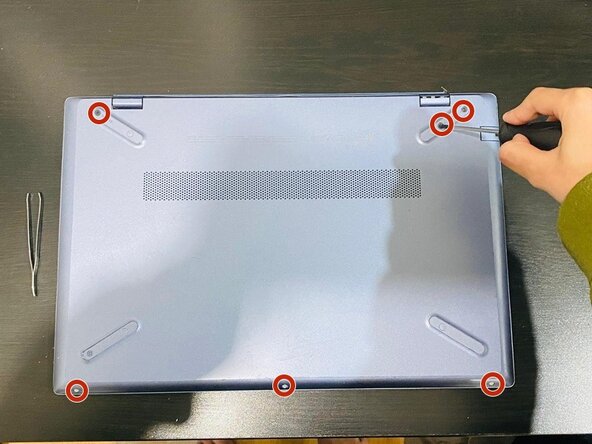
Flip the laptop over so the bottom panel is facing up.
-
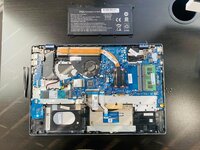
Use a Phillips #0 screwdriver to remove six 3.2 mm screws securing the back panel.
-
Insert a plastic card or opening tool along the edges of the back panel.
-
Gently slide the opening tool around the edges to release the clips.
-
Once loosened, carefully lift the panel off and set it aside.
-
-
-
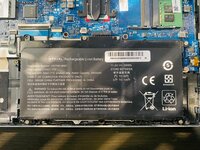
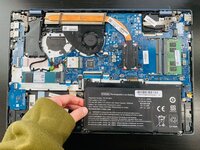
Use a Phillips #0 screwdriver to remove the five screws securing the battery to the laptop.
-
Gently lift the battery approximately 7 mm from the bottom edge, then slide it out of its connector on the motherboard.
-
-
-
-
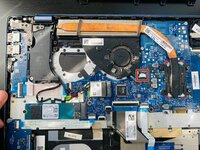
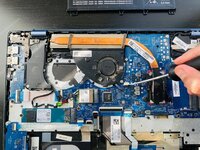
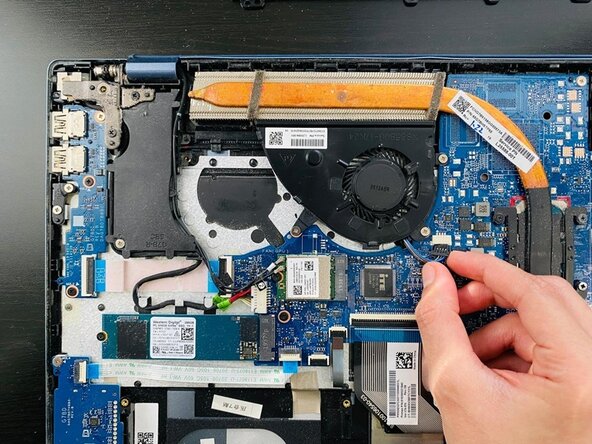
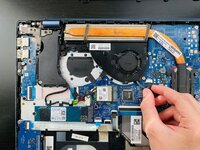
Use the point of a spudger to push on alternating sides of the fan connector to "walk" it out of its socket.
-
-
-
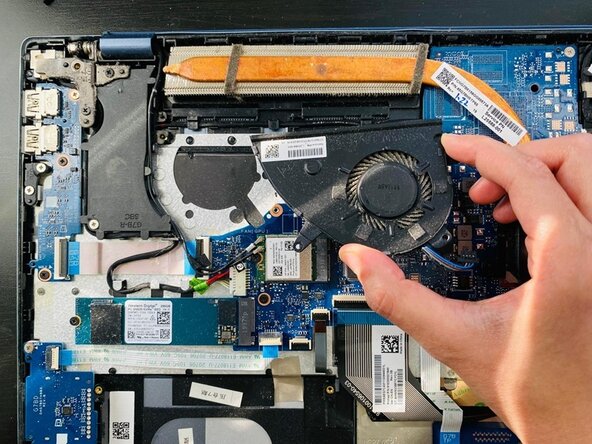
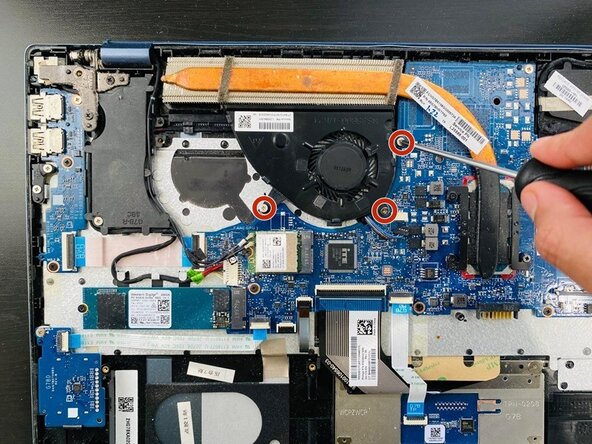
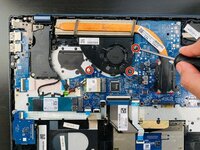
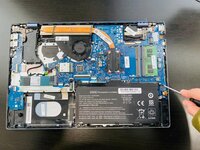
Use a Phillips #0 screwdriver to remove three 2.5 mm screws that secure the fan to the board.
-
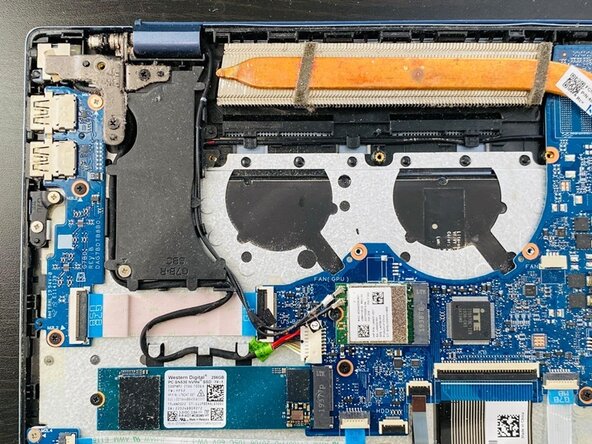
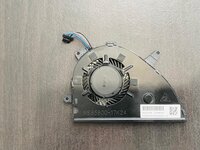
Carefully remove the fan and set it aside to clean the area if necessary.
-
-
-
Carefully replace the fan without bending or pinching any cables.
-
Use a Phillips #0 screwdriver to secure the three 2.5 mm screws.
-
-
-
Slide the battery back in so it plugs into the connector on the motherboard and secure the screws.
-
Replace the back panel and press it down gently around the edges to ensure the clips attach properly.
-
Use the Phillips #0 screwdriver to secure the six 3.2 mm screws.
-


To reassemble your device, follow these instructions in reverse order.

crwdns2935287:0crwdne2935287:0

York University, Team 3-9, Woodhouse Winter 2025 crwdns2935289:0York University, Team 3-9, Woodhouse Winter 2025crwdne2935289:0
YORK-WOODHOUSE-W25S3G9
crwdns2931471:02crwdne2931471:0
crwdns2935303:01crwdne2935303:0