crwdns2933423:0crwdne2933423:0

HP Pavilion 15-b109wm Fan Replacement

crwdns2942213:0crwdne2942213:0

  1. HP Pavilion 15-b109wm Fan Replacement, Battery: crwdns2935265:01crwdnd2935265:01crwdnd2935265:01crwdne2935265:0
    • Power off the device and disconnect from any power source.

  2. HP Pavilion 15-b109wm Fan Replacement: crwdns2935265:02crwdnd2935265:01crwdnd2935265:01crwdne2935265:0
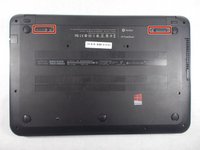
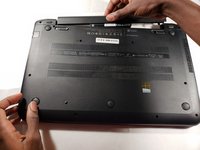
    • Turn the device upside down and ensure the back of the device is facing you.

  3. HP Pavilion 15-b109wm Fan Replacement: crwdns2935265:03crwdnd2935265:01crwdnd2935265:03crwdne2935265:0 HP Pavilion 15-b109wm Fan Replacement: crwdns2935265:03crwdnd2935265:02crwdnd2935265:03crwdne2935265:0 HP Pavilion 15-b109wm Fan Replacement: crwdns2935265:03crwdnd2935265:03crwdnd2935265:03crwdne2935265:0
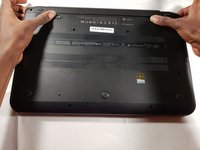
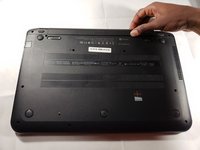
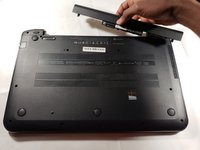
    • Push both buttons towards one another simultaneously. The battery slightly pops out.

  4. HP Pavilion 15-b109wm Fan Replacement: crwdns2935265:04crwdnd2935265:01crwdnd2935265:03crwdne2935265:0 HP Pavilion 15-b109wm Fan Replacement: crwdns2935265:04crwdnd2935265:02crwdnd2935265:03crwdne2935265:0 HP Pavilion 15-b109wm Fan Replacement: crwdns2935265:04crwdnd2935265:03crwdnd2935265:03crwdne2935265:0
    • Pull out the battery from the device's battery slot.

  5. HP Pavilion 15-b109wm Fan Replacement, Keyboard: crwdns2935265:05crwdnd2935265:01crwdnd2935265:02crwdne2935265:0 HP Pavilion 15-b109wm Fan Replacement, Keyboard: crwdns2935265:05crwdnd2935265:02crwdnd2935265:02crwdne2935265:0
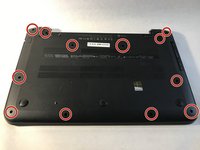
    • Use JIS #1 screwdriver to remove the eleven 6 mm screws.

  6. HP Pavilion 15-b109wm Fan Replacement: crwdns2935265:06crwdnd2935265:01crwdnd2935265:01crwdne2935265:0
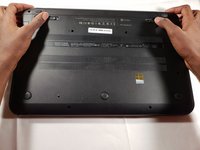
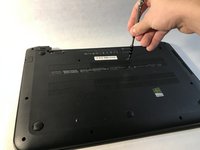
    • Locate the two screw holes that allow access to removing the keyboard.

    • There is a keyboard sign beside both keyboard access holes.

  7. HP Pavilion 15-b109wm Fan Replacement: crwdns2935265:07crwdnd2935265:01crwdnd2935265:01crwdne2935265:0
    • Turn the device onto its side.

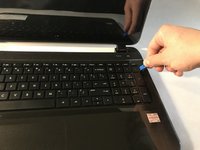
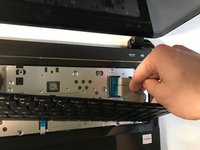
    • Using a heavy duty spudger, gently disengage the keyboard.

  8. HP Pavilion 15-b109wm Fan Replacement: crwdns2935265:08crwdnd2935265:01crwdnd2935265:02crwdne2935265:0 HP Pavilion 15-b109wm Fan Replacement: crwdns2935265:08crwdnd2935265:02crwdnd2935265:02crwdne2935265:0
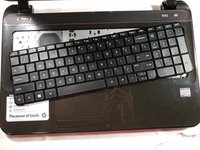
    • Using a plastic opening tool, release the keyboard clips.

  9. HP Pavilion 15-b109wm Fan Replacement: crwdns2935265:09crwdnd2935265:01crwdnd2935265:01crwdne2935265:0
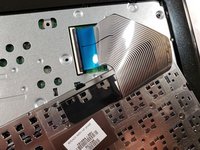
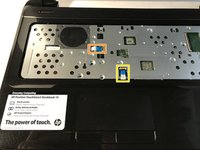
    • Tilt the keyboard to expose the Zero Insertion Force connector to which the keyboard cable is attached.

  10. HP Pavilion 15-b109wm Fan Replacement: crwdns2935265:010crwdnd2935265:01crwdnd2935265:03crwdne2935265:0 HP Pavilion 15-b109wm Fan Replacement: crwdns2935265:010crwdnd2935265:02crwdnd2935265:03crwdne2935265:0 HP Pavilion 15-b109wm Fan Replacement: crwdns2935265:010crwdnd2935265:03crwdnd2935265:03crwdne2935265:0
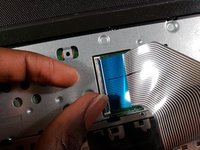
    • Disconnect the keyboard cable from the motherboard by detaching the Zero Insertion Force connector.

    • To detach the connector, release by lifting the black plastic tab up.

  11. HP Pavilion 15-b109wm Fan Replacement, Fan: crwdns2935265:011crwdnd2935265:01crwdnd2935265:03crwdne2935265:0 HP Pavilion 15-b109wm Fan Replacement, Fan: crwdns2935265:011crwdnd2935265:02crwdnd2935265:03crwdne2935265:0 HP Pavilion 15-b109wm Fan Replacement, Fan: crwdns2935265:011crwdnd2935265:03crwdnd2935265:03crwdne2935265:0
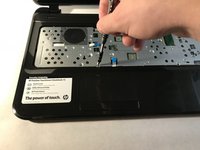
    • Using a JIS #1 screwdriver, remove the five 5mm screws.

    • Detach the power button cable.

    • Detach the touch pad cable.

  12. HP Pavilion 15-b109wm Fan Replacement: crwdns2935265:012crwdnd2935265:01crwdnd2935265:03crwdne2935265:0 HP Pavilion 15-b109wm Fan Replacement: crwdns2935265:012crwdnd2935265:02crwdnd2935265:03crwdne2935265:0 HP Pavilion 15-b109wm Fan Replacement: crwdns2935265:012crwdnd2935265:03crwdnd2935265:03crwdne2935265:0
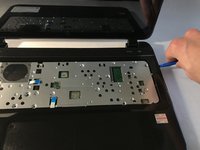
    • Using a plastic opening tool, pry open the top cover.

    • Unscrew the two 5 mm screws using a JIS #1 screwdriver.

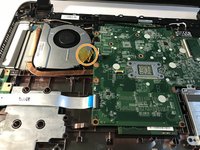
    • Gently, pull to detach the fan cable.

    • Be careful so you do not damage the motherboard.

  13. HP Pavilion 15-b109wm Fan Replacement: crwdns2935265:013crwdnd2935265:01crwdnd2935265:01crwdne2935265:0
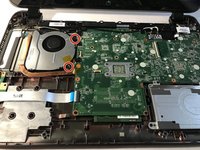
    • Carefully remove the fan from its slot.

crwdns2915888:0crwdne2915888:0

To reassemble your device, follow these instructions in reverse order.

Stephen Gacioch

crwdns2935283:010/26/18crwdne2935283:0

437 crwdns2915208:0crwdne2915208:0

crwdns2935297:03crwdne2935297:0

crwdns2915084:0crwdne2915084:0

UMass Dartmouth, Team S2-G2, Peak Fall 2018 crwdns2935289:0UMass Dartmouth, Team S2-G2, Peak Fall 2018crwdne2935289:0

UMASSD-PEAK-F18S2G2

crwdns2931471:03crwdne2931471:0

crwdns2935297:05crwdne2935297:0

crwdns2944067:00crwdne2944067:0

crwdns2917038:0crwdne2917038:0

crwdns2936625:0crwdne2936625:0:

crwdns2936751:024crwdne2936751:0 2

crwdns2936753:07crwdne2936753:0 4

crwdns2936753:030crwdne2936753:0 13

crwdns2942667:0crwdne2942667:0 409