crwdns2915892:0crwdne2915892:0
This replacement will require the use of prying tools and screwdrivers. It can completed with moderate difficulty and within a few minutes. You will need a clear work surface. Replacing the hard drive can often solve internal computer problems such as a slow start up.
crwdns2942213:0crwdne2942213:0
-
-
Slide the battery lock latch on the left to unlock. Slide from left to right to unlock.
-
-
-
Slide the battery release latch on the right with continuous force from right to left.
-
Once battery pops, you may release latch.
-
-
-
Grab the battery, rotating upwards and away from you. This will remove the battery.
-
-
-
Flip computer over so that the bottom is facing the ceiling and the hinges are farthest from you.
-
-
-
Using the Phillips #000 screwdriver, remove the 7 mm screw on the middle right.
-
-
-
Slide the drive out from the right side of the device.
-
-
-
-
Using the Phillips #1 screwdriver, remove the two 12mm screws located on the hinge covers.
-
-
-
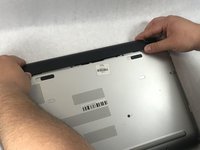
Lift the corner covers off of the computer using a prying tool.
-
-
-
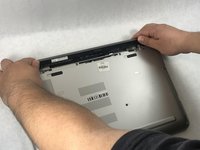
Remove the six 6.5mm screws using a Phillips #1 screwdriver that are located near the top of the laptop.
-
-
-
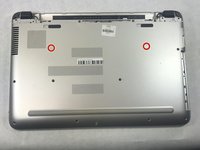
Remove the remaining seven 6.5mm screws using a Phillips #1 screwdriver that are securing the back cover.
-
-
-
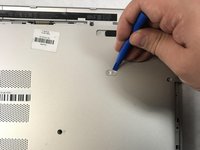
Use the Phillips #0 screwdriver to remove the two 2mm screws.
-
-
-
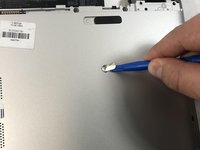
Use prying tools to pry the covers off of the screwholes.
-
Using the Phillips #1 screwdriver, remove the two 6.5mm screws.
-
-
-
Flip computer over and open so that the screen is facing you.
-
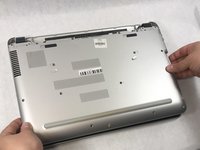
Starting at the bottom right corner, insert the prying tool and lift upwards to loosen the back panel.
-
Continue down all sides and corners of the device.
-
-
-
Flip laptop back over so that the bottom is facing up
-
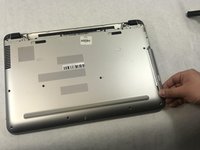
After all sides are loosened, remove the back panel from the device.
-
-
-
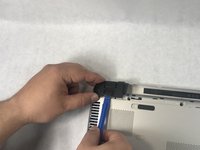
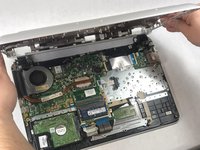
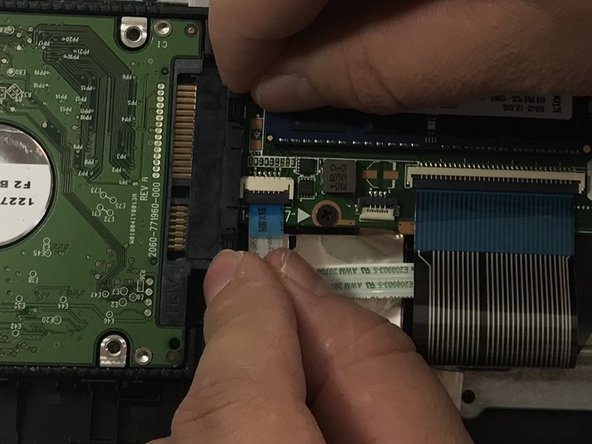
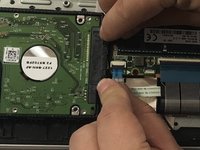
Disconnect the hard drive cable from the motherboard by sliding it left to right.
-
-
-
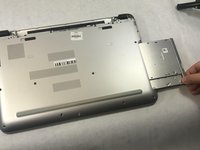
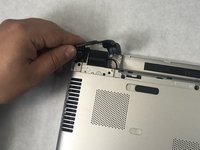
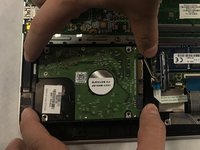
Lift the hard drive from the computer.
-
-
-
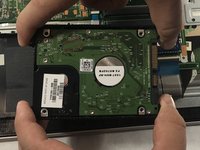
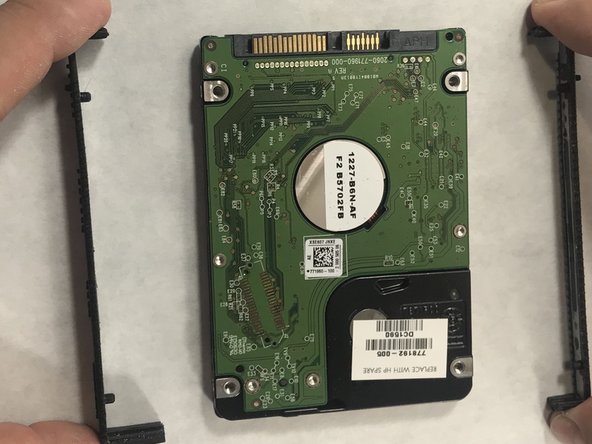
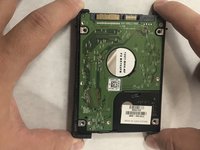
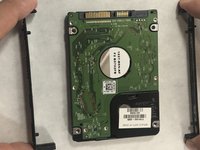
Pull the brackets away from each side of the hard drive.
-


To reassemble your device, follow these instructions in reverse order.
To reassemble your device, follow these instructions in reverse order.
crwdns2935221:0crwdne2935221:0
crwdns2935229:02crwdne2935229:0
crwdns2915084:0crwdne2915084:0

UMass Dartmouth, Team S1-G4, Simcock Spring 2019 crwdns2935289:0UMass Dartmouth, Team S1-G4, Simcock Spring 2019crwdne2935289:0
UMASSD-SIMCOCK-S19S1G4
crwdns2931471:04crwdne2931471:0
crwdns2935297:07crwdne2935297:0