crwdns2915892:0crwdne2915892:0
This guide provides a detail explanation of how to replace your device's battery. Before you begin, make sure you have adequately troubleshoot your poor battery life using this Troubleshooting Page. In addition, make sure you have read through all the steps required and understand what you will be doing. If you don't understand or feel comfortable completing any of the steps, find someone with more experience to assist you with this guide.
crwdns2942213:0crwdne2942213:0
-
-
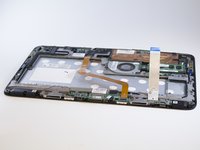
Gently use the black nylon spudger to pry the back casing from the screen until it snaps apart.
-
-
-
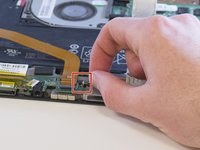
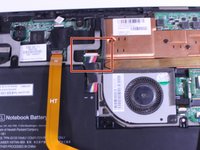
Flip the gray latch back and remove the blue and white band of wires from the green motherboard.
-
-
-
-
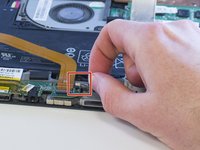
Pull the black and white wire out of the green circuit board.
-
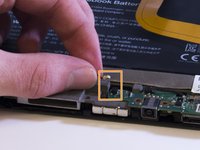
Pull the red and black wire out on the other side of the device.
-
-
-
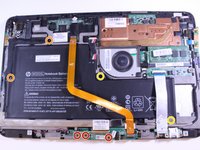
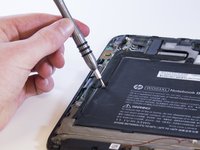
Unscrew the three screws from the circuit board using a Phillips #00 screwdriver.
-
Unscrew two 4.0 mm Philips #00 screws from the left side of the battery.
-
Unscrew two 3.0 mm Philips #00 screws from the right side of the battery.
-
-
-
Unplug the bound (red, white and black) wires connecting the battery and the motherboard.
-
-
-
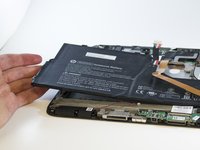
Carefully remove the battery without pulling the copper information transmitter out.
-


To reassemble your device, follow these instructions in reverse order.
To reassemble your device, follow these instructions in reverse order.
crwdns2915084:0crwdne2915084:0

Eastern Washington University, Team S2-G5, Munoz Winter 2018 crwdns2935289:0Eastern Washington University, Team S2-G5, Munoz Winter 2018crwdne2935289:0
EWU-MUNOZ-W18S2G5
crwdns2931471:04crwdne2931471:0
crwdns2935297:05crwdne2935297:0