crwdns2915892:0crwdne2915892:0
To gain access to the motherboard, the CMOS battery, and the power supply of your HP Officejet Pro 8625, use this guide to remove the left side panel. You will need a T9 Torx screwdriver for each screw in this guide.
crwdns2942213:0crwdne2942213:0
-
-
Remove the two 11.6 mm T9 screws from the right side of the back of the printer.
-
-
-
-
Pull down the front panel to expose the screws on the front.
-
Remove the one 11.6 mm T9 screw on the left side of the front face.
-
-
-
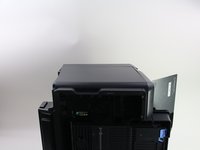
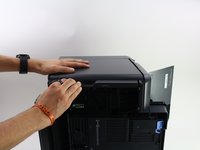
Remove the side panel by pushing down and towards the back.
-


To reassemble your device, follow these instructions in reverse order.
crwdns2935287:0crwdne2935287:0

Cal Poly, Team S13-G3, White Fall 2018 crwdns2935289:0Cal Poly, Team S13-G3, White Fall 2018crwdne2935289:0
CPSU-WHITE-F18S13G3
crwdns2931471:03crwdne2931471:0
crwdns2935297:014crwdne2935297:0