crwdns2933423:0crwdne2933423:0

HP Officejet J4550 All-in-one Glass Plate Replacement

crwdns2942213:0crwdne2942213:0

  1. HP Officejet J4550 All-in-one Glass Plate Replacement, Glass Plate: crwdns2935265:01crwdnd2935265:01crwdnd2935265:02crwdne2935265:0 HP Officejet J4550 All-in-one Glass Plate Replacement, Glass Plate: crwdns2935265:01crwdnd2935265:02crwdnd2935265:02crwdne2935265:0
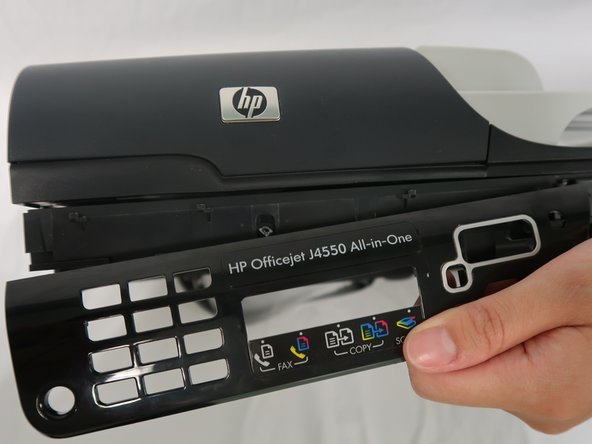
    • Insert 2 fingers in the dent on the right side of the printer and pull towards the front of the printer.

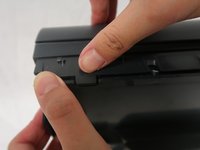
    • Using fingers to open the cover of the scanner which located on the top of the printer.

  2. HP Officejet J4550 All-in-one Glass Plate Replacement: crwdns2935265:02crwdnd2935265:01crwdnd2935265:03crwdne2935265:0 HP Officejet J4550 All-in-one Glass Plate Replacement: crwdns2935265:02crwdnd2935265:02crwdnd2935265:03crwdne2935265:0 HP Officejet J4550 All-in-one Glass Plate Replacement: crwdns2935265:02crwdnd2935265:03crwdnd2935265:03crwdne2935265:0
    • Remove four 10mm screws on the panel with T8 torx security screwdriver.

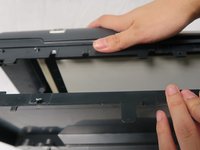
    • Remove the cover of the top part.

  3. HP Officejet J4550 All-in-one Glass Plate Replacement: crwdns2935265:03crwdnd2935265:01crwdnd2935265:03crwdne2935265:0 HP Officejet J4550 All-in-one Glass Plate Replacement: crwdns2935265:03crwdnd2935265:02crwdnd2935265:03crwdne2935265:0 HP Officejet J4550 All-in-one Glass Plate Replacement: crwdns2935265:03crwdnd2935265:03crwdnd2935265:03crwdne2935265:0
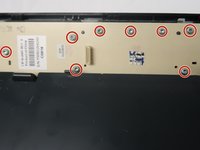
    • Remove eight 10mm screws on the back of the controlling keyboard with T8 torx security screwdriver.

    • Remove the back board of the controlling keyboard.

  4. HP Officejet J4550 All-in-one Glass Plate Replacement: crwdns2935265:04crwdnd2935265:01crwdnd2935265:02crwdne2935265:0 HP Officejet J4550 All-in-one Glass Plate Replacement: crwdns2935265:04crwdnd2935265:02crwdnd2935265:02crwdne2935265:0
    • Remove the controlling keyboard with hands.

  5. HP Officejet J4550 All-in-one Glass Plate Replacement: crwdns2935265:05crwdnd2935265:01crwdnd2935265:02crwdne2935265:0 HP Officejet J4550 All-in-one Glass Plate Replacement: crwdns2935265:05crwdnd2935265:02crwdnd2935265:02crwdne2935265:0
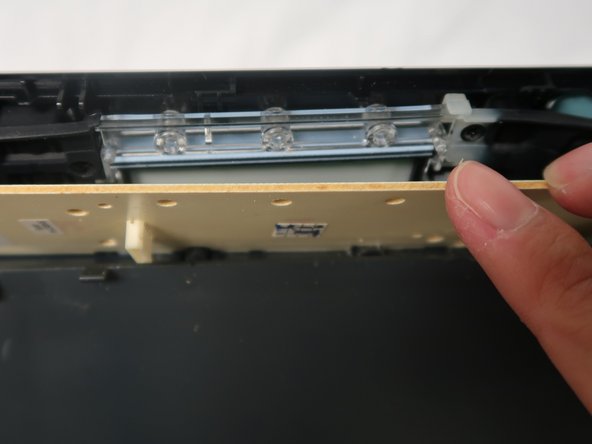
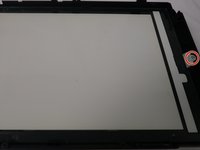
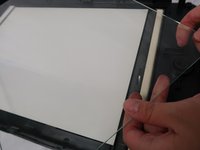
    • Using fingers to open the back cover board of the glass plate.

  6. HP Officejet J4550 All-in-one Glass Plate Replacement: crwdns2935265:06crwdnd2935265:01crwdnd2935265:03crwdne2935265:0 HP Officejet J4550 All-in-one Glass Plate Replacement: crwdns2935265:06crwdnd2935265:02crwdnd2935265:03crwdne2935265:0 HP Officejet J4550 All-in-one Glass Plate Replacement: crwdns2935265:06crwdnd2935265:03crwdnd2935265:03crwdne2935265:0
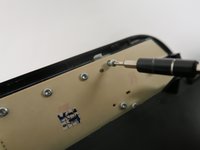
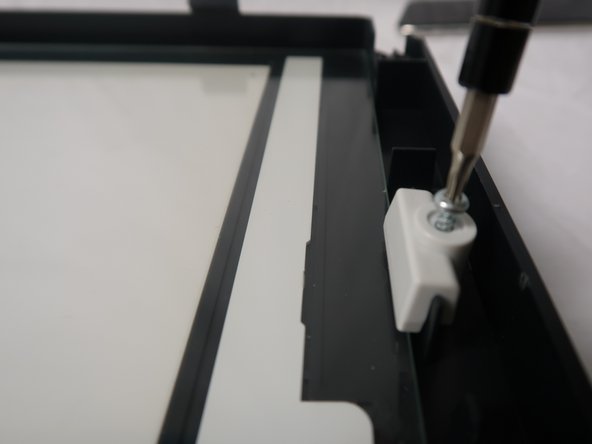
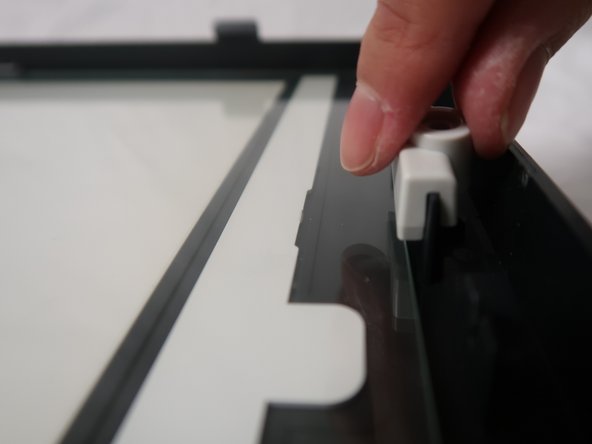
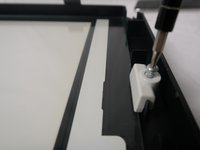
    • Remove the 10mm screw on the right of the board with T8 torx security screwdriver.

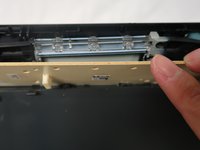
    • Remove the part that is under the 10mm screw.

  7. HP Officejet J4550 All-in-one Glass Plate Replacement: crwdns2935265:07crwdnd2935265:01crwdnd2935265:02crwdne2935265:0 HP Officejet J4550 All-in-one Glass Plate Replacement: crwdns2935265:07crwdnd2935265:02crwdnd2935265:02crwdne2935265:0
    • Remove the glass plate with hands.

crwdns2915888:0crwdne2915888:0

To reassemble your device, follow these instructions in reverse order.

Jiayin Zhu

crwdns2935283:010/21/18crwdne2935283:0

373 crwdns2915208:0crwdne2915208:0

crwdns2935297:03crwdne2935297:0

crwdns2915084:0crwdne2915084:0

UC Davis, Team S11-G8, Lore Fall 2018 crwdns2935289:0UC Davis, Team S11-G8, Lore Fall 2018crwdne2935289:0

UCD-LORE-F18S11G8

crwdns2931471:03crwdne2931471:0

crwdns2935297:08crwdne2935297:0

crwdns2944067:00crwdne2944067:0

crwdns2917038:0crwdne2917038:0

crwdns2936625:0crwdne2936625:0:

crwdns2936751:024crwdne2936751:0 0

crwdns2936753:07crwdne2936753:0 1

crwdns2936753:030crwdne2936753:0 9

crwdns2942667:0crwdne2942667:0 183