crwdns2933423:0crwdne2933423:0
crwdns2947577:0crwdnd2947577:0crwdne2947577:0

HP Mini 210-2070NR Keyboard Replacement

crwdns2942213:0crwdne2942213:0

    1. HP Mini 210-2070NR Keyboard Replacement, Battery and Service Access Cover: crwdns2935265:01crwdnd2935265:01crwdnd2935265:01crwdne2935265:0
      • Before beginning, make sure that your computer is turned off and all external power cords are disconnected.

      • Close the laptop and turn it over so that the underside is up and the silver battery bay is facing towards you.

      crwdns2952109:0crwdne2952109:0

      crwdns2917038:0crwdne2917038:0

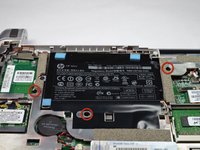
    2. HP Mini 210-2070NR Keyboard Replacement: crwdns2935265:02crwdnd2935265:01crwdnd2935265:03crwdne2935265:0 HP Mini 210-2070NR Keyboard Replacement: crwdns2935265:02crwdnd2935265:02crwdnd2935265:03crwdne2935265:0 HP Mini 210-2070NR Keyboard Replacement: crwdns2935265:02crwdnd2935265:03crwdnd2935265:03crwdne2935265:0
      • The battery locking latch is on the bottom right corner; slide it inward to unlock the battery.

      • Slide the battery release latch inwards.

      • Pull the battery towards you to remove it.

      crwdns2952109:0crwdne2952109:0

      crwdns2917038:0crwdne2917038:0

    3. HP Mini 210-2070NR Keyboard Replacement: crwdns2935265:03crwdnd2935265:01crwdnd2935265:03crwdne2935265:0 HP Mini 210-2070NR Keyboard Replacement: crwdns2935265:03crwdnd2935265:02crwdnd2935265:03crwdne2935265:0 HP Mini 210-2070NR Keyboard Replacement: crwdns2935265:03crwdnd2935265:03crwdnd2935265:03crwdne2935265:0
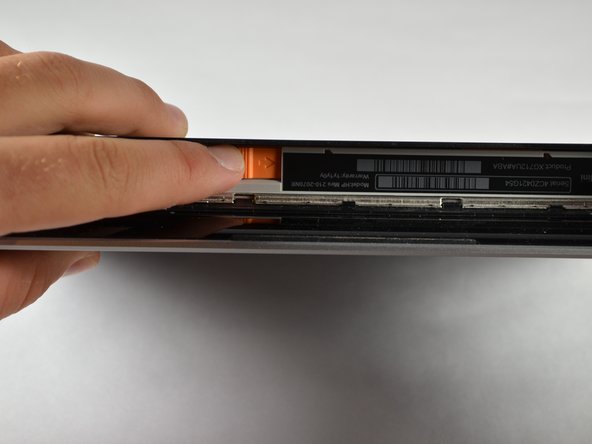
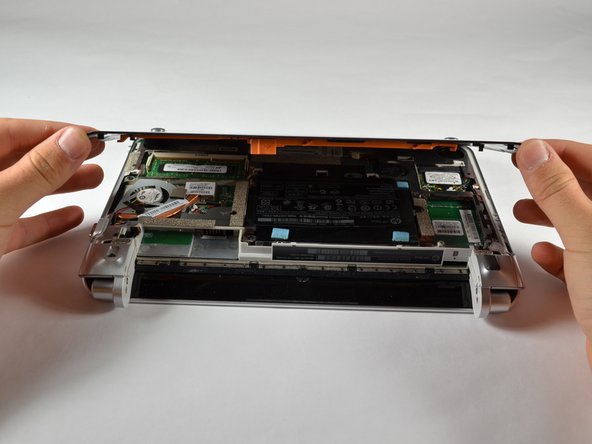
      • Slide the service access cover release lever to the right.

      • While holding the lever to the right, lift up the laptop's bottom cover gently and remove the cover.

      crwdns2952109:0crwdne2952109:0

      crwdns2917038:0crwdne2917038:0

    4. HP Mini 210-2070NR Keyboard Replacement: crwdns2935265:04crwdnd2935265:01crwdnd2935265:01crwdne2935265:0
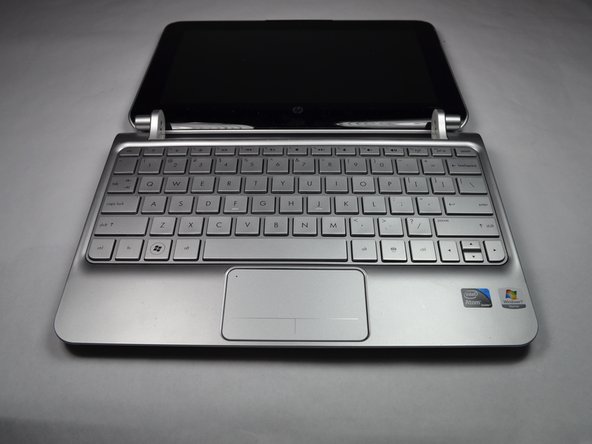
      • Orient the computer as shown in the picture.

      crwdns2952109:0crwdne2952109:0

      crwdns2917038:0crwdne2917038:0

    1. HP Mini 210-2070NR Keyboard Replacement, Keyboard: crwdns2935265:05crwdnd2935265:01crwdnd2935265:02crwdne2935265:0 HP Mini 210-2070NR Keyboard Replacement, Keyboard: crwdns2935265:05crwdnd2935265:02crwdnd2935265:02crwdne2935265:0
      • Using a 00 Phillips screwdriver, unscrew and remove the three 2.0 X 5.0 screws that connect the keyboard to the computer.

      • Each of the screws are labeled with small keyboards next to them.

      • Flip the computer over so that the front is facing you.

      crwdns2952109:0crwdne2952109:0

      crwdns2917038:0crwdne2917038:0

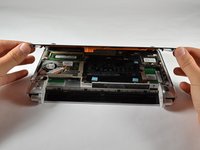
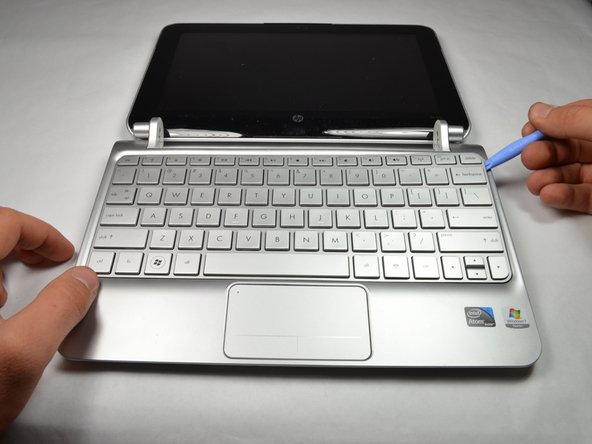
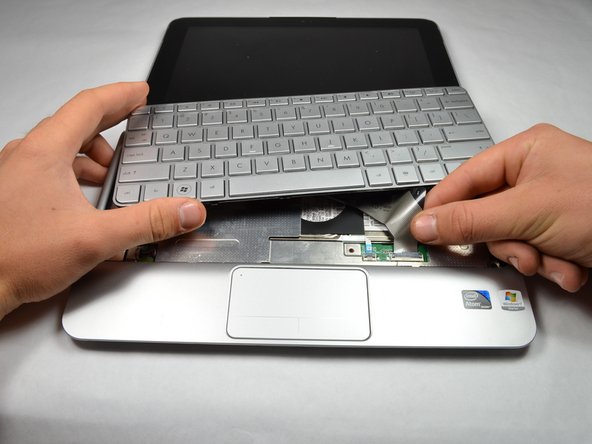
    2. HP Mini 210-2070NR Keyboard Replacement: crwdns2935265:06crwdnd2935265:01crwdnd2935265:03crwdne2935265:0 HP Mini 210-2070NR Keyboard Replacement: crwdns2935265:06crwdnd2935265:02crwdnd2935265:03crwdne2935265:0 HP Mini 210-2070NR Keyboard Replacement: crwdns2935265:06crwdnd2935265:03crwdnd2935265:03crwdne2935265:0
      • Open the computer screen as far as possible. It should be able to lay flat on whatever surface you are working on.

      • Pry along the rear edge of the keyboard away from the PC with the plastic opening tool.

      • Once enough of an opening has been established, gently grasp the edge and pull the keyboard towards you.

      • There is a cable connecting the keyboard to the laptop, so do not attempt to fully remove the keyboard yet or you will damage your device.

      crwdns2952109:0crwdne2952109:0

      crwdns2917038:0crwdne2917038:0

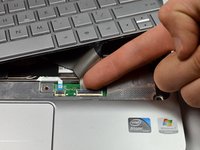
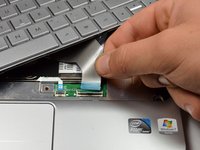
    3. HP Mini 210-2070NR Keyboard Replacement: crwdns2935265:07crwdnd2935265:01crwdnd2935265:02crwdne2935265:0 HP Mini 210-2070NR Keyboard Replacement: crwdns2935265:07crwdnd2935265:02crwdnd2935265:02crwdne2935265:0
      • Use your fingernail to flip up the black retaining flap attached to the keyboard ZIF connector.

      • Pull the keyboard cable out of its socket to disconnect it.

      crwdns2952109:0crwdne2952109:0

      crwdns2917038:0crwdne2917038:0

    4. HP Mini 210-2070NR Keyboard Replacement: crwdns2935265:08crwdnd2935265:01crwdnd2935265:01crwdne2935265:0
      • Remove the keyboard by lifting it away from the computer.

      crwdns2952109:0crwdne2952109:0

      crwdns2917038:0crwdne2917038:0

crwdns2915888:0crwdne2915888:0

To reassemble your device, follow these instructions in reverse order.

crwdns2935221:0crwdne2935221:0

Sean Kuster

crwdns2935283:010/05/12crwdne2935283:0

91 crwdns2915208:0crwdne2915208:0

crwdns2935297:03crwdne2935297:0

crwdns2935287:0crwdne2935287:0

Cal Poly, Team 3-23, Amido Fall 2012 crwdns2935289:0Cal Poly, Team 3-23, Amido Fall 2012crwdne2935289:0

CPSU-AMIDO-F12S3G23

crwdns2931471:04crwdne2931471:0

crwdns2935297:06crwdne2935297:0

crwdns2947412:00crwdne2947412:0

crwdns2917038:0crwdne2917038:0

crwdns2936625:0crwdne2936625:0:

crwdns2936751:024crwdne2936751:0 0

crwdns2936753:07crwdne2936753:0 8

crwdns2936753:030crwdne2936753:0 25

crwdns2942667:0crwdne2942667:0 2,037