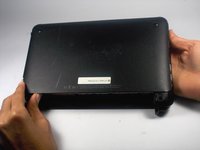
crwdns2915892:0crwdne2915892:0
If your hard drive is broken or you just want to upgrade, this guide will walk you through the steps for replacing the hard drive.
crwdns2942213:0crwdne2942213:0
-
-
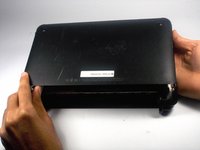
With the bottom of the HP Mini facing up, slide both switches inward towards each other.
-
-
-
With the left switch still pushed inward, pull the battery towards you to remove it from the computer.
-
-
-
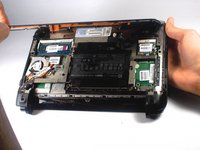
Pull upward from under the back cover via the missing battery area.
-
-
-
-
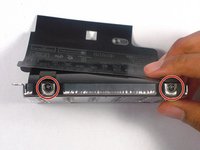
Remove the three 5.0 mm screws holding the hard drive cage in place using a Phillips #1 screw driver.
-
-
-
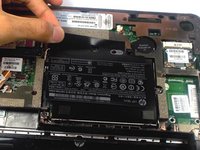
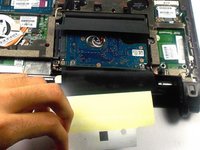
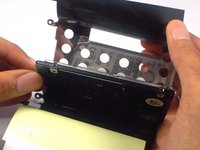
Lift the hard drive cage by pulling the tape upward.
-
Start by pulling the tape from the side with the keyboard symbol.
-
-
-
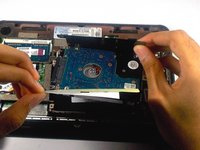
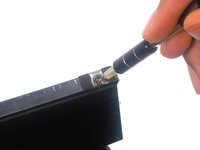
Unplug the cable connecting to the hard drive.
-
-
-
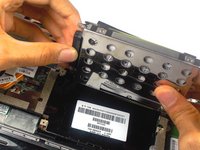
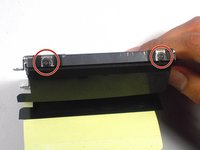
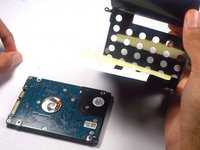
Remove the four 4.0 mm screws on both sides of the cage using a Phillips #1 screw driver.
-
-
-
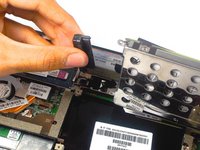
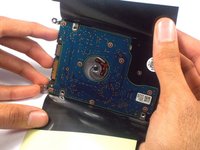
Gently remove the hard drive from it's cage.
-


To reassemble your device, follow these instructions in reverse order.
To reassemble your device, follow these instructions in reverse order.
crwdns2935221:0crwdne2935221:0
crwdns2935229:02crwdne2935229:0
crwdns2915084:0crwdne2915084:0

UMass Dartmouth, Team 4-1, Catania Spring 2016 crwdns2935289:0UMass Dartmouth, Team 4-1, Catania Spring 2016crwdne2935289:0
UMASSD-CATANIA-S16S4G1
crwdns2931471:04crwdne2931471:0
crwdns2935297:07crwdne2935297:0