crwdns2942213:0crwdne2942213:0
-
-
Pull on the two tabs on the back of the printer to release the left side cover.
-
Remove the cover by rotating it towards the front of the printer.
-
-
-
With the printer turned so that the right side is facing upwards, use a metal spudger to disengage 3 tabs holding the right side cover in place.
-
Lift the cover off of the printer.
-
-
-
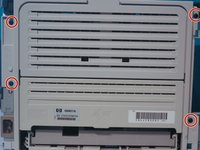
Remove 4 screws on the back of the printer.
-
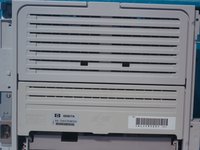
Remove the back cover.
-
-
-
-
Remove 2 screws on the back of the printer, one on the left, and one on the front.
-
-
-
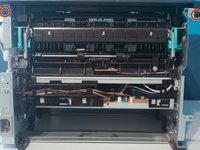
Disconnect the control panel cable and remove the top cover.
-
-
-
Pull on the blue-green tab to release the duplexer tray.
-
-
-
Remove 2 screws from the front of the printer.
-
Remove the cartridge door.
-
-
-
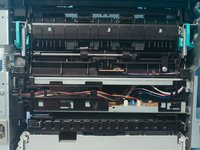
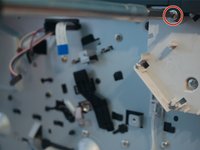
Remove the pickup roller by rotating the white tabs upwards and pulling them outwards.
-


To reassemble your device, follow these instructions in reverse order.
To reassemble your device, follow these instructions in reverse order.
crwdns2935221:0crwdne2935221:0
crwdns2935229:02crwdne2935229:0

crwdns2947412:06crwdne2947412:0
no need to remove any sides....
Just go straight to step 8, that’s all you need to do!
Step 6 and Step 8 are the only steps necessary.
Ok here is the pickup roller replacement procedure: 1. Turn off the printer and unplug the power cord and and network or USB cables; 2. Remove toner cartridge; 3. Remove paper tray; 4. Reposition printer on its back (the side where power/network/USB cables connect); 5. Release duplexer tray (step 6 in the procedure outlined above); 6. Using a needle-nose pliers, move the white handles outward and rotate them upward (first image in step 8 above); 7. Once you’ve rotated the white tabs so they look like picture 2 in step 8 above, pull them outward. The left tab will come off; 8. Move the rollers to the left and they will be free. 9. Reverse the steps to reassemble.
No hay que desmontar nada. En este video lo explica.
No need dismount any part. Look at this video.