crwdns2915892:0crwdne2915892:0
To work on this laptop, or any other device, it is important to shut down the computer. If you are unsure whether the computer is off or in Hibernation, turn on the computer, and then shut it down through the operating system. Disconnect all external devices connected to the computer. Disconnect the power from the computer by first disconnecting the power cord from the AC outlet and then disconnecting the AC adapter from the computer. The failed hard drive is easy to remove and there are no hidden screws or tabs.
crwdns2942213:0crwdne2942213:0
-
-
Shut down the computer. Disconnect all external devices connected to the computer. Disconnect the power from the computer by first disconnecting the power cord from the AC outlet and then disconnecting the AC adapter from the computer.
-
Turn the computer so that it faces upside down. Position the computer with the front toward you.
-
Slide the battery release latch to release the battery. Pivot the battery to remove it.
-
-
-
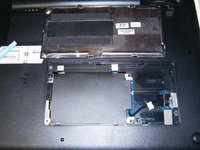
Loosen the two Phillips 2.5×6.0 captive screws that secure the hard drive cover to the computer.
-
The cover is snapped in by some clips. Use a plastic opening tool on both sides to remove the cover.
-
-
-
-
Remove the cover
-
Remove the four Phillips M2.5x5.0 screws
-
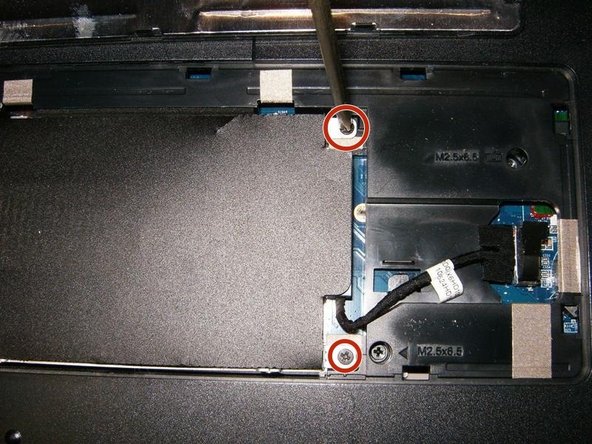
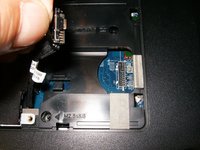
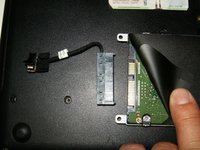
Disconnect the hard drive cable from the system board.
-
-
-
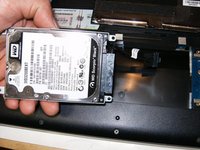
Remove the hard drive from the hard drive bay
-
Remove the hard drive cable from the drive.
-
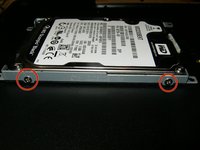
Remove the four (two on either side) Phillips M3.0×4.0 screws that secure the hard drive bracket to the hard drive
-


To reassemble your device, follow these instructions in reverse order.
To reassemble your device, follow these instructions in reverse order.
crwdns2935221:0crwdne2935221:0
crwdns2935229:010crwdne2935229:0
