crwdns2915892:0crwdne2915892:0
This guide is helpful if you have something wrong with your hard drive and you need to replace it.
crwdns2942213:0crwdne2942213:0
-
-
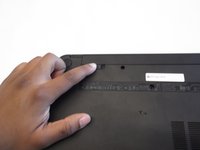
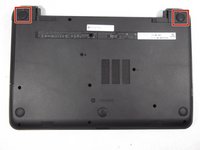
With laptop closed flip to look at the underside of the laptop.
-
-
-
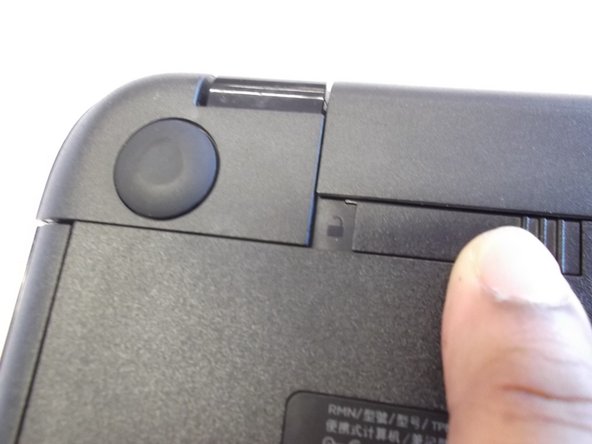
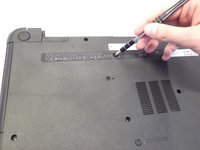
On the underside of the laptop towards the hinge for the screen there are two rectangular slide switches located inside of rectangular tracks.
-
-
-
The left switch is the battery unlock switch.
-
Inside the rectangular track of this switch there is an image of a closed lock that should be visible. Push this switch to the other end of the track and an image of an open lock should be visible.
-
-
-
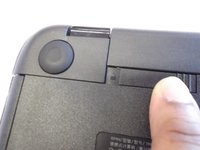
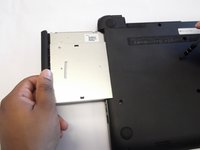
Then take and slide the other switch to the other end of its track which will pop out the battery.
-
Grab the battery and pull it out of the slot.
-
-
-
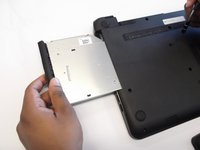
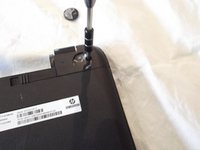
Remove the 4mm Phillips #1 screw located towards the middle of the laptop slightly towards the right with the picture of the CD next to it.
-
-
-
Slide the disc tray out of the its slot.
-
-
-
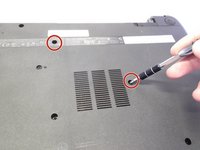
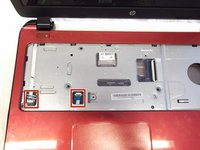
Next locate and unscrew the two 4mm Phllips #1 screws with the keyboard symbol located towards the middle and top of the bottom of the laptop.
-
-
-
-
Next turn the laptop over and flip open the screen.
-
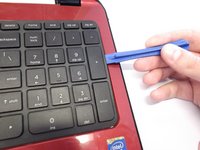
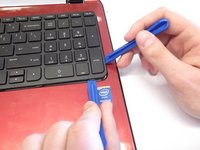
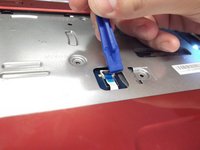
Use the plastic opening tool to pry the keyboard upwards from the bottom right hand corner of the keyboard.
-
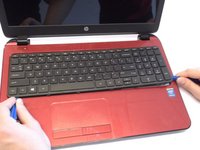
Use another plastic opening tool with the first plastic opening tool you placed to undo every plastic clasp surrounding the keyboard.
-
-
-
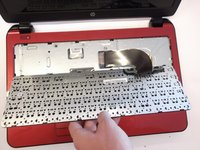
Next lift up the keyboard gently and use the plastic opening tool to undo the ribbon wire by unclasping the ZIF (zero insertion force) connector to the laptop.
-
Gently slide the ribbon wire out of its slot.
-
-
-
After removing the keyboard close the laptop and flip it over.
-
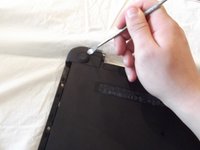
Using a spudger to remove the rubber bumpers located at the top left and top right of the laptop.
-
-
-
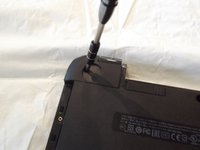
Remove the two 4mm Phillips #1 screws located under the rubber bumpers.
-
-
-
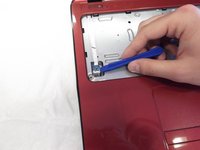
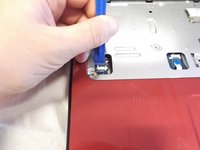
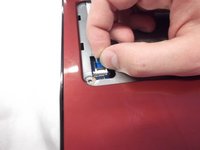
Now remove both corner pieces by sliding them away from the laptop and pulling upwards.
-
-
-
Remove the two 4mm Phillips #1 screws located where you pulled the disk tray out of.
-
-
-
Now flip the laptop back over and open the screen. Remove the four 4mm Phllips #1 screws.
-
-
-
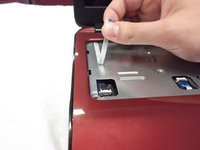
Using the plastic opening tool you will need to remove two pieces of tape.
-
-
-
Using the plastic opening tool detach both ribbon cables by disconnecting both ZIF (zero insertion force) connectors on the ends.
-
-
-
Now peel back the glued longer ribbon cable gently.
-
-
-
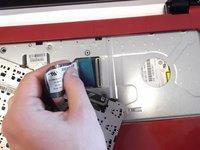
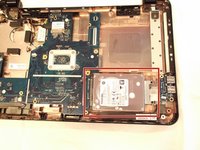
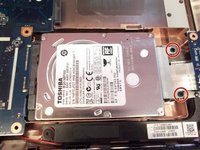
Now you can see the hard drive.
-
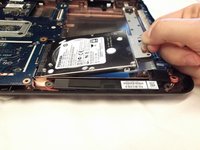
Remove the two 4 mm Phllips #1 screws.
-
-
-
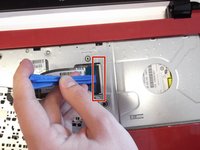
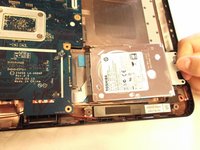
Now pull the bracket where the screws where to right as you lift up the hard drive.
-
It will disconnect from the motherboard as shown.
-


To reassemble your device, follow these instructions in reverse order.
crwdns2935221:0crwdne2935221:0
crwdns2935229:09crwdne2935229:0
