crwdns2933423:0crwdne2933423:0

HP Envy x360 m6-w103dx Memory (RAM) Replacement

crwdns2942213:0crwdne2942213:0

  1. HP Envy x360 m6-w103dx Memory (RAM) Replacement, Keyboard: crwdns2935265:01crwdnd2935265:01crwdnd2935265:02crwdne2935265:0 HP Envy x360 m6-w103dx Memory (RAM) Replacement, Keyboard: crwdns2935265:01crwdnd2935265:02crwdnd2935265:02crwdne2935265:0
    • Before you begin, be sure to power off your laptop.

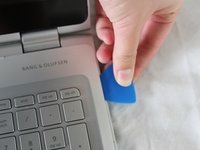
    • Using an opening pick, remove the 4 rubber feet and 4 screw covers.

  2. HP Envy x360 m6-w103dx Memory (RAM) Replacement: crwdns2935265:02crwdnd2935265:01crwdnd2935265:02crwdne2935265:0 HP Envy x360 m6-w103dx Memory (RAM) Replacement: crwdns2935265:02crwdnd2935265:02crwdnd2935265:02crwdne2935265:0
    • Unscrew the twelve 6 mm screws from the bottom of the laptop using a Phillips #0 screwdriver.

  3. HP Envy x360 m6-w103dx Memory (RAM) Replacement: crwdns2935265:03crwdnd2935265:01crwdnd2935265:03crwdne2935265:0 HP Envy x360 m6-w103dx Memory (RAM) Replacement: crwdns2935265:03crwdnd2935265:02crwdnd2935265:03crwdne2935265:0 HP Envy x360 m6-w103dx Memory (RAM) Replacement: crwdns2935265:03crwdnd2935265:03crwdnd2935265:03crwdne2935265:0
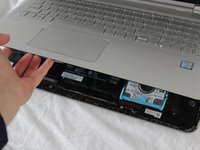
    • Open the laptop carefully, with the keyboard face up.

    • Pry around the outside of the keyboard with the plastic opening tool until the keyboard can be lifted slightly.

    • When lifting the keyboard do not pull too hard. There are cables that must be disconnected before the keyboard can be removed.

  4. HP Envy x360 m6-w103dx Memory (RAM) Replacement: crwdns2935265:04crwdnd2935265:01crwdnd2935265:03crwdne2935265:0 HP Envy x360 m6-w103dx Memory (RAM) Replacement: crwdns2935265:04crwdnd2935265:02crwdnd2935265:03crwdne2935265:0 HP Envy x360 m6-w103dx Memory (RAM) Replacement: crwdns2935265:04crwdnd2935265:03crwdnd2935265:03crwdne2935265:0
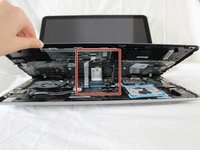
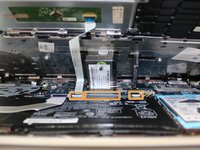
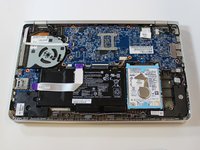
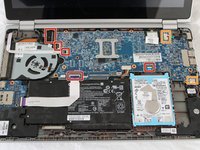
    • Lift the keyboard until you can see the cables connected to the motherboard.

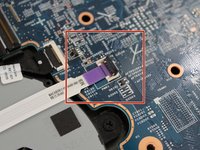
    • Gently lift the tab on each ZIF connector that connects each cable to the motherboard using a spudger. Once each tab is flipped up, the corresponding ribbon cable will come out easily.

    • Detach the keyboard.

  5. HP Envy x360 m6-w103dx Memory (RAM) Replacement, Motherboard: crwdns2935265:05crwdnd2935265:01crwdnd2935265:01crwdne2935265:0
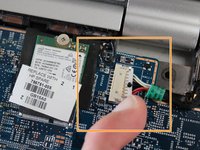
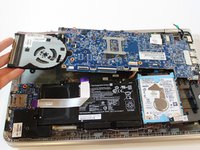
    • Disconnect the pin head battery connection to remove power from the motherboard.

    • Unscrew the five 4mm screws holding the motherboard in place using a #0 Phillips screwdriver.

    • It's possible the positions of the screws will be different on your board. If the motherboard resists lifting, double-check that all screws have been removed.

  6. HP Envy x360 m6-w103dx Memory (RAM) Replacement: crwdns2935265:06crwdnd2935265:01crwdnd2935265:03crwdne2935265:0 HP Envy x360 m6-w103dx Memory (RAM) Replacement: crwdns2935265:06crwdnd2935265:02crwdnd2935265:03crwdne2935265:0 HP Envy x360 m6-w103dx Memory (RAM) Replacement: crwdns2935265:06crwdnd2935265:03crwdnd2935265:03crwdne2935265:0
    • Remove the five flat ribbon cables by gently lifting the head of the cable up and back.

    • Remove the two remaining multicolored ribbon cables by pulling the white plastic head backwards.

    • Do not pull directly on the wires.

    • If the head of the multicolored ribbon cable doesn't come out, try gently wiggling it side to side as you pull.

  7. HP Envy x360 m6-w103dx Memory (RAM) Replacement: crwdns2935265:07crwdnd2935265:01crwdnd2935265:03crwdne2935265:0 HP Envy x360 m6-w103dx Memory (RAM) Replacement: crwdns2935265:07crwdnd2935265:02crwdnd2935265:03crwdne2935265:0 HP Envy x360 m6-w103dx Memory (RAM) Replacement: crwdns2935265:07crwdnd2935265:03crwdnd2935265:03crwdne2935265:0
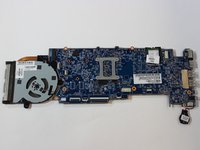
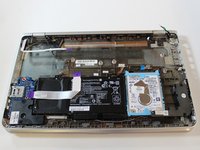
    • Lift the motherboard up from the left side at a shallow angle.

    • Gently pull the motherboard to the left and gently wiggle it side to side until the ports on the right side of the board detach from the case.

    • Ensure the laptop is well supported, as the motherboard is a heavy component and removing it may make the laptop off-balance.

  8. HP Envy x360 m6-w103dx Memory (RAM) Replacement, Memory (RAM): crwdns2935265:08crwdnd2935265:01crwdnd2935265:03crwdne2935265:0 HP Envy x360 m6-w103dx Memory (RAM) Replacement, Memory (RAM): crwdns2935265:08crwdnd2935265:02crwdnd2935265:03crwdne2935265:0 HP Envy x360 m6-w103dx Memory (RAM) Replacement, Memory (RAM): crwdns2935265:08crwdnd2935265:03crwdnd2935265:03crwdne2935265:0
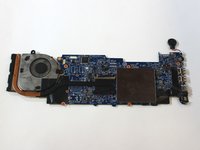
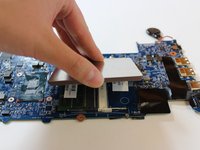
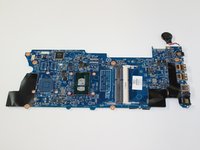
    • Carefully lay the motherboard on a flat surface with the metal plate facing up.

    • Remove the metal plate from the eight surrounding inserts.

    • It should lift directly off of the motherboard without much fuss.

  9. HP Envy x360 m6-w103dx Memory (RAM) Replacement: crwdns2935265:09crwdnd2935265:01crwdnd2935265:02crwdne2935265:0 HP Envy x360 m6-w103dx Memory (RAM) Replacement: crwdns2935265:09crwdnd2935265:02crwdnd2935265:02crwdne2935265:0
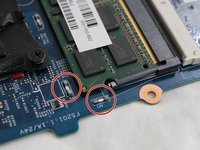
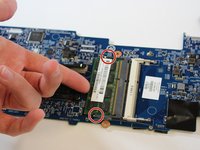
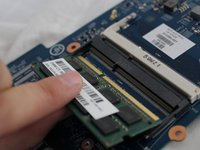
    • Move the two locking tabs on either side of the RAM stick away from each other.

    • The RAM should clear the tabs and spring up to rest at an angle to the motherboard.

  10. HP Envy x360 m6-w103dx Memory (RAM) Replacement: crwdns2935265:010crwdnd2935265:01crwdnd2935265:02crwdne2935265:0 HP Envy x360 m6-w103dx Memory (RAM) Replacement: crwdns2935265:010crwdnd2935265:02crwdnd2935265:02crwdne2935265:0
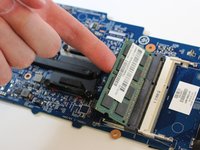
    • Gently pull the memory stick away from the memory slot with respect to the angle at which it rests.

    • To reinstall, insert the RAM stick at the same angle that it rested before, then press the stick down until the locking tabs on either side hold it down in place.

crwdns2915888:0crwdne2915888:0

To reassemble your device, follow these instructions in reverse order.

crwdns2935229:04crwdne2935229:0

Steven Ngo

crwdns2935283:010/10/19crwdne2935283:0

963 crwdns2915208:0crwdne2915208:0

crwdns2935297:07crwdne2935297:0

crwdns2915084:0crwdne2915084:0

Cal Poly, Team S12-G2, Regan Fall 2019 crwdns2935289:0Cal Poly, Team S12-G2, Regan Fall 2019crwdne2935289:0

CPSU-REGAN-F19S12G2

crwdns2931471:04crwdne2931471:0

crwdns2935297:023crwdne2935297:0

crwdns2947410:01crwdne2947410:0

Great tutorial! The only things that weren't mentioned are the fact that you have to detach the little metal wires from the Wi-Fi card in the top-right of the motherboard, and you also have to take out the audio jack if you want to lay the motherboard upside down. Otherwise, this was exactly what I was looking for. Thanks!

Aleksandr - crwdns2934203:0crwdne2934203:0

crwdns2917038:0crwdne2917038:0

crwdns2936625:0crwdne2936625:0:

crwdns2936751:024crwdne2936751:0 0

crwdns2936753:07crwdne2936753:0 4

crwdns2936753:030crwdne2936753:0 46

crwdns2942667:0crwdne2942667:0 1,970